
Hello readers, and welcome back to another series of the Pentestit Write-ups! I know it has been a while since I last posted here - but with the release of the v11 Pentestit Lab I became ecstatic and managed to find some time to go through the lab and create these write ups.
For those that have already read my “Pentestit Lab v10 - Introduction & Network” blog post or have completed the v10 Pentestit Lab previously, then you can go ahead and skip this specific blog post as it’s only going over what the lab is and how to connect to it for new readers/hackers.
Though, I do recommend reading the “Preamble” section of this blog post which can be found at the bottom of the page as it provides some information on how the Pentestit v11 write-ups will be structured due to the complexity of the lab.
Other than that, if you just want to get into the write-ups then you can start here with the Pentestit Lab v11 - CRM Token!
About the “Test Lab”:

The “Test lab” contains penetration testing laboratories that emulates the IT infrastructure of real companies and are created for legal pentesting and improving penetration testing skills. Laboratories are always unique and include the most recent and known vulnerabilities.
The “Test lab” is presented as a computer network of virtual companies containing widely of distributed misconfigurations and vulnerabilities. Participants, playing a pentester role, are trying to exploit them - and in case of success, gain access to particular lab nodes which contain a token. The winner is the one who collects all tokens.
Penetration testing in the labs is based on a “grey box” methodology: participants have network infrastructure information in form of a schema and a text description. Participants can use different methods of penetration - exploiting network services, web, social engineering, buffer overflow and etc.
During development of the labs, they try to cover almost all IT areas: network security, security of OSs and applications. Participants are supposed to exploit the variety of vulnerabilities in the network components and cryptographic mechanisms, in configurations and code, and also the human factor. The outstanding features of “Test lab” is the unique story and whole scenery which links tasks with each other. For example, one can use already found mail credentials to attack other services and machines (Active Directory, for example). This is more real than standalone tasks in CTF contests, which can be done separately.
The Network:
Before you are able to access the Network Information and VPN Connection to the lab - you have to register. Once you are registered and verified you will be able to access the “Test Lab 11” Main Screen.
From here you will be able to access the Network Diagram, Forums, Chat, and also be allowed to enter any “Tokens” found during your pentest.

When you click on the Network Diagram link, you will be presented with the layout of the lab - in other terms you will be presented with the Companies Network Layout for your Grey-Box pentest.
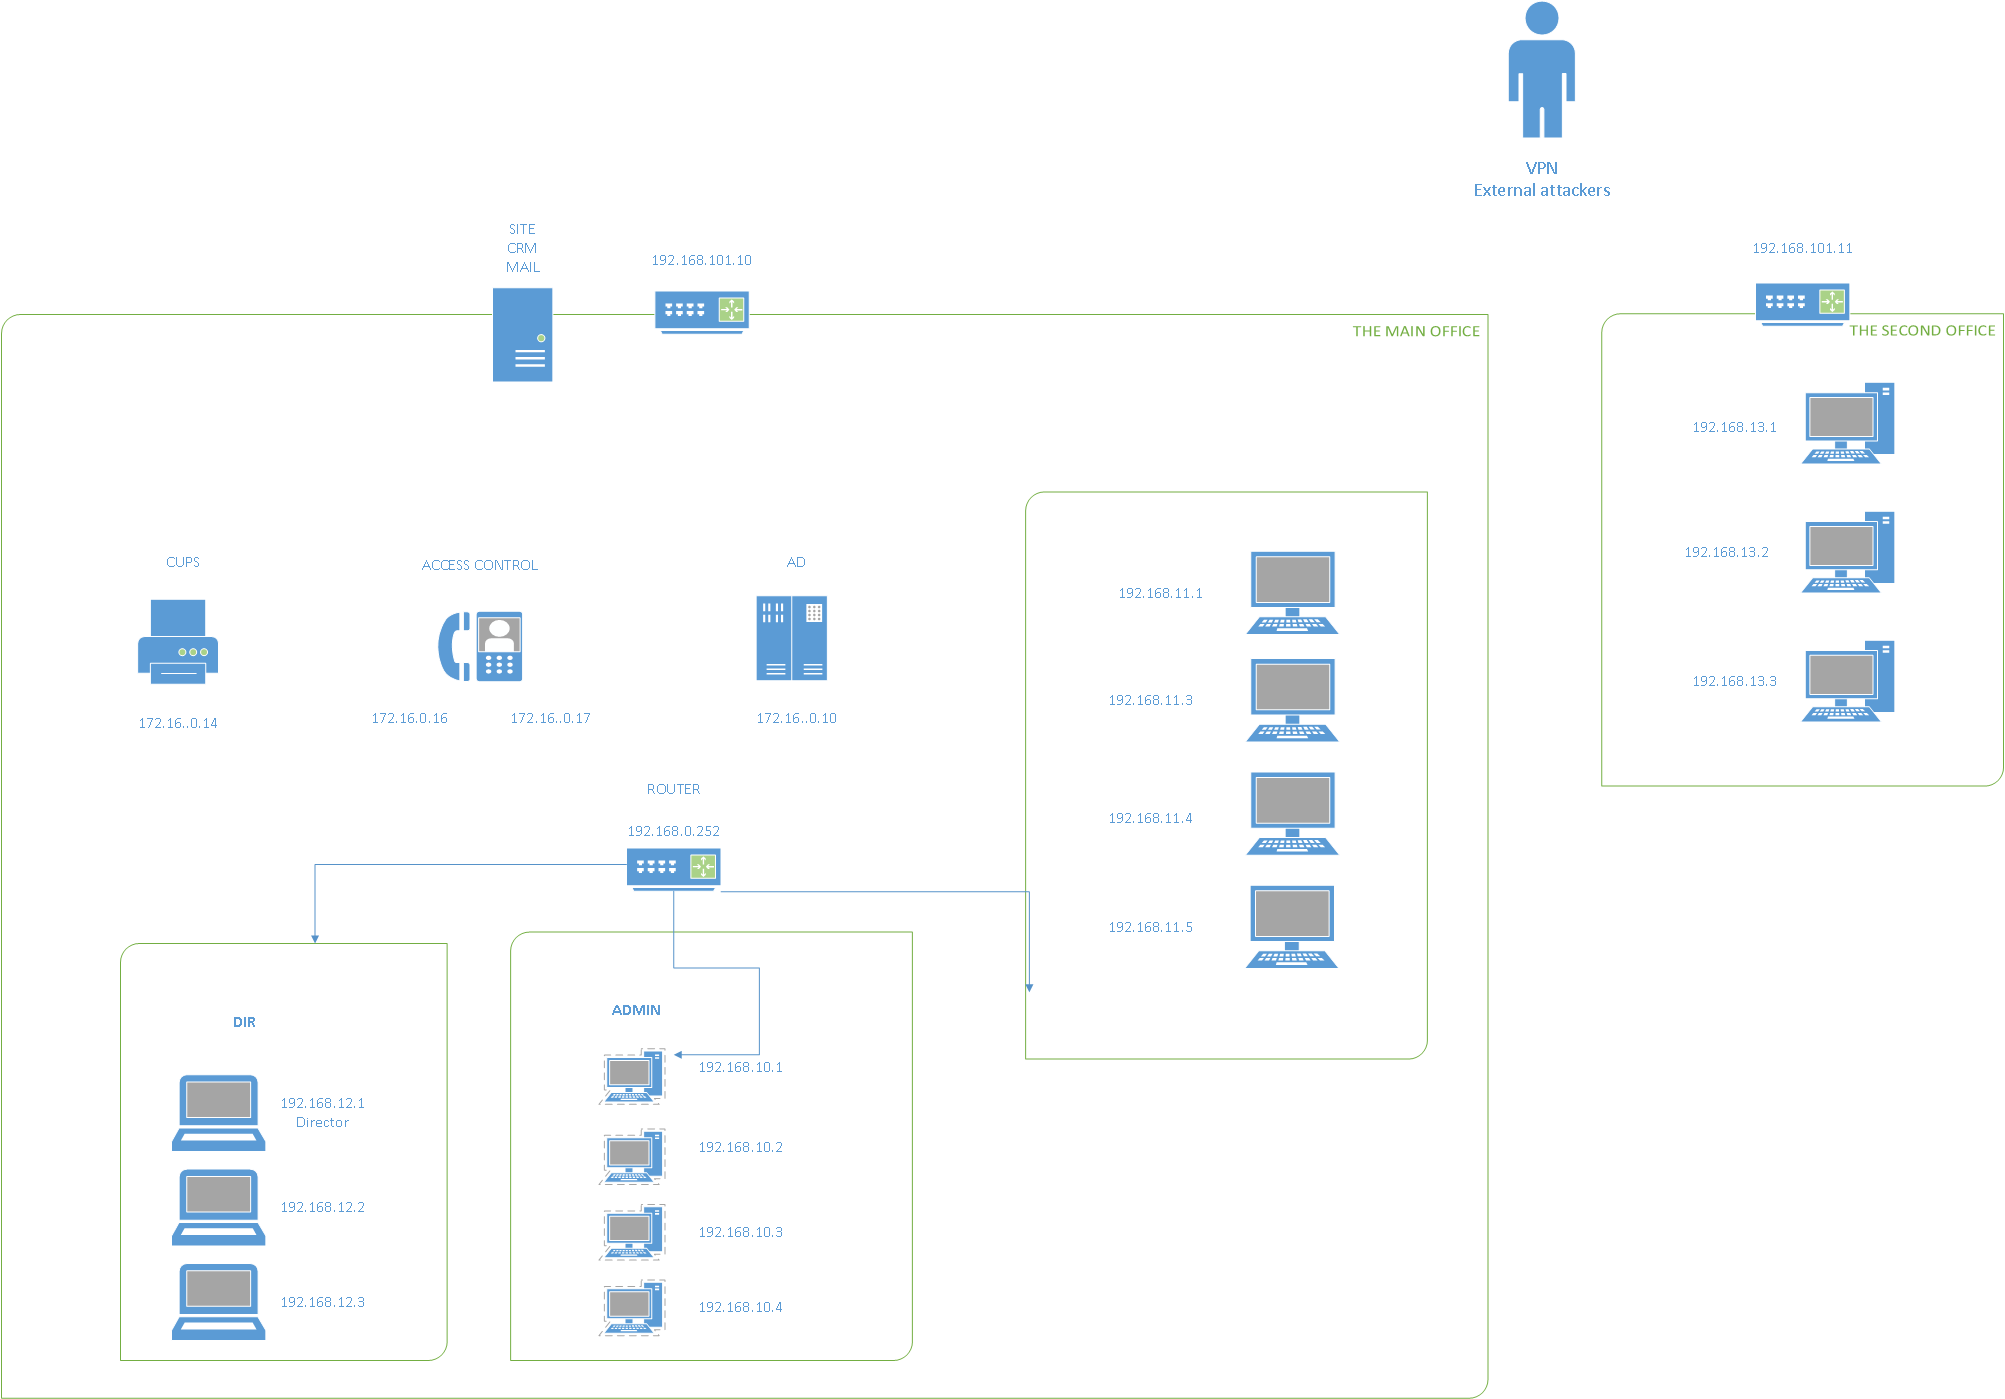
From the initial image we can see that we will have access to the Lab via VPN or Virtual Private Network.
Once in the network, we will only have access to two public facing host; SITE/CRM/MAIL sitting at 192.168.101.10 and another host at 192.168.101.11 - possibly sitting in the DMZ. From the initial view of the network diagram it seems that both of these hosts are routers, so we would need to compromise them before we can get access into the internal network. Do note that there seems to be five (5) different vlans in this network outline that need to be compromised.
Our objective would be to compromise the hosts, get remote access, and then pivot into the Internal Network to continue our pentest.
Our “main” objective would be to compromise the AD host as that is the Domain Controller for the network. If we can compromise that, then we will have the keys to the kingdom. Overall, that is also the goal in any Network Pentest, to see if we can get access to the Domain. Unfortunately… in this Pentest lab that is not the case, and you will see why later in the write-ups!
Connecting to the Lab:
Once you are registered and at the main “Test Lab” screen, if you look at the top right corner of your screen, you will see a “HOW TO CONNECT” button, right next to your Progress Meter.

Once you click on “HOW TO CONNECT” you will be redirected to the Instructions Screen.
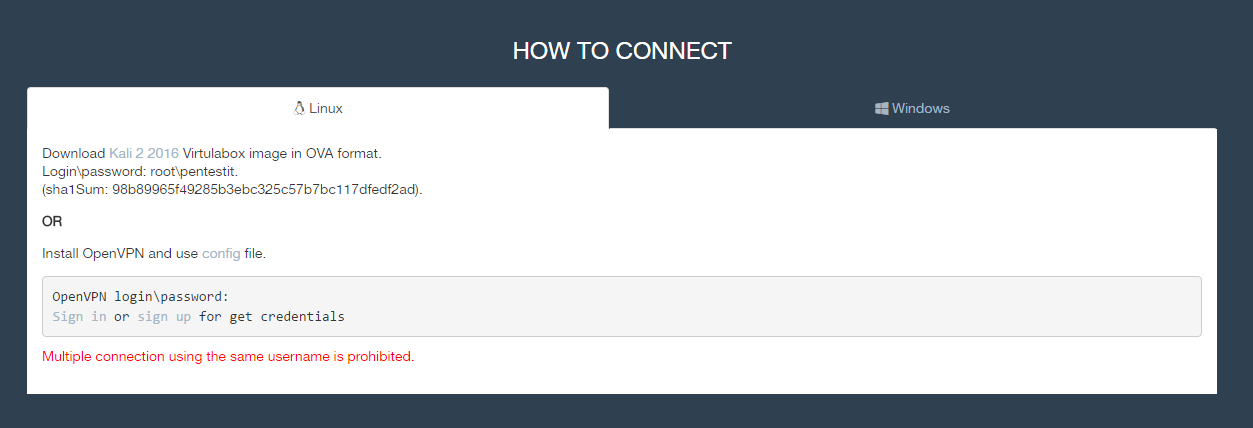
You can connect using either Linux or Windows. I used my Linux Kali Distribution along with OpenVPN and Pentestit’s OpenVPN config file.
If you want, you can download their custom Kali 2 VirtualBox OVA Image, but I preferred to use my own custom setup… plus I didn’t know what else they might have installed/not installed on there, and I didn’t want any headaches during testing.
Once you login to the website, get your VPN credentials, and download the OpenVPN config file to your Kali Box, we can go ahead and connect to the Lab.
This can be simply done by running the OpenVPN Command with the Pentestit config file as the argument, like so:
root@kali:~# openvpn lab.pentestit.ru.conf
Thu Jul 27 22:15:43 2016 OpenVPN 2.3.11 x86_64-pc-linux-gnu [SSL (OpenSSL)] [LZO] [EPOLL] [PKCS11] [MH] [IPv6] built on May 23 2016
Thu Jul 27 22:15:43 2016 library versions: OpenSSL 1.0.2j  26 Sep 2016, LZO 2.08
Enter Auth Username: ******
Enter Auth Password: ********
---snip---
Thu Jul 27 22:15:53 2016 /sbin/ip route add 192.168.101.0/24 via 10.10.200.121
Thu Jul 27 22:15:53 2016 /sbin/ip route add 10.10.0.1/32 via 10.10.200.121
Thu Jul 27 22:15:53 2016 Initialization Sequence Completed
After you see “Sequence Completed” then you are successfully in the lab and can start pentesting!
Preamble
For all those that are reading these write-ups, please understand that due to the complexity of this lab and the amount of tunneling used to connect each network segment, the posts will follow in a sequential orders from beginning to end.
This means that the posts will go in a structured order and will assume that you have not disconnected from the network or closed one of your tunnels. To aid those that might have done that I will be adding a post mid write-up to explain what needs to be done to reconnect to where you left off.
Alright, that’s all for today! Stay tuned for more posts in the upcoming days on how to compromise the lab!
Leave a Comment